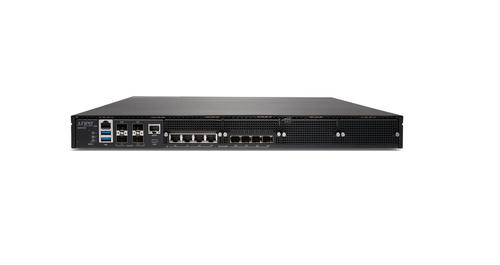
Home > JUNIPER NETWORKS > Juniper NETWORKS SSR120 Router User Guide

Juniper NETWORKS SSR120 Router User Guide

Quick Start  
SSR120  
IN THIS GUIDE  
Step 1: Begin | 1  
Step 2: Up and Running | 4  
Step 3: Keep Going | 9  
Step 1: Begin  
IN THIS SECTION  
Meet the SSR120 | 2  
Onboarding the SSR120 | 2  
Onboard the SSR120 Using the Mist AI Mobile App | 3  
Onboard the SSR120 Using a Web Browser | 3  
This guide walks you through the simple steps to get a new cloud-ready Juniper Networks® SSR120 router up and  
running in the Juniper Mist™ cloud portal. You can onboard a single device using your mobile phone, or one or more  
devices using your computer. Once onboarded, we'll walk you through the steps to create a basic configuraꢀon.  
You'll need your Juniper Mist WAN Assurance subscripꢀon and your login credenꢀals for the Juniper Mist portal.  
GeneralDetails
NameJuniper NETWORKS SSR120 Router User Guide
MakeJUNIPER NETWORKS
LanguageEnglish
FiletypePDF (Download)
File size0.18 MB
Download PDF
1 Star2 Stars3 Stars4 Stars5 Stars (1 votes, average: 5.00 out of 5)
Loading...

Leave a Reply

Your email address will not be published. Required fields are marked *

5 × 2 =

Juniper NETWORKS SSR1300 Router User Guide
Juniper NETWORKS ACX Series Paragon Automation Router User Guide
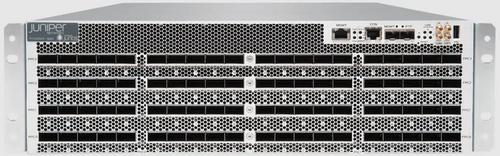
Juniper NETWORKS PTX10003 Fixed Packet Transport Router User Guide
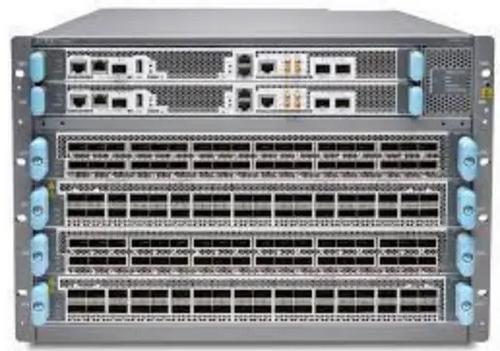
Juniper NETWORKS PTX10004 Ultra-Compact Modular Router User Guide
Juniper NETWORKS ACX710 Universal Metro Router User Guide
Juniper NETWORKS PTX10001-36MR Packet Transport Router User Guide
Juniper NETWORKS SSR1300 Smart Router User Guide
Juniper NETWORKS ACX7024 Cloud Metro Router User Guide
JUNIPER NETWORKS PTX10004 Packet Transport Router User Guide
Juniper NETWORKS ACX7509 Cloud Metro Router User Guide

Juniper NETWORKS SSR120 Router User Guide
Get PDF manual for the Juniper NETWORKS SSR120 Router User Guide for free. Access setup steps, Wi-Fi configuration, and troubleshooting tips. 👉 View online or download now!

Juniper NETWORKS SSR120 Router User Guide Overview

Summary of Contents

  • Page 1: Quick Start Step 1: Begin Meet the SSR120 Onboarding the SSR120 Onboard the SSR120 Using the Mist AI Mobile App Onboard the SSR120 Using a Web Browser This guide walks you through the simple steps to get a new cloud-ready Juniper Networks SSR120 router up and running in the Juniper Mist cloud portal. You can onboard a single device using your mobile phone, or one or more devices using your computer. Once onboarded, we'll walk you through the steps to create a basic configuration. You'll need your Juniper Mist WAN Assurance subscription and your login credentials for the Juniper Mist portal.
  • Page 2: Before you begin, you must set up your organization and sites and activate your subscriptions. The Juniper Networks SSR120 network appliance is part of the Juniper Session Smart Routing portfolio. The SSR120 features four 1 GbE ports and two 1 GbE RJ-45/SFP combo ports. The SSR120 runs the FIPS 140-2 Level 1 compliant Juniper Session Smart Routing software, which provides secure and resilient WAN connectivity. The SSR120 comes ready to install and manage using the Juniper Mist Cloud portal. You can onboard one or more routers using your computer, or a single router using your mobile phone. To onboard your SSR120 using your mobile phone, see Onboard the SSR120 using the Mist AI Mobile App. To manually onboard your SSR120, see Onboard the SSR120 using a Web Browser. To perform either onboarding process, you will need to locate the SSR120 claim code label on the rear panel of your device.
  • Page 3: Download and install the Mist AI app from the Google Play Store or Apple App Store. Open the Mist AI app and log in using your account credentials. Select your organization. Tap Claim Devices to Org and focus the camera on the QR code on the claim code label. The app automatically claims the device and adds it into your organization's inventory. On the Organization screen, tap Device Inventory → Routers → Unassigned. Review the MAC address. Onboarding complete! To provision the SSR120, see Step 2: Up and Running on page 4 and continue with Add the Network. When you purchase multiple switches, we provide you with an activation code along with your PO information. Make a note of this code.
  • Page 4: Onboarding a single switch involves locating the QR code and noting the alphanumeric claim code above it. Log in to your account at the specified URL. If you do not have an account, refer to the section on creating a Mist account and organization. Log in to your Mist organization's dashboard. Navigate to your organization's inventory and select the WAN tab. Select the Claim WAN Edges button in the upper right of the inventory screen. Add the claim code into the list of devices to claim. Clear the Assign claimed WAN edges to site check box to place the device into inventory. Click the Claim button to claim the device into your inventory. Expect a slight delay for the Router Claim Results window if claiming multiple routers. Review the information and close the window. View your new router or routers on the Inventory page, which will initially show the status as Disconnected.
  • Page 5: Assign the template to a site. Install the SSR120 hardware. Connect your SSR120 to the Mist Cloud. To provision the SSR120 with ZTP, log in to your Mist portal and begin the WAN configuration. Configuring your SSR device is made simple through the use of the SSR WAN Edge templates. The WAN Edge templates provide you with the basic network configuration in a single step. The template provides device specific, preconfigured WAN interfaces, LAN interfaces, a traffic steering policy, and an application policy. From the organization sidebar menu, select WAN Edge Templates. Select Create Template in the upper right. Give the template a name. Place a checkmark in the Create from Device Model box. Select your SSR model from the dropdown.
  • Page 6: Assign the template to a site. Now that you have set up a template, you need to assign it to the site where your SSR will be deployed. Scroll to the top and click Assign to Site. Select the site from the list where you want the template applied. Click Apply.
  • Page 7: Great work! All that remains is to associate the SSR120 with a site. Assign the SSR120 to a site. Once you associate the SSR120 with a site and a template, the working configuration will be complete. Select Organization on the left sidebar, and navigate to your organization's WAN Edges Inventory. Select your SSR120 and assign it to your site. If you are configuring a Mist-managed router, check the Manage configuration with Mist check box. For version 5.4.x and greater conductor-managed routers, make sure there is no check mark in the Manage Configuration from Mist. Select Assign to Site. Congratulations, you now have a Mist-claimed SSR120, and a basic configuration ready to send to your device! Install the SSR120 hardware. Your SSR120 installation has specific features that must be installed depending on your use and environment.
  • Page 8: Antenna install SIM card install Connecting power Please return here after completing those procedures to complete the network connections. Connect your SSR120 to the Mist Cloud. Your SSR120 uses port 0 (ge-0-0) as a default WAN port to contact Mist for zero-touch provisioning (ZTP). You'll need to set up port 3 (ge-0-3) with a LAN network. Connect port 0 to an Ethernet WAN link that can provide DHCP address assignment and connectivity to the Internet and Mist. Connect SSR port 3 to your LAN devices, including Mist-managed Juniper EX switches, Mist APs, and user devices. Great job, your SSR120 is now connected to the Mist cloud! In just a few minutes, Mist will send the template-driven configuration down to your device. Once the configuration has been applied, it will begin forwarding sessions from LAN to WAN as described by your policy.
  • Page 9: For conductor-managed devices, additional views for Cloud Telemetry are configurable in the SSR GUI and PCLI. Congratulations! Now that you've done the initial configuration, your SSR120 is ready to use. Get an overview of configuration and configuration management on the SSR120. See the SSR Configuration Management section of the SSR documentation in the Juniper Networks TechLibrary. See all documentation available for the SSR120. See the SSR120 documentation in the Juniper Networks TechLibrary. Get more details about installing and maintaining the SSR120 hardware. See the SSR120 Hardware Guide. See all documentation available for SSR software. Visit Session Smart Router documentation in the Juniper Networks TechLibrary.
  • Page 10: Stay up-to-date about new and changed features and known and resolved issues. Learn with videos that will help you expand your knowledge of SSR software. Learn about Virtual Router Redundancy Protocol for the SSR. Learn about BFD for traditional routing. See Configuration Concurrency on the SSR YouTube page. Learn about Service Route Redundancy and vectors. Get short, concise tips and instructions that provide quick answers, clarity, and insight into specific features and functions of Juniper technologies. View a list of free technical training offered by Juniper. Visit the Getting Started page on the Juniper Learning Portal. Juniper Networks reserves the right to change, modify, transfer, or otherwise revise this publication without notice. Juniper Networks assumes no responsibility for any inaccuracies in this document. Copyright © 2023 Juniper Networks, Inc. All rights reserved.