NEXTIVITY SHIELD MegaFi 2 Fixed Wi-Fi 6 Mobile Router User Guide


Complete the Router Configuration
Cloud Connectivity
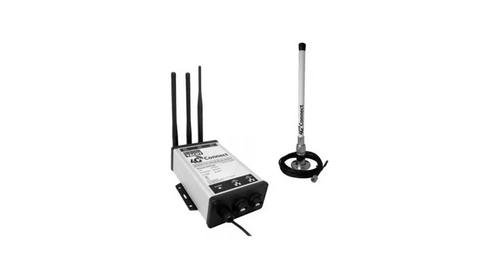
Connect Antennas to the Router
Connect Power to the Router
3
1
2
4
PWR
Plug the power cord into the Labeled PWR port and a wall outlet
GNSS
CELL4
CELL3 WiFi1
WiFi2
WiFi3
CELL2 CELL1 HPUE
1. To connect to the cloud management environment, MegaPortal,
open your computer browser window and enter
https://megaportal.nextivityinc.net
It takes ~10 seconds for display
to show information
GNSS
CELL4 PWR
CELL3 WiFi1
WiFi2
WiFi3
CELL2 CELL1 HPUE
1. Connect your computer to the router LAN1 port via Ethernet cable or
using WiFi with the SSID name and password shown on the MegaFi 2
display or from the label underneath the router.
2. If your organization already has an account, contact your
organization’s administrator to create a user account. If your
organization does not yet have an account, contact
support@nextivityinc.com to create an administrative account for your
organization. If you already have an account, enter the email and the
password for your account and click Sign in.
Attach each paddle antenna to its respective port as illustrated by
holding the antenna straight and twisting the base to thread onto the
connector. Do not overtighten. Finger-tight is sufficient. For optimal
signal reception, alternate the antenna orientations as shown above.
2. To configure your router settings through Mission Control, open your
computer browser window, enter https://192.168.113.1, and accept
any browser certificate warnings.
After connecting the antennas and power, the LCD display will
illuminate with device status and information. By default, the display
screen will rotate between 3 pages every 15 seconds. The page will
begin to indicate cellular connection signal strength, connection to
the network, status for High-Power mode (HPUE), Internet, GNSS
connection, and WiFi. This information will be shown on all 3 pages.
Please refer to the MegaFi 2 User Guide for more details on what
other information is displayed on all 3 pages. The bootup process
will take a few minutes before a successful connection is indicated
by an illuminated Internet icon. If the router does not
automatically connect to the network, refer to the MegaFi
2 documentation at
Connect the 5 bigger black paddle Cellular antennas to the HPUE and
CELL ports and connect the 3 smaller black WiFi antennas to the WiFi 1,
WiFi 2, and WiFi 3 ports and the GPS “puck”-style antenna to the GNSS
port. Please note, WiFi ports have a pin, while the HPUE and CELL ports
do not. WiFi antennas do not have a pin, while Cellular antennas do
have a pin. Connecting a Cellular antenna with a pin to a WiFi port with
a pin will damage one or the other or both. If location data is desired,
make sure the GPS antenna has an unobstructed view of the sky.
3. At the router’s login screen, enter “admin” as username and the
default password. The username and password are available on both
the display and the label. Then click Login.
3. To add a device as admin, click on Devices on the right-hand side
of the screen, then click New Device. To add a device as a user, click
on New Device. After clicking on New Device, enter the Serial Number
and the MAC address from the display or from the label on the bottom
of MegaFi 2 unit. Choose the desired pool or the default pool and click
Save. You have now associated your device with your account and can
now manage your MegaFi 2 from the cloud.
4. When the End User License Agreement appears, complete the
information at the bottom of the form and click Apply.
5. You will then be directed to update your password. Please update
the password and click Save.
Note: SMA connectors have a 3–5 inch-pound torque limit.
Over-torquing can cause damage and void the warranty.
https://nextivityinc.com/products/shield-megafi-2-hpue
or scan the QR code.
4. Update the device configuration from the cloud as needed for full
deployment.
Note: A factory reset restores the original default password.
| General | Details |
|---|---|
| Name | NEXTIVITY SHIELD MegaFi 2 Fixed Wi-Fi 6 Mobile Router User Guide |
| Make | NEXTIVITY |
| Language | English |
| Filetype | PDF (Download) |
| File size | 0.84 MB |


NEXTIVITY Shield Megafi Wireless Wan Router User Guide


TRUPER ROU-A3 Professional Router User Manual

Cudy WR1300 Gigabit Mesh Wi-Fi Router Installation Guide

Promethean OPS-A Router Installation Guide

Tenda F3 300Mbps Wireless Router User Guide

TP-Link Archer MR600 Wireless 4G LTE Router Installation Guide

airlive XG-XGS OLT MESH Router User Guide

zpe Nodegrid Virtual Services Router Owner’s Manual

D-Link DWR-933M Mobile Router Installation Guide

WAVLINK AC1200 Wireless WiFi Router User Guide
DIGITAL DEPP SEA 4GXtream Premium LTE Internet Access Router Instruction Manual