JuniPer ACX7024 Cloud Metro Router User Guide


6
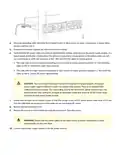
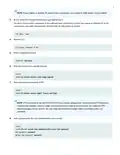
NOTE: To connect the DC source to an ACX7024 router, use a 12 AWG and 75°C temperature-rated or 14
AWG and 90°C temperature-rated stranded copper wire. To connect the DC power source to an ACX7024
in a data center or a central office, use a 14 AWG DC wire.
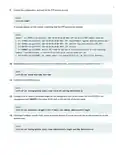
a. Secure the ring lug of the posiꢀve (+) DC power source cable to the RTN (return) terminal on the DC power
supply module using one of the terminal screws.
b. Secure the ring lug of the negaꢀve (–) DC power source cable to the –48V (input) terminal on the DC power
supply module using the other terminal screw.
c. Tighten the screws on the power supply module terminals unꢀl snug using the Phillips number 2 screwdriver.
Do not overꢀghten—apply 1.2 N-m of torque to the screws.
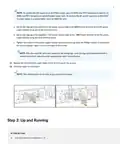
NOTE: Aſter the input DC wires are crimped to the wiring lugs, cover the lugs and crimped area with a
suitable heat shrink sleeve to avoid exposed bare lug or crimped areas.
11. Replace the terminal block cover. Apply 0.5 N-m of torque to the screws.
12. Close the input circuit breaker.
NOTE: The switch powers on as soon as you connect it to power.
Step 2: Up and Running
IN THIS SECTION
Customize the Basic Configuraꢀon | 7
| General | Details |
|---|---|
| Name | JuniPer ACX7024 Cloud Metro Router User Guide |
| Make | JUNIPer |
| Language | English |
| Filetype | PDF (Download) |
| File size | 0.15 MB |

If you have any questions regarding JuniPer ACX7024 Cloud Metro Router User Guide, please ask here and describe the problem in detail.

JUNIPER SSR1300 Session Router User Guide

JUNIPER SSR1400 Session Router User Guide

JuniPer Cloud-Ready SSR1500 Session Router User Guide

JUniPer MX304 Universal Router User Guide

JUNIPer SSR120 Session Router User Guide

JUNIPer SSR120 Session Smart Router User Guide

JUNIPER SSR1400 Session Smart Router User Guide

JUNIPER SSR1300 Session Smart Router User Guide

JuniPer Cloud-Ready SSR1500 Session Smart Router User Guide

Juniper ACX7509 Cloud Metro Router User Guide


Cudy R700 Gigabit Multi-WAN VPN Router Installation Guide

FiberHome SR120CC Smart Router User Manual

FIRSTNUM C600C 4G LTE Broadband Router User Manual

CP PLUS CP-XR-DE21-S 4G Router Installation Guide

TP-Link BE11000 Tri Band Wi-Fi 7 Gaming Router User Guide

GLiNet MT6000 Wireless Router User Guide

Grass Valley MV-825-RTRUM Multiviewer with Integrated Router User Manual

accelerated 6300-LX USB Router User Guide

Siretta UPnP NAT-PMP Router Instructions

TP-Link 7106508102 Deco Router Installation Guide