
Bauer 23121E-B Variable Speed Compact Router Owner’s Manual







Owner’s Manual & Safety Instructions
Save This Manual Keep this manual for the safety warnings and precautions, assembly,
operating, inspection, maintenance and cleaning procedures. Write the product’s serial number in the
back of the manual (or month and year of purchase if product has no number). Keep this manual and the
receipt in a safe and dry place for future reference.
23h
23121E-B
VARIABLE SPEED
COMPACT ROUTER
email our technical support at: productsupport@harborfreight.com
58253
When unpacking, make sure that the product is intact
and undamaged. If any parts are missing or broken,
please call 1‑888‑866‑5797 as soon as possible.
©
®
Copyright 2023 by Harbor Freight Tools . All rights reserved.
No portion of this manual or any artwork contained herein may be reproduced in
any shape or form without the express written consent of Harbor Freight Tools.
Diagrams within this manual may not be drawn proportionally. Due to continuing
improvements, actual product may differ slightly from the product described herein.
Tools required for assembly and service may not be included.
Read this material before using this product.
Failure to do so can result in serious injury.
SAVE THIS MANUAL.


| General | Details |
|---|---|
| Name | Bauer 23121E-B Variable Speed Compact Router Owner’s Manual |
| Make | BAUER |
| Language | English |
| Filetype | PDF (Download) |
| File size | 1.09 MB |
 (1 votes, average: 5.00 out of 5)
 Loading...

Bauer 23121E-B Variable Speed Compact Router Owner’s Manual Overview
Summary of Contents
- Page 1: Owner’s manual & safety instructions Save this manual for the safety warnings and precautions, assembly, operating, inspection, maintenance and cleaning procedures. Write the product’s serial number in the back of the manual. Keep this manual and the receipt in a safe and dry place for future reference. When unpacking, make sure that the product is intact and undamaged. If any parts are missing or broken, please call as soon as possible. Read this material before using this product. Failure to do so can result in serious injury.
- Page 2: Safety alert symbol is used to alert you to potential personal injury hazards. Obey all safety messages that follow this symbol to avoid possible injury or death. Indicates a hazardous situation which, if not avoided, will result in death or serious injury. Indicates a hazardous situation which, if not avoided, could result in death or serious injury. Indicates a hazardous situation which, if not avoided, could result in minor or moderate injury. Addresses practices not related to personal injury. Read all safety warnings, instructions, illustrations, and specifications provided with this power tool. Failure to follow all instructions may result in electric shock, fire, and/or serious injury. Keep work area clean and well lit. Do not operate power tools in explosive atmospheres, such as in the presence of flammable liquids, gases, or dust.
- Page 3: Do not expose power tools to rain or wet conditions. Water entering a power tool will increase the risk of electric shock. Only use safety equipment that has been approved by an appropriate standards agency. Unapproved safety equipment may not provide adequate protection. Avoid unintentional starting. Prepare to begin work before turning on the tool. When operating a power tool outdoors, use an extension cord suitable for outdoor use. Do not lay the tool down until it has come to a complete stop. If operating a power tool in a damp location is unavoidable, use a ground fault circuit interrupter (GFCI) protected supply. Stay alert, watch what you are doing and use common sense when operating a power tool. Use personal protective equipment. Always wear eye protection. Prevent unintentional starting. Ensure the switch is in the off-position before connecting to power source. Do not force the power tool. Use the correct power tool for your application.
- Page 4: Disconnect the plug from the power source and/or remove the battery pack before making any adjustments. Use clamps or another practical way to secure and support the workpiece to a stable platform. Let the bit cool before touching, changing, or adjusting it. Store idle power tools out of the reach of children and do not allow untrained persons to operate the power tool. Maintain power tools and accessories; check for misalignment or binding of moving parts. Repeated or long-term exposure to vibration may cause temporary or permanent physical injury. Anyone using vibrating tools regularly should first be examined by a doctor. Keep cutting tools sharp and clean to ensure safe handling and control. Wear suitable gloves to reduce the vibration effects on the user. Have your power tool serviced by a qualified repair person using only identical replacement parts.
- Page 5: Grounding Check with a qualified electrician if you are in doubt as to whether the outlet is properly grounded. Do not modify the power cord plug provided with the tool. Never remove the grounding prong from the plug. Do not use the tool if the power cord or plug is damaged. Grounded tools have three prong plugs. The grounding prong in the plug is connected through the green wire inside the cord to the grounding system in the tool. The tool must be plugged into an appropriate outlet, properly installed and grounded. Tools marked with “Grounding Required” have a three wire cord and three prong grounding plug. Grounding provides a low resistance path to carry electricity away from the user, reducing the risk of electric shock. Tools marked “Double Insulated” do not require grounding.
- Page 6: Grounded tools require a three wire extension cord. Double insulated tools can use either a two or three wire extension cord. Make sure the extension cord is properly wired and in good electrical condition. Always replace a damaged extension cord or have it repaired by a qualified electrician before using it. As the distance from the supply outlet increases, you must use a heavier gauge extension cord. Using extension cords with inadequately sized wire causes a serious drop in voltage, resulting in loss of power and possible tool damage. Protect the extension cords from sharp objects, excessive heat, and damp or wet areas. When using more than one extension cord to make up the total length, make sure each cord contains at least the minimum wire size required. If you are using one extension cord for more than one tool, add the nameplate amperes and use the sum to determine the required minimum cord size. If you are using an extension cord outdoors, make sure it is marked with the suffix “W‑A” to indicate it is acceptable for outdoor use.
- Page 7: Specifications include electrical rating, no load speed, collet size, and maximum accessory diameter. The electrical rating is 120V / 60Hz / 6.5A. No load speed ranges from 10000 to 30000/min. The collet size is Ø1/4. The maximum accessory diameter is 1‑3/8. Before use, read the entire important safety information section at the beginning of the manual. Key functions include fence, speed control dial, power cord, power switch, depth adjustment knob, motor, spindle lock, lock lever, base edge guide, depth scale, and base plate.
- Page 8: Operating instructions Read the entire important safety information section at the beginning of this manual before setup or use of this product. To prevent serious injury from accidental operation: Make sure that the power switch is in the off-position and unplug the tool from its electrical outlet before performing any procedure in this section. Tool changing Bit installation Warning! To prevent serious injury: Use only rotary cutting bits of the correct shank diameter for the collet mounted. Carefully inspect router bits for cracks, chips, or other damage before installing. Do not use bits that have been dropped, cracked, or damaged. Use only bits with 1/4 shank size that are marked as suitable for the type of material being cut. Use the Edge Guide to make cuts parallel to the edge of a workpiece, or following a guide clamped onto the workpiece.
- Page 9: Set up temporary guide Clamp a temporary guide to the workpiece to make a straight cut which is not parallel to the edge of the workpiece. Clamp a suitable straight board across the workpiece parallel to the desired location of the cut. Loosen Edge Guide Knob, then install Edge Guide with Fence facing outward and up. Tighten Edge Guide Knob securely. Measure proper distance from bit to Fence. Loosen Fence Knob, adjust Fence, then tighten Knob. Template guide installation note: Template guide is for use with a template on the workpiece only. Remove the Template Guide when using this product for any other application. Secure template to workpiece using appropriate offset from desired cut line. Turn Router upside down.
- Page 10: Circle cutting requires using the center hole in the Fence as a pivot point. Install the Fence according to the setup instructions. Loosen the Fence Knob to set the distance from the center hole to the far edge of the bit, equal to the radius of the circle. Tighten the Fence Knob after adjusting. Align the center hole in the Fence with the center point of the circle. Drive a nail through the center hole to secure the Fence in place. Set the depth of cut using the scale marked on the side of the Router. Open the Lock Lever and turn the Depth Adjustment Knob until the bit is retracted within the Base. Designate a clean and well-lit work area, free from distractions and hazards. Secure loose workpieces using a vise or clamps to prevent movement while working.
- Page 11: General operating instructions Mark cut line on workpiece. The bit rotates clockwise. Adjust for this while cutting. Turn power switch off, then plug power cord into the nearest 120VAC, grounded electrical outlet. For most materials, it is best to move the router from left to right as facing the workpiece. Verify that workpiece has no hidden utility lines before cutting. Adjust speed to suit workpiece and bit diameter. Run the tool for about 10 seconds before routing to ensure all moving parts are running smoothly. Determine optimum speed by testing on scrap material until you are able to produce a smooth cut with no burnishing or burn marks. When using the fence, cut parallel to the edge of the workpiece with the fence following the edge. After completing the cut, raise the router so the bit is clear of the workpiece, and turn the power switch off.
- Page 12: Maintenance and servicing procedures not specifically explained in this manual must be performed only by a qualified technician. To prevent serious injury from accidental operation, make sure that the power switch is in the off-position and unplug the tool from its electrical outlet before performing any procedure in this section. To prevent serious injury from tool failure, do not use damaged equipment. If abnormal noise or vibration occurs, have the problem corrected before further use. Before each use, inspect the general condition of the tool. Check for loose hardware, misalignment or binding of moving parts, damaged cord/electrical wiring, cracked or broken parts, and any other condition that may affect its safe operation. This procedure must be completed by a qualified technician. Warning! To prevent serious injury, if the supply cord of this power tool is damaged, it must be replaced only by a qualified service technician. After use, wipe external surfaces of the tool with a clean cloth. Periodically, wear ANSI-approved safety goggles and NIOSH-approved breathing protection and blow dust out of the motor vents using dry compressed air.
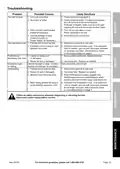
- Page 13: Troubleshooting Tool will not start. Check that cord is plugged in. Check power at outlet. If outlet is unpowered, turn off tool and check circuit breaker. Turn off tool and allow to cool. Press reset button on tool. Have technician service tool. Tool operates slowly. Allow tool to work at its own rate. Eliminate use of extension cord. If an extension cord is needed, use one with the proper diameter for its length and load. Performance decreases over time. Have qualified technician replace brushes. Use sharp bits. Replace as needed. Excessive noise or rattling. Allow tool to work at its own rate. Wear ANSI-approved safety goggles and NIOSH-approved dust mask/respirator while blowing dust out of motor using compressed air. Follow all safety precautions whenever diagnosing or servicing the tool. Disconnect power supply before service.
- Page 14: Record product’s serial number here. If the product has no serial number, record month and year of purchase instead. Replacement parts may be available for this item. Visit harborfreight.com/parts for a list of in stock parts. Reference UPC 193175523242. For technical questions, please call 1-888-866-5797. Item 58253.
- Page 15: Limited 90 Day Warranty Harbor Freight Tools Co. warrants to the original purchaser that this product is free from defects in materials and workmanship for the period of 90 days from the date of purchase. This warranty does not apply to damage due directly or indirectly to misuse, abuse, negligence or accidents. We shall in no event be liable for death, injuries to persons or property, or for incidental, contingent, special or consequential damages arising from the use of our product. This warranty is expressly in lieu of all other warranties, express or implied, including the warranties of merchantability and fitness. To take advantage of this warranty, the product or part must be returned to us with transportation charges prepaid. Proof of purchase date and an explanation of the complaint must accompany the merchandise. If our inspection verifies the defect, we will either repair or replace the product at our election. We will return repaired products at our expense, but if we determine there is no defect, you must bear the cost of returning the product. This warranty gives you specific legal rights and you may also have other rights which vary from state to state.
- Page 16: Page 16

advantech ICR-3831 RAILWAY 4G LTE ROUTER & GATEWAY User Guide

mikrotik RB960PGS Hex PoE 5-Port Router User Manual

D-Link DIR-882 EXO AC2600 MU-MIMO Wifi Router Installation Guide

Draytek Vigor C410 Series VPN Router User Guide

Zbtlink WE2805-B 4G LTE Router User Guide

HBC BX54 Gigabit Dual Band Wireless Router User Manual

ESUNSTAR AF792 Portable 4G Router User Manual

hoymiles DTU-Pro-S Wifi Router Installation Guide

GUDE OF 1200 E Router Instructions

ASUS RT-AX82U AX5400 Dual Band WiFi Router User Guide