×
- 1. Ax3000 Gigabit Wi-fi 6 Router
- 2. About This Guide (Connect The Hardware → Log In To Your Router → Set Up Internet Connection → Tp-link Cloud Service → Wireless Settings)
- 3. Our Technical Support Contact Information Can Be Found At The Contact Technical Support Page At Https://www.tp-link.com/support/.
- 4. Product Overview (Appearance)
- 5. Get To Know About Your Router (Product Overview → Appearance → Top Panel)
- 6. Get To Know About Your Router (Back Panel)
- 7. Get To Know About Your Router (Button And Port Explanation → Wps/wi-fi Button → Reset Button → Wan Port → Lan Port (1-4) → Power On/off Button)
- 8. Connectthehardware (Positionyourrouter → Connectyourrouter)
- 9. Connect The Hardware (Position Your Router → Connect Your Router)
- 10. Connect The Hardware (Internet → Method 1: Wired → Method 2: Wirelessly)
- 11. Connect The Hardware (Wi-fi → Method 3: Use The Wps Button)
- 12. Log In To Your Router
- 13. Log In To Your Router (Set Up The Tcp/ip Protocol → Visit Http://tplinkwifi.net → Create A Login Password For Secure Management)
- 14. Set Up Internet Connection (Use Quick Setup Wizard → Quick Setup Via Tp-link Tether App → Manually Set Up Your Internet Connection → Set Up The Router As An Access Point → Set Up An Ipv6 Internet Connection)
- 15. Set Up Internet Connection (Use Quick Setup Wizard → Set Up An Ipv6 Internet Connection → Quick Setup Via Tp-link Tether App)
- 16. Set Up Internet Connection (Manually Set Up Your Internet Connection → Connect Your Devices → Modify Internet Connection Settings → Select Your Internet Connection Type → Follow The Instructions For Configuration → Clone The Mac Address)
- 17. Set Up Internet Connection (Static Ip → Pppoe)
- 18. Set Up Internet Connection (Secondary Connection → Dynamic Ip And Pppoe → Advanced > Network > Internet → Faq)
- 19. Set Up Internet Connection (Set Up The Router As An Access Point → Set Up An Ipv6 Internet Connection)
- 20. Set Up Internet Connection (Enable Ipv6 And Select The Internet Connection Type Provided By Your Isp → Fill In Information As Required By Different Connection Types → Static Ip → Dynamic Ip(slaac/dhcpv6) → Pppoe)
- 21. Set Up Internet Connection (Manually Set Up Your Internet Connection → To4 Tunnel → Pass-through (bridge))
- 22. Set Up Internet Connection (Configure Lan Ports → Mac Clone → Check Ipv6 Connection Status)
- 23. Register A Tp-link Id (Change Your Tp-link Id Information → Manage The User Tp-link Ids → Manage The Router Via The Tp-link Tether App)
- 24. Register A Tp-link Id (Change Your Tp-link Id Information → Manage The User Tp-link Ids → Manage The Router Via The Tp-link Tether App → Unbind The Admin Tp-link Id From Your Router)
- 25. Tp-link Cloud Service (Change Your Password → Manage The User Tp-link Ids)
- 26. Addtp-linkidtomanagetherouter (Removetp-linkid(s)frommanagingtherouter → Manage The Router Via The Tp-link Tether App)
- 27. Manage The Router Via The Tp-link Tether App (Launch The Apple App Store Or Google Play Store → Connect Your Device To The Routers Wireless Network → Log In With Your Tp-link Id → Register A Tp-link Id)
- 28. Wireless Settings (Specify Wireless Settings → Schedule Your Wireless Function → Use Wps For Wireless Connection → Advanced Wireless Settings)
- 29. Wireless Settings (Specify Wireless Settings → Enable Or Disable Ofdma → Enable Or Disable Twt)
- 30. Wireless Settings (Smart Connect Function → Enable Or Disable Wireless Function → Change Wireless Network Name (ssid) And Password → Hide Ssid → Change Security Option → Change Transmit Power And Channel Settings)
- 31. Wireless Settings (Channel Width → Channel → Mode → Mu-mimo Function → Schedule Your Wireless Function)
- 32. Wireless Settings (Use Wps For Wireless Connection → Connect Via The Clients Pin)
- 33. Wireless Settings (Connect Via The Routers Pin → Push The Wps Button → Advanced Wireless Settings)
- 34. Wireless Settings (Configure Advanced Wireless Settings → Wmm → Ap Isolation → Airtime Fairness → Beacon Interval → Rts Threshold)
- 35. Guest Network (Create A Network For Guests → Customize Guest Network Options)
- 36. Create A Network For Guests (Enable Bandwidth Control → Set The Effective Time To Keep The Guest Network → Select The Security Type And Customize Your Own Password → Click Save → Share Network)
- 37. Guest Network (Customize Guest Network Options → Allow Guests To See Each Other → Allow Guests To Access Your Local Network)
- 38. Iot Network
- 39. Iot Network (Create An Iot Network As Needed → Enable Checkbox For The 2.4ghz, Or 5 Ghz Wireless Network → Customize The Ssid → Select The Security Type And Customize Your Own Password → Click Save → Share Network)
- 40. Network Security (Parental Controls → Network Analysis & Optimization)
- 41. Network Security (Iot Protection → Intrusion Prevention System → Malicious Content Filter → Ddos Protection → Parental Controls)
- 42. Homeshield (Child Protection → Family Incentive Program → Family Time → Network Analysis & Optimization → Weekly And Monthly Reports → Quality Of Service (qos))
- 43. Homeshield (Launch The Tether App And Log In With Your Tp-link Id → Log In To Your Router And Tap The Homeshield Tab)
- 44. Add A Router As A Satellite Device (Add A Range Extender As A Satellite Device → Manage Devices In The Easymesh Network)
- 45. Add A Router As A Satellite Device (Easymesh With Seamless Roaming)
- 46. Easymesh With Seamless Roaming (Add A Range Extender As A Satellite Device)
- 47. Easymesh With Seamless Roaming (Plug In The Extender Next To The Main Router → Press The Wps Button On Main Router And On The Extender → Wps Process Is Complete)
- 48. Easymesh With Seamless Roaming (Manage Devices In The Easymesh Network → View Mesh Devices And Connected Clients → Manage An Easymesh Device → Change Device Information)
- 49. Protect The Network From Cyber Attacks (Access Control → Ip & Mac Binding → Alg → Device Isolation)
- 50. Protectthenetworkfromcyberattacks (Accesscontrol)
- 51. Network Security (Allow Specific Device(s): → Add Connected Devices)
- 52. Network Security (Add Unconnected Devices → Ip & Mac Binding)
- 53. Network Security (Ip & Mac Binding → Bind Your Device(s) According To Your Need → Locate The Arp List Section → Enable Bind → Add A Binding Entry → View Connected Devices)
- 54. Network Security (Alg)
- 55. Device Isolation (Network Security → Installation Steps → Accessing The Router → Enabling Device Isolation → Adding Iot Devices → Isolated Device Communication)
- 56. Nat Forwarding (Share Local Resources On The Internet By Port Forwarding → Open Ports Dynamically By Port Triggering → Make Applications Free From Port Restriction By Dmz → Make Xbox Online Games Run Smoothly By Upnp)
- 57. Nat Forwarding (Share Local Resources On The Internet By Port Forwarding → Assign A Static Ip Address To Your Pc → Visit Http://tplinkwifi.net → Go To Advanced > Nat Forwarding > Port Forwarding)
- 58. Nat Forwarding (View Common Services → View Connected Devices → Device Ip Address → Save → Tips)
- 59. Nat Forwarding (Set Up A Dynamic Dns Service Account → Open Ports Dynamically By Port Triggering → Configure The Port Triggering Rules)
- 60. Nat Forwarding (Make Applications Free From Port Restriction By Dmz → Warning: Dmz Is Totally Exposed To The Internet, Which May Bring Some Potential Safety Hazards.)
- 61. Nat Forwarding (Assign A Static Ip Address To Your Pc → Enable Dmz → Make Xbox Online Games Run Smoothly By Upnp)
- 62. Nat Forwarding (Upnp)
- 63. Vpn Server (Openvpn → Pptp Vpn → L2tp/ipsec Vpn → Wireguard Vpn → Vpn Client → Use Vpn Client To Access A Remote Vpn Server)
- 64. Use Openvpn To Access Your Home Network (Set Up Openvpn Server On Your Router)
- 65. Vpn Server & Client (Configure Openvpn Connection On Your Remote Device → Use Pptp Vpn To Access Your Home Network → Set Up Pptp Vpn Server On Your Router)
- 66. Vpn Server & Client (Enable Pptp → Dynamic Dns Service → Client Ip Address → Pptp Connection Permission → Save → Pptp Vpn Connection Account)
- 67. Vpn Server & Client (Configure Pptp Vpn Connection On Your Remote Device → Set Up A New Connection Or Network → Connect To A Workplace)
- 68. Vpn Server & Client
- 69. Vpn Server & Client
- 70. Use L2tp/ipsec Vpn To Access Your Home Network (Set Up L2tp/ipsec Vpn Server On Your Router)
- 71. Vpn Server & Client (Client Ip Address → Ipsec Encryption → Ipsec Pre-shared Key → Configure The L2tp/ipsec Vpn Connection Account → Username And Password → Configure L2tp/ipsec Vpn Connection On Your Remote Device)
- 72. Vpn Server & Client (Set Up A New Connection Or Network → Connect To A Workplace)
- 73. Vpn Server & Client (Use My Internet Connection (vpn) → Enter The Internet Ip Address Of The Router → Dont Connect Now; Just Set It Up So I Can Connect Later → Enter The User Name And Password)
- 74. Vpn Server & Client
- 75. Vpn Server & Client
- 76. Vpn Server & Client (Security → Layer 2 Tunneling Protocol With Ipsec (l2tp/ipsec) → Advanced Settings → Use Preshared Key For Authentication → Ipsec Pre-shared Key → Connect To Start Vpn Connection)
- 77. Use Wireguard Vpn To Access Your Home Network (Set Up Wireguard Vpn Server On Your Router)
- 78. Vpn Server & Client (Set The Tunnel Ip Address And Listen Port → Select Your Client Access Type → Advanced Settings → Create Accounts That Can Be Used By Remote Clients To Connect To The Vpn Server → Enable Or Disable Pre-shared Key → Click Save)
- 79. Vpn Server & Client (Connect To The Wireguard Server → Export To Save The Wireguard Vpn Configuration File → Modify The Vpn Server Settings → Connect To The Server → Delete The Account)
- 80. Vpn Client To Access A Remote Vpn Server (Use The Vpn Feature → Visit Http://tplinkwifi.net → Go To Advanced > Vpn Client → Enable Vpn Client → Add Vpn Servers → Specify A Description For The Vpn)
- 81. Vpn Server & Client (Openvpn → Enter The Vpn Information Provided By Your Vpn Provider. → Import The Ca File Or Edit The .ovpn File Manually)
- 82. Vpn Server & Client (Pptp → L2tp/ipsec Vpn)
- 83. Vpn Server & Client (Wireguard Vpn)
- 84. Vpn Server & Client
- 85. Vpn Server & Client (Add And Manage The Devices That Will Use The Vpn Function → Device List → Save The Settings)
- 86. Vpn Server & Client
- 87. Customize Your Network Settings (Change The Internet Settings → Change The Lan Settings → Configure To Support Iptv Service → Specify Dhcp Server Settings → Set Up A Dynamic Dns Service Account → Create Static Routes)
- 88. Customizeyournetworksettings (Changetheinternetsettings)
- 89. Customizeyournetworksettings (Changethemacaddressoftherouter → Setupnat → Changetheinternetportnegotiationspeedsetting → Enableflowcontroller)
- 90. Customizeyournetworksettings (Changethelansettings → Toenableflowcontroller)
- 91. Customizeyournetworksettings (Configuretosupportiptvservice → Iptvsetup → Advanced>network>iptv/vlan → Igmpproxyandigmpsnooping → Enableiptv/vlan → Selecttheappropriatemode)
- 92. Customizeyournetworksettings (Specifydhcpserversettings)
- 93. Customize Your Network Settings (Set Up A Dynamic Dns Service Account)
- 94. Customizeyournetworksettings (Dynamicdns → Ddnsserviceprovider → Registernow → Domainnamelist)
- 95. Customizeyournetworksettings (Createstaticroutes)
- 96. Customizeyournetworksettings (Changetherouterslanipaddresses → Visithttp://tplinkwifi.net → Gotoadvancednetworkrouting → Clickaddandfinishthesettings → Networkdestination → Defaultgateway)
- 97. Customizeyournetworksettings (Interface → Description → Clicksave → Checktheroutingtable → Done → Openawebbrowseronyourpc)
- 98. Upgrade The Firmware (Backup And Restore Configuration Settings → Change The Login Password → Password Recovery → Local Management → Remote Management → System Log)
- 99. Upgrade The Firmware (Auto Update → Online Upgrade)
- 100. Manage The Router (Online Upgrade → Local Upgrade → Firmware Upgrade → Advanced → System)
- 101. Manage The Router (Easymesh Satellite Update → Backup And Restore Configuration Settings)
- 102. Manage The Router (Restore Configuration Settings → Reset The Router Except Your Login Password And Tp-link Id → Reset The Router To Factory Default Settings)
- 103. Manage The Router (Change The Login Password → Password Recovery)
- 104. Manage The Router (Local Management → Authentication → Smtp Server → Access The Router Via Https And Http)
- 105. Manage The Router (Allow All Lan Connected Devices To Manage The Router → Allow Specific Devices To Manage The Router)
- 106. Manage The Router (Remote Management)
- 107. Manage The Router (Set Up A Dynamic Dns Service Account → Allow A Specific Device To Manage The Router Remotely → System Log)
- 108. Manage The Router (System Log → Save Log → Mail Log)
- 109. Manage The Router (Test The Network Connectivity)
- 110. Manage The Router (Diagnostics → Ping → Traceroute → Ip Address Or Domain Name → Ping Count → Ping Packet Size)
- 111. Manage The Router (Set System Time And Language)
- 112. Manage The Router (Ntp Server I → Ntp Server Ii → Set Time → Manually Set The Date And Time → Enable Daylight Saving Time)
- 113. Manage The Router (Set System Language → Set The Router To Reboot Regularly)
- 114. Manage The Router (Control The Led → Reboot Time → Night Mode → Led Control)
- 115. Manage The Router
- 116. Wireless Password Recovery (Web Management Password Reset → Router Reset Instructions → Logging Into The Router's Web Management Page → Ip Address Configuration → Network Settings Verification → Password Recovery Configuration)
- 117. Clicklansettingsanddeselectthefollowingthreeoptionsandclickok.go Toadvanced>restoreadvancedsettings,clickoktosavethesettings.
- 118. Reset The Router To Factory Default Settings (Reconfigure The Router To Surf The Internet → Check Internet Status → Manually Configure The Dns Server)
- 119. Restart The Modem And The Router (Reset The Router To Factory Default Settings And Reconfigure The Router → Upgrade The Firmware Of The Router → Check The Tcp/ip Settings On The Particular Device → Make Sure The Physical Connection Between The Router And The Modem Is Proper → Clone The Mac Address Of Your Computer)
- 120. Visit Http://tplinkwifi.net, And Log In With Your Tp-link Id Or The Password You Set For The Router.
- 121. Power Off Your Modem And Router (Confirm Your Internet Connection Type → Visit Http://tplinkwifi.net → Select Your Internet Connection Type → Click Save → Restart The Modem And The Router Again → Please Upgrade The Firmware Of The Router)
- 122. Make Sure The Wireless Adapter Driver Is Installed Successfully And The Wireless Adapter Is Enabled. (Troubleshooting Wireless Connections On Windows 7 → Troubleshooting Wireless Connections On Windows Xp → Check The Wlan Led Indicator On Your Wireless Router/modem → Ensure Your Computer/device Is Within Range Of Your Router/modem → Verify Wireless Settings And Ssid Visibility → Resolving Authenticating Problems/password Mismatch)
- 123. Fcc Compliance Information Statement (Product Name → Model Number → Component Name → Responsible Party → Address → Website)
- 124. Fcc Rf Radiation Exposure Statement (Fcc Compliance Information Statement → Product Name → Model Number → Responsible Party → Address → Website)
- 125. Rf Exposure Information (National Restrictions → Ukca Mark → Uk Declaration Of Conformity)
- 126. Canadian Compliance Statement (Caution → Radiation Exposure Statement)
- 127. Déclaration Dexposition Aux Radiations (Industry Canada Statement → Korea Warning Statements → Ncc Notice & Bsmi Notice → 安全諮詢及注意事項)
- 128. Safety Information
- 129. Operating Temperature: 0~40 (Explanations Of The Symbols On The Product Label)
- 130. Functional Earthing (Operators Manual → Disconnection, All Power Plugs → Caution, Hot Surface → Caution → Fuse → Recycling)
×
TP-Link Archer AX53 Gigabit Wi-Fi 6 Router User Guide
Chapter 15
Manage the Router
4. Click SAVE.
Devices on the internet can log in to http://Router’s WAN IP address:port number (such
as http://113.116.60.229:1024) to manage the router.
Tips:
•
•
You can find the WAN IP address of the router on Network Map > Internet.
The router’s WAN IP is usually a dynamic IP. Please refer to Set Up a Dynamic DNS Service Account if you want to log
in to the router through a domain name.
•
Allow a specific device to manage the router remotely:
1. Tick the Enable checkbox of Remote Management.
2. Keep the HTTPS port as default settings (recommended) or enter a value between
1024 and 65535.
3. Select Specified Device for Remote Managers.
4. In the Only this IP Address field, enter the IP address of the remote device to manage
the router.
5. Click SAVE.
Devices using this WAN IP can manage the router by logging in to http://Router’s WAN
IP:port number (such as http://113.116.60.229:1024).
Tips: The router’s WAN IP is usually a dynamic IP. Please refer to Set Up a Dynamic DNS Service Account if you want
to log in to the router through a domain name.
15 7 System Log
When the router does not work normally, you can save the system log and send it to the
technical support for troubleshooting.
•
To save the system log locally:
1. Visit http://tplinkwifi.net, and log in your TP-Link ID or the password you set for the
router.
106
| General | Details |
|---|---|
| Name | TP-Link Archer AX53 Gigabit Wi-Fi 6 Router User Guide |
| Make | TP-Link |
| Language | English |
| Filetype | PDF (Download) |
| File size | 11.78 MB |
If you have any questions regarding TP-Link Archer AX53 Gigabit Wi-Fi 6 Router User Guide, please ask here and describe the problem in detail.

TP-Link VR300 Archer Modem Router User Guide

TP-Link T150500-2-DT WiFi Router Instruction Manual

TP-Link Archer AX55 Wi-Fi 6 Router Installation Guide

TP-Link Omada ER8411 VPN Router Instructions

TP-Link Configure VDSL Router User Guide

TP-Link Archer BE805 BE19000 Tri-Band Wi-Fi 7 Router User Manual

TP-Link VR600 Wireless DSL Modem Router Installation Guide

TP-Link AX58 Dual Band Gigabit Wi-Fi 6 Router Installation Guide

TP-Link AC750 Wireless Dual Band Router Owner’s Manual

TP-Link AX6000 8-Stream Wi-Fi 6 Router Installation Guide


NETGEAR NIGHTHAWK BE6500 Tri Band Wi-Fi 7 Router User Guide

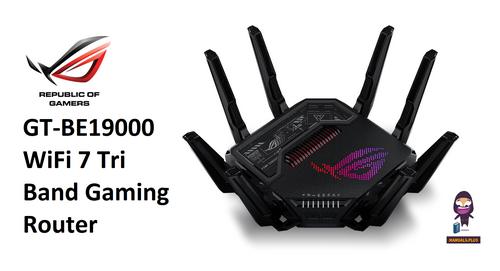
REPUBLIC OF GAMERS GT-BE19000 WiFi 7 Tri Band Gaming Router User Guide

cradlepoint AER1600 LTE Router User Guide

Xiaomi CB0401V2 5G CPE Pro V2 Wi-Fi 6 Router User Manual

POYNTING EPOYNT-4 Outdoor LTE-5G Antenna and Router Enclosure User Guide

ASUS TUF-AX5400 TUF Gaming Wi-Fi 6 Router User Guide

DIGITAL YACHT 4GXtream NMEA 2000 3G or 4G Router Instruction Manual

TELTONIKA Networks RUT950 Cellular Router User Guide

TP-Link BE805 Archer Wi-Fi 7 Router User Guide

WESTMANN GigaSpire BLAST U6 Router User Guide
Table of Contents
- 1. Ax3000 Gigabit Wi-fi 6 Router →
- 2. About This Guide - Connect The Hardware →
- 3. Our Technical Support Contact Information Can Be Found At Th... →
- 4. Product Overview - Appearance →
- 5. Get To Know About Your Router - Product Overview →
- 6. Get To Know About Your Router - Back Panel →
- 7. Get To Know About Your Router - Button And Port Explanation →
- 8. Connectthehardware - Positionyourrouter →
- 9. Connect The Hardware - Position Your Router →
- 10. Connect The Hardware - Internet →
- 11. Connect The Hardware - Wi-fi →
- 12. Log In To Your Router →
- 13. Log In To Your Router - Set Up The Tcp/ip Protocol →
- 14. Set Up Internet Connection - Use Quick Setup Wizard →
- 15. Set Up Internet Connection - Use Quick Setup Wizard →
- 16. Set Up Internet Connection - Manually Set Up Your Internet C... →
- 17. Set Up Internet Connection - Static Ip →
- 18. Set Up Internet Connection - Secondary Connection →
- 19. Set Up Internet Connection - Set Up The Router As An Access ... →
- 20. Set Up Internet Connection - Enable Ipv6 And Select The Inte... →
- 21. Set Up Internet Connection - Manually Set Up Your Internet C... →
- 22. Set Up Internet Connection - Configure Lan Ports →
- 23. Register A Tp-link Id - Change Your Tp-link Id Information →
- 24. Register A Tp-link Id - Change Your Tp-link Id Information →
- 25. Tp-link Cloud Service - Change Your Password →
- 26. Addtp-linkidtomanagetherouter - Removetp-linkid(s)frommanagi... →
- 27. Manage The Router Via The Tp-link Tether App - Launch The Ap... →
- 28. Wireless Settings - Specify Wireless Settings →
- 29. Wireless Settings - Specify Wireless Settings →
- 30. Wireless Settings - Smart Connect Function →
- 31. Wireless Settings - Channel Width →
- 32. Wireless Settings - Use Wps For Wireless Connection →
- 33. Wireless Settings - Connect Via The Routers Pin →
- 34. Wireless Settings - Configure Advanced Wireless Settings →
- 35. Guest Network - Create A Network For Guests →
- 36. Create A Network For Guests - Enable Bandwidth Control →
- 37. Guest Network - Customize Guest Network Options →
- 38. Iot Network →
- 39. Iot Network - Create An Iot Network As Needed →
- 40. Network Security - Parental Controls →
- 41. Network Security - Iot Protection →
- 42. Homeshield - Child Protection →
- 43. Homeshield - Launch The Tether App And Log In With Your Tp-l... →
- 44. Add A Router As A Satellite Device - Add A Range Extender As... →
- 45. Add A Router As A Satellite Device - Easymesh With Seamless ... →
- 46. Easymesh With Seamless Roaming - Add A Range Extender As A S... →
- 47. Easymesh With Seamless Roaming - Plug In The Extender Next T... →
- 48. Easymesh With Seamless Roaming - Manage Devices In The Easym... →
- 49. Protect The Network From Cyber Attacks - Access Control →
- 50. Protectthenetworkfro... - Accesscontrol →
- 51. Network Security - Allow Specific Device(s): →
- 52. Network Security - Add Unconnected Devices →
- 53. Network Security - Ip & Mac Binding →
- 54. Network Security - Alg →
- 55. Device Isolation - Network Security →
- 56. Nat Forwarding - Share Local Resources On The Internet By Po... →
- 57. Nat Forwarding - Share Local Resources On The Internet By Po... →
- 58. Nat Forwarding - View Common Services →
- 59. Nat Forwarding - Set Up A Dynamic Dns Service Account →
- 60. Nat Forwarding - Make Applications Free From Port Restrictio... →
- 61. Nat Forwarding - Assign A Static Ip Address To Your Pc →
- 62. Nat Forwarding - Upnp →
- 63. Vpn Server - Openvpn →
- 64. Use Openvpn To Access Your Home Network - Set Up Openvpn Ser... →
- 65. Vpn Server & Client - Configure Openvpn Connection On Your R... →
- 66. Vpn Server & Client - Enable Pptp →
- 67. Vpn Server & Client - Configure Pptp Vpn Connection On Your ... →
- 68. Vpn Server & Client →
- 69. Vpn Server & Client →
- 70. Use L2tp/ipsec Vpn To Access Your Home Network - Set Up L2tp... →
- 71. Vpn Server & Client - Client Ip Address →
- 72. Vpn Server & Client - Set Up A New Connection Or Network →
- 73. Vpn Server & Client - Use My Internet Connection (vpn) →
- 74. Vpn Server & Client →
- 75. Vpn Server & Client →
- 76. Vpn Server & Client - Security →
- 77. Use Wireguard Vpn To Access Your Home Network - Set Up Wireg... →
- 78. Vpn Server & Client - Set The Tunnel Ip Address And Listen P... →
- 79. Vpn Server & Client - Connect To The Wireguard Server →
- 80. Vpn Client To Access A Remote Vpn Server - Use The Vpn Featu... →
- 81. Vpn Server & Client - Openvpn →
- 82. Vpn Server & Client - Pptp →
- 83. Vpn Server & Client - Wireguard Vpn →
- 84. Vpn Server & Client →
- 85. Vpn Server & Client - Add And Manage The Devices That Will U... →
- 86. Vpn Server & Client →
- 87. Customize Your Network Settings - Change The Internet Settin... →
- 88. Customizeyournetwork... - Changetheinternetset... →
- 89. Customizeyournetworksettings - Changethemacaddressoftheroute... →
- 90. Customizeyournetwork... - Changethelansettings →
- 91. Customizeyournetwork... - Configuretosupportip... →
- 92. Customizeyournetwork... - Specifydhcpserverset... →
- 93. Customize Your Network Settings - Set Up A Dynamic Dns Servi... →
- 94. Customizeyournetwork... - Dynamicdns →
- 95. Customizeyournetwork... - Createstaticroutes →
- 96. Customizeyournetworksettings - Changetherouterslanipaddresse... →
- 97. Customizeyournetwork... - Interface →
- 98. Upgrade The Firmware - Backup And Restore Configuration Sett... →
- 99. Upgrade The Firmware - Auto Update →
- 100. Manage The Router - Online Upgrade →
- 101. Manage The Router - Easymesh Satellite Update →
- 102. Manage The Router - Restore Configuration Settings →
- 103. Manage The Router - Change The Login Password →
- 104. Manage The Router - Local Management →
- 105. Manage The Router - Allow All Lan Connected Devices To Manag... →
- 106. Manage The Router - Remote Management →
- 107. Manage The Router - Set Up A Dynamic Dns Service Account →
- 108. Manage The Router - System Log →
- 109. Manage The Router - Test The Network Connectivity →
- 110. Manage The Router - Diagnostics →
- 111. Manage The Router - Set System Time And Language →
- 112. Manage The Router - Ntp Server I →
- 113. Manage The Router - Set System Language →
- 114. Manage The Router - Control The Led →
- 115. Manage The Router →
- 116. Wireless Password Recovery - Web Management Password Reset →
- 117. Clicklansettingsanddeselectthefollowingthreeoptionsandclicko... →
- 118. Reset The Router To Factory Default Settings - Reconfigure T... →
- 119. Restart The Modem And The Router - Reset The Router To Facto... →
- 120. Visit Http://tplinkwifi.net, And Log In With Your Tp-link Id... →
- 121. Power Off Your Modem And Router - Confirm Your Internet Conn... →
- 122. Make Sure The Wireless Adapter Driver Is Installed Successfu... →
- 123. Fcc Compliance Information Statement - Product Name →
- 124. Fcc Rf Radiation Exposure Statement - Fcc Compliance Informa... →
- 125. Rf Exposure Information - National Restrictions →
- 126. Canadian Compliance Statement - Caution →
- 127. Déclaration Dexposition Aux Radiations - Industry Canada Sta... →
- 128. Safety Information →
- 129. Operating Temperature: 0~40 - Explanations Of The Symbols On... →
- 130. Functional Earthing - Operators Manual →