
×
- 1. The Provided Html Code Does Not Contain Any Subheadings Or Relevant Content Related To Installation/setup/configuration. Therefore, I Will T… (User Guide Be11000/be9300 Tri-band Wi-fi 7 Gaming Router Archer Ge650/ge550 2024 Tp-link 1910013678 Rev1.0.0)
- 2. About This Guide (Connect The Hardware → Log In To Your Router → Set Up Internet Connection → Tp-link Cloud Service → Network Map → Wireless Settings)
- 3. Use Of Wi-fi 7 (802.11be), Wi-fi 6 (802.11ax), And Features Including Multi-link Operation (mlo) (Homeshield Includes The Free Basic Plan → Use Of Wpa3 Requires Clients To Also Support The Corresponding Feature → This Router May Not Support All The Mandatory Features As Ratified In The Ieee 802.11be Specification → Further Software Upgrades For Feature Availability May Be Required → Actual Network Speed May Be Limited By The Rate Of The Products Ethernet Wan Or Lan Port)
- 4. Get To Know About Your Router (Product Overview → Appearance)
- 5. Get To Know About Your Router (Wps/wi-fi Button → Power On/off Button → Usb 3.0 Port → Reset Button → Led Description → Led Status)
- 6. Get To Know About Your Router (Led Status → Description)
- 7. Connect The Hardware (Positionyourrouter → Connectyourrouter)
- 8. Connect The Hardware (Position Your Router → Connect Your Router)
- 9. Connect The Hardware (Computer → Smart Device → Wi-fi → Wireless Network Connection → Choose A Network... → Connect Automatically)
- 10. Log In To Your Router
- 11. Log In To Your Router (Set Up The Tcp/ip Protocol → Visit Http://tplinkwifi.net)
- 12. Set Up Internet Connection (Use Quick Setup Wizard → Quick Setup Via Tp-link Tether App → Manually Set Up Your Internet Connection → Set Up The Router As An Access Point → Set Up An Ipv6 Internet Connection)
- 13. Set Up Internet Connection (Use Quick Setup Wizard → Set Up An Ipv6 Internet Connection → Quick Setup Via Tp-link Tether App → Tp-link Cloud Service)
- 14. Set Up Internet Connection (Manually Set Up Your Internet Connection)
- 15. Set Up Internet Connection (Pppoe → L2tp)
- 16. Set Up Internet Connection (Set Up The Router As An Access Point)
- 17. Set Up Internet Connection (Set Up An Ipv6 Internet Connection)
- 18. Set Up Internet Connection (Dynamic Ip(slaac/dhcpv6) → Pppoe)
- 19. Set Up Internet Connection (Manually Set Up Your Internet Connection → To4 Tunnel → Pass-through (bridge))
- 20. Set Up Internet Connection (Set Up Ipv6 Firewall Rules)
- 21. Set Up Internet Connection (Service Type → Service Name → Internal Ip)
- 22. Register A Tp-link Id (Change Your Tp-link Id Information → Manage The User Tp-link Ids → Manage The Router Via The Tp-link Tether App)
- 23. Register A Tp-link Id (Change Your Tp-link Id Information)
- 24. Tp-link Cloud Service (To Change Your Email Address → To Change Your Password)
- 25. Manage The User Tp-link Ids (Add Tp-link Id To Manage The Router → Manage The Router Via The Tp-link Tether App)
- 26. Removetp-linkid(s)frommanagingtherouter (Managetherouterviathetp-linktetherapp)
- 27. Registeratp-linkid
- 28. Network Map
- 29. Network Map (Visit Http://tplinkwifi.net, And Log In With Your Tp-link Id Or The Password You Set For The Router. → Click Each Network Device Icon To Check And Manage General Network Settings. → Click Internet To Check Internet Status. → Click The Router To Check Device Status And Network Settings. → You Can Turn On Or Off The Wireless Network Or Guest Network, Or Click Edit To Change Related Settings.)
- 30. Network Map (Mesh Devices → Clients → Speed Limit)
- 31. Network Map (Speed Limit)
- 32. Wireless Settings (Specify Wireless Settings → Schedule Your Wireless Function → Use Wps For Wireless Connection → Advanced Wireless Settings)
- 33. Wireless Settings (Specify Wireless Settings)
- 34. Wireless Settings (Enable Or Disable Twt → Enable Or Disable Ofdma → Use The Smart Connect Function → Enable Or Disable The Wireless Function → Change The Wireless Network Name (ssid) And Wireless Password)
- 35. Wireless Settings (Hide Ssid → Change The Security Option → Change Channel Settings → Change The Transmission Mode → Schedule Your Wireless Function)
- 36. Wireless Settings (Use Wps For Wireless Connection → Connect Via The Clients Pin)
- 37. Wireless Settings (Connect Via The Routers Pin → Push The Wps Button)
- 38. Wireless Settings (Advanced Wireless Settings → Check Advanced Wireless Settings For Your Device.)
- 39. Wireless Settings (Airtime Fairness → Beacon Interval → Rts Threshold → Dtim Interval → Group Key Update Period)
- 40. Create A Network For Guests (Customize Guest Network Options)
- 41. Create A Network For Guests (Enable Bandwidth Control → Set The Effective Time → Select The Security Type)
- 42. Guest Network (Customize Guest Network Options)
- 43. Iot Network
- 44. Iot Network (Create An Iot Network → Enable Checkbox For The 2.4ghz Or 5 Ghz Wireless Network → Customize The Ssid → Select The Security Type And Customize Your Own Password → Click Save → Sharing Network)
- 45. Access The Usb Storage Device (Media Sharing → Time Machine)
- 46. Usb Settings (Access The Usb Storage Device → Access The Usb Device Locally)
- 47. Usb Settings (To Set Up Authentication For Data Security → To Customize The Address Of The Usb Storage Device → Access The Usb Device Remotely)
- 48. Usb Settings (Configure Remote Access Settings → Visit Http://tplinkwifi.net → Go To Advanced > Usb > Usb Storage Device → Tick The Internet Ftp Checkbox → Click Save → Refer To The Following Table To Access Your Usb Disk Remotely)
- 49. Usb Settings (Customize The Access Settings → Set Up Authentication For Data Security → Set Up A Dynamic Dns Service Account → Access With The Username And Password → Go To Advanced > Usb > Usb Storage Device → Customize The Address Of The Usb Storage Device)
- 50. Usb Settings (Toonlysharespecificcontent → Tosetupauthenticationfordatasecurity)
- 51. Usb Settings (Media Sharing → Accessing As An Administrator → Changing Authentication Settings → Customizing The Address Of The Usb Storage Device → Default Administrator Account → Default Visitor Account)
- 52. Usb Settings (Time Machine)
- 53. Usb Settings (Time Machine → Storage Limit For Backups)
- 54. Homeshield (Network Check → Parental Controls → Qos → More Features)
- 55. Network Check
- 56. Homeshield (Parental Controls → Visit Http://tplinkwifi.net, And Log In With Your Tp-link Id Or The Password You Set For The Router. → Go To Advanced > Homeshield > Parental Controls. → Click + Add To Create A Profile For A Family Member. → Add Basic Profile Information. → Under Devices, Add Devices That Belong To This Family Member.)
- 57. Homeshield (Content Filter → Block Content For This Profile → Select The Content Categories To Block → Block A Specific Website → Set Time Restrictions On Internet Access)
- 58. Homeshield (Qos → Enable Bedtime → Advanced > Homeshield > More Features → Advanced > Homeshield > Qos)
- 59. Visithttp://tplinkwifi.net,andloginwithyourtp-linkidorthepasswordyousetfortherouter.
- 60.
- 61. Add A Router As A Satellite Device (Add A Range Extender As A Satellite Device → Manage Devices In The Easymesh Network)
- 62. Add A Router As A Satellite Device (Via An Ethernet Cable → Via The Wps Button → Via The Tether App)
- 63. Easymesh With Seamless Roaming (Add Satellite Devices → Via The Web Browser → Enable Easymesh)
- 64. Easymesh With Seamless Roaming (Add Satellite Devices → Follow The Page Instructions To Prepare Your Satellite Router → This Device Has Been Added Successfully)
- 65. Easymesh With Seamless Roaming (Add A Range Extender As A Satellite Device)
- 66. Easymesh With Seamless Roaming (Plug In The Extender Next To The Main Router → Press The Wps Button On Main Router And On The Extender → Check The Mesh Device On The Routers Web Page)
- 67. Manage Devices In The Easymesh Network (To View Mesh Devices And Connected Clients In The Network → To Manage An Easymesh Device In The Network → Change Device Information)
- 68. Protect The Network From Cyber Attacks (Access Control → Ip & Mac Binding → Alg → Device Isolation)
- 69. Protect The Network From Cyber Attacks (Access Control)
- 70. Network Security (Allow Specific Device(s) → Deny List)
- 71. Network Security
- 72. Network Security (Ip & Mac Binding → Allow List → Deny List)
- 73. Network Security (Alg → Sip Alg Configuration → Nat Traversal Filters → Router Login → Default Settings → Voice And Video Applications)
- 74. Device Isolation
- 75. Nat Forwarding (Share Local Resources On The Internet By Port Forwarding → Open Ports Dynamically By Port Triggering → Make Applications Free From Port Restriction By Dmz → Make Xbox Online Games Run Smoothly By Upnp)
- 76. Nat Forwarding (Share Local Resources On The Internet By Port Forwarding → Assign A Static Ip Address To Your Pc → Visit Http://tplinkwifi.net → Go To Advanced > Nat Forwarding > Port Forwarding → Click +add)
- 77. Nat Forwarding (View Common Services → View Connected Devices → Device Ip Address → Save → Recommended To Keep The Default Settings → Verify The Port Number)
- 78. Nat Forwarding (Set Up A Dynamic Dns Service Account → Open Ports Dynamically By Port Triggering → Configure The Port Triggering Rules)
- 79. Nat Forwarding (Make Applications Free From Port Restriction By Dmz → Note: → Tips:)
- 80. Assign A Static Ip Address To Your Pc (Enable Dmz → Select Your Pc For Dmz Host Ip Address → Save Configuration → Make Xbox Online Games Run Smoothly By Upnp → Enable Upnp For Multiplayer Gaming → Upnp Default Settings And Requirements)
- 81. Nat Forwarding (Upnp)
- 82. Vpn Server (Openvpn → Pptp Vpn → L2tp/ipsec Vpn → Wireguard Vpn → Vpn Client → Use Openvpn To Access Your Home Network)
- 83. Use Openvpn To Access Your Home Network (Set Up Openvpn Server On Your Router)
- 84. Vpn Server&client (Configure Openvpn Connection On Your Remote Device → Use Pptp Vpn To Access Your Home Network → Set Up Pptp Vpn Server On Your Router)
- 85. Vpn Server&client (Enable Pptp → Dynamic Dns Service → Client Ip Address → Pptp Connection Permission → Save → Configure Pptp Vpn Connection Account)
- 86. Vpn Server&client (Configure Pptp Vpn Connection On Your Remote Device → Set Up A New Connection Or Network → Connect To A Workplace)
- 87. Vpn Server&client (Use My Internet Connection (vpn) → Enter The Internet Ip Address Of The Router)
- 88. Vpn Server&client
- 89. Usel2tp/ipsecvpntoaccessyourhomenetwork (Set Upl2tp/ipsecvpnserveronyourrouter → Configurel2tp/ipsecconnectiononremotedevices)
- 90. Vpn Server&client (Client Ip Address → Ipsec Encryption → Ipsec Pre-shared Key → Configure The L2tp/ipsec Vpn Connection Account → Username And Password → Configure L2tp/ipsec Vpn Connection On Your Remote Device)
- 91. Vpn Server&client (Set Up A New Connection Or Network → Connect To A Workplace)
- 92. Vpn Server&client (Use My Internet Connection (vpn) → Enter The Internet Ip Address Of The Router → Dont Connect Now; Just Set It Up So I Can Connect Later → Enter The User Name And Password)
- 93. Vpn Server&client
- 94. Vpn Server&client (User Name And Password Configuration)
- 95. Vpn Server&client (Security → Layer 2 Tunneling Protocol With Ipsec (l2tp/ipsec) → Advanced Settings → Use Preshared Key For Authentication → Ipsec Pre-shared Key → Connect)
- 96. Use Wireguard Vpn To Access Your Home Network (Set Up Wireguard Vpn Server On Your Router)
- 97. Vpn Server&client (Set The Tunnel Ip Address And Listen Port → Select Your Client Access Type → Advanced Settings → Create Accounts That Can Be Used By Remote Clients To Connect To The Vpn Server → Account List → Traffic Sent From The Wiregard Vpn Client To The Allowed Ips)
- 98. Vpn Server&client (Use Vpn Client To Access A Remote Vpn Server → Enable Or Disable Pre-shared Key → Visit Http://tplinkwifi.net, And Log In With Your Tp-link Id Or The Password You Set For The Router → Go To Advanced > Vpn Client → Enable Vpn Client, Then Save The Settings → Add Vpn Servers, And Enable The One You Need)
- 99. Vpn Server&client (Openvpn → Pptp)
- 100. Vpn Server&client (L2tp/ipsec Vpn → Wireguard Vpn)
- 101. Vpn Server&client (Save The Settings → Add And Manage The Devices That Will Use The Vpn Function → In The Device List Section, Click Add)
- 102. Vpn Server&client (Choose And Add The Devices That Will Access The Vpn Server You Have Configured. → Save The Settings. → Now The Devices You Specified Can Access The Vpn Server You Enabled.)
- 103. Customizeyournetworksettings (Change Theinternetsettings → Change Thelansettings → Setuplinkaggregation → Flowcontroller → Configuretosupportiptvservice → Specifydhcpserversettings)
- 104. Customizeyournetworksettings (Changetheinternetsettings)
- 105. Customizeyournetworksettings (Change Themacaddressofthe Router → Change Theinternetportnegotiationspeedsetting → Enableflowcontroller → Change Thelansettings)
- 106. Customizeyournetworksettings (Setuplinkaggregation)
- 107. Customizeyournetworksettings (Flowcontroller → Configuretosupportiptvservice)
- 108. Customize Your Network Settings (Igmp Proxy And Igmp Snooping → Wireless Multicast Forwarding → Enable Iptv/vlan → Select The Appropriate Mode → Lan Port For Iptv Connection → Click Save)
- 109. Customizeyournetworksettings (Specifydhcpserversettings → Connectthesettopbox → Configureyoursettopbox → Enabledhcpserver → Reserveipaddresses → Visithttp://tplinkwifi.net)
- 110. Customizeyournetworksettings (Setupadynamicdnsserviceaccount)
- 111. Customizeyournetworksettings
- 112. Customizeyournetworksettings (Createstaticroutes)
- 113. Customizeyournetworksettings (Change The Routers Lan Ip Addresses → Disable Router Bs Dhcp Function → Visit Http://tplinkwifi.net → Log In With Your Tp-link Id → Go To Advanced > Network > Routing → Click Add And Finish The Settings)
- 114. Customizeyournetworksettings (Networkdestination → Subnetmask → Defaultgateway → Interface → Description → Checktheroutingtable)
- 115. Customizeyournetworksettings (Advancedtrafficmonitor → Enabletrafficstatistic)
- 116. Manage The Router (Update The Firmware → Backup And Restore Configuration Settings → Change The Login Password → Password Recovery → Local Management → Remote Management)
- 117. Manage The Router (Update The Firmware → Auto Update → Online Update)
- 118. Manage The Router (Local Update → Easymesh Satellite Update)
- 119. Manage The Router (Backup And Restore Configuration Settings)
- 120. Manage The Router (Factory Default Restore → Reset The Router Except Your Login Password And Tp-link Id → Reset The Router To Factory Default Settings → Backup The Current Configuration Settings)
- 121. Manage The Router (Change The Login Password → Password Recovery)
- 122. Manage The Router (Local Management)
- 123. Manage The Router (Remote Management)
- 124. Manage The Router (Remote Management → Set Up A Dynamic Dns Service Account)
- 125. Manage The Router (System Log)
- 126. Manage The Router (Save Log → Send The System Log To A Mailbox → Visit Http://tplinkwifi.net → Log In With Your Tp-link Id → Go To Advanced > System Tools > System Log → Enter The Information Required)
- 127. Manage The Router (Test The Network Connectivity)
- 128. Manage The Router (Advanced > System > Diagnostics → Ping Or Traceroute → Ip Address Or Domain Name → Ping Count And Ping Packet Size → Traceroute Max Ttl → Start To Begin The Diagnostics)
- 129. Manage The Router (Set System Time And Language)
- 130. Manage The Router (Set Time → Get From Managing Device → Manually Set The Date And Time → Set Daylight Saving Time)
- 131. Manage The Router (Set The Router To Reboot Regularly → Select The Correct Start Date And Time → Select The Correct End Date And Time → Set System Language → Click Save → Visit Http://tplinkwifi.net And Log In)
- 132. Manage The Router (Control The Led → Reboot Time → Night Mode → Led Control → Save)
- 133. Manage The Router
- 134. Checkkeyparametersongamepanel (Gameacceleration → Gameportforwarding → Gamestatictics → Gamedetector → Gamediagnostics)
- 135. Check Key Parameters On Game Panel (Visit Http://tplinkwifi.net, And Log In With Your Tp-link Id Or The Password You Set For The Router. → Go To Game Center > Game Panel. → Click Rgb Effects To Choose A Preferred Rgb Effect. By Default, The Fire Effect Is Used.)
- 136. Game Center (Network Traffic → Performance → Connected Usb Devices → Advanced > Usb > Usb Storage Device)
- 137. Game Dashboard (Game Acceleration → Qos → Game Server Acceleration → Gear Acceleration)
- 138. Qos (Game Server Acceleration)
- 139. Game Center (Game Acceleration → Game Server Acceleration → Device Boost List → Log In To The Account Of Your Subscribed Gpn Service → Select The Device You Want To Accelerate → Click Save)
- 140. Chapter 18 (Game Center)
- 141. Game Center (Gear Acceleration → Enable Button → Device Priority → Acceleration Duration → Reduce Game Latency → Boost Game Speed)
- 142. Game Port Forwarding (Visit Http://tplinkwifi.net, And Log In With Your Tp-link Id Or The Password You Set For The Router. → Go To Game Center > Game Port Forwarding. → Click +add. → Select A Game To Create A Game Profile.)
- 143. Game Center (Game Statistics)
- 144. Game Center (Game Detector → Visit Http://tplinkwifi.net → Log In With Your Tp-link Id → Go To Game Center > Game Detector → Choose A Game To Check The Real-time Server Ping Information)
- 145. Game Center (Game Diagnostics → Test The Network Connectivity → Visit Http://tplinkwifi.net → Log In With Your Tp-link Id → Go To Game Center > Game Diagnostics → Choose Ping Or Traceroute)
- 146. Traceroute (Enter The Ip Address Or Domain Name → Modify The Ping Count And The Ping Packet Size → Modify The Traceroute Max Ttl → Click Start To Begin The Diagnostics)
- 147. Wireless Password Recovery (Web Management Password Reset → Router Reset Instructions → Logging Into The Router's Web Management Page → Ip Address Configuration → Network Settings Verification → Internet Options Configuration)
- 148. Lan Settings (Advanced → Restore Advanced Settings)
- 149. Resetting The Router To Factory Default Settings (Reconfiguring The Router → Checking Internet Status → Configuring Dns Server)
- 150. Restart The Modem And The Router (Reset The Router To Factory Default Settings And Reconfigure The Router → Upgrade The Firmware Of The Router → Check The Tcp/ip Settings On The Particular Device → Make Sure The Physical Connection Between The Router And The Modem Is Proper → Clone The Mac Address Of Your Computer)
- 151. Visit Http://tplinkwifi.net, And Log In With Your Tp-link Id Or The Password You Set For The Router.
- 152. Power Off Your Modem And Router (Confirm Your Internet Connection Type → Visit Http://tplinkwifi.net → Select Your Internet Connection Type → Click Save → Restart The Modem And The Router → Please Upgrade The Firmware Of The Router)
- 153. Make Sure The Wireless Adapter Driver Is Installed Successfully And The Wireless Adapter Is Enabled. (On Windows 7 → On Windows Xp → Check The Wlan Led Indicator On Your Wireless Router/modem. → Go To Wireless Or Advanced > Wireless > Wireless Settings → Authenticating Problem/password Mismatch)
- 154. Fcc Compliance Information Statement (Product Name: Be11000/be9300 Tri-band Wi-fi 7 Gaming Router → Model Number: Archer Ge650/ge550 → Responsible Party: Tp-link Systems Inc → This Equipment Has Been Tested And Found To Comply With The Limits For A Class B Digital Device, Pursuant To Part 15 Of The Fcc Rules. → This Device Complies With Part 15 Of The Fcc Rules. Operation Is Subject To The Following Two Conditions:)
- 155. Fcc Rf Radiation Exposure Statement (Mobile Configurations → Indoor Use Only → Prohibited Operations → Separation Distance Requirements → Compliance With Technical Standards → Unauthorized Modifications)
- 156. Eu Declaration Of Conformity (Rf Exposure Information → National Restrictions → Ukca Mark → Uk Declaration Of Conformity)
- 157. Canadian Compliance Statement (Caution → Dfs (dynamic Frequency Selection) → Operation Restrictions)
- 158. Installation And Operation Guidelines (Radiation Exposure Statement → Industry Canada Statement → Safety Consultations And Precautions)
- 159. Adapter Installation Requirements (Recommended Power Supplies → Operating Temperature Range → Electromagnetic Field Precautions → Safety Information And Usage Guidelines → Explanation Of Symbols On The Product Label)
- 160. Caution, Risk Of Electric Shock (Caution, Hot Surface → Operators Manual → Energy Efficiency Marking → Waste Electrical And Electronic Equipment (weee) → Protective Earth → Functional Earthing)
- 161. Disconnection, All Power Plugs (Switch Of Mini-gap Construction → Switch Of Micro-gap Construction (for Us Version) → Switch Of Micro-gap → Micro-disconnection Construction (for Other Versions Except Us) → Switch Without Contact Gap (semiconductor Switching Device))
×
TP-Link BE11000 Tri Band Wi-Fi 7 Gaming Router User Guide








Chapter 1
Get to Know About Your Router
1 1 Product Overview
TP-Link Wi-Fi 7 router, with the 802.11be Wi-Fi technology and the brand-new 6 GHz
band, achieves Wi-Fi performance at its ultimate level. The new features of Wi-Fi 7 and
4k QAM dramatically improve throughput and increase capacity and efficiency of the
whole network. Access to the 6 GHz band brings more bandwidth, faster speeds, and
lower latency, opening up resources for future innovations.
Moreover, it is simple and convenient to set up and use the TP-Link router due to its
intuitive Tether app and powerful web interface.
1 2 Appearance
The physical buttons and ports are located on the back of the router.
Item
Description
5Gbps Internet Port
For connecting to your modem or the Ethernet outlet.
5Gbps Gaming Port
(LAN 4)
For connecting your game device to prioritizes the game device traffic.
4

| General | Details |
|---|---|
| Name | TP-Link BE11000 Tri Band Wi-Fi 7 Gaming Router User Guide |
| Make | TP-Link |
| Language | English |
| Filetype | PDF (Download) |
| File size | 1.95 MB |
 (1 votes, average: 5.00 out of 5)
 Loading...
If you have any questions regarding TP-Link BE11000 Tri Band Wi-Fi 7 Gaming Router User Guide, please ask here and describe the problem in detail.

TP-Link VR300 Archer Modem Router User Guide

TP-Link T150500-2-DT WiFi Router Instruction Manual

TP-Link Archer AX55 Wi-Fi 6 Router Installation Guide

TP-Link Omada ER8411 VPN Router Instructions

TP-Link Configure VDSL Router User Guide

TP-Link Archer BE805 BE19000 Tri-Band Wi-Fi 7 Router User Manual

TP-Link VR600 Wireless DSL Modem Router Installation Guide

TP-Link AX58 Dual Band Gigabit Wi-Fi 6 Router Installation Guide

TP-Link AC750 Wireless Dual Band Router Owner’s Manual

TP-Link AX6000 8-Stream Wi-Fi 6 Router Installation Guide


ASUS RT-BE86U Wireless Router User Guide

robustel R2010 Dual SIM VPN IoT Router Instruction Manual

Cudy WR3000SE AX3000 Gigabit Mesh Wi-Fi 6 Router Owner’s Manual

Cudy WR1200 Dual Band Smart Wi-Fi Router Installation Guide

Maiyuan AX3000W Router Installation Guide

CASTLENET EBM522U Mesh WiFi Router Installation Guide

MERCUSYS MR47BE BE9300 Tri Band WiFi 7 Router User Guide

Juniper NETWORKS PTX10001-36MR Packet Transport Router User Guide

HUAWEI Outdoor CPE B2368 CAT12 LTE Router with Antenna User Guide
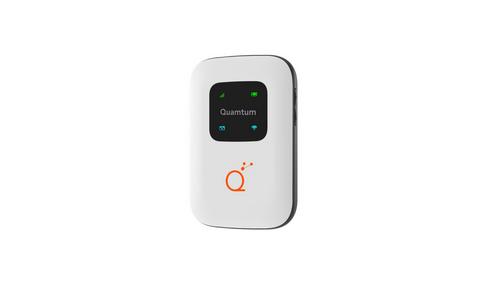
Quamtum HS2 HotSpot Wireless Portable Router User Manual
Table of Contents
- 1. The Provided Html Code Does Not Contain Any Subheadings Or R... →
- 2. About This Guide - Connect The Hardware →
- 3. Use Of Wi-fi 7 (802.11be), Wi-fi 6 (802.11ax), And Features ... →
- 4. Get To Know About Your Router - Product Overview →
- 5. Get To Know About Your Router - Wps/wi-fi Button →
- 6. Get To Know About Your Router - Led Status →
- 7. Connect The Hardware - Positionyourrouter →
- 8. Connect The Hardware - Position Your Router →
- 9. Connect The Hardware - Computer →
- 10. Log In To Your Router →
- 11. Log In To Your Router - Set Up The Tcp/ip Protocol →
- 12. Set Up Internet Connection - Use Quick Setup Wizard →
- 13. Set Up Internet Connection - Use Quick Setup Wizard →
- 14. Set Up Internet Connection - Manually Set Up Your Internet C... →
- 15. Set Up Internet Connection - Pppoe →
- 16. Set Up Internet Connection - Set Up The Router As An Access ... →
- 17. Set Up Internet Connection - Set Up An Ipv6 Internet Connect... →
- 18. Set Up Internet Connection - Dynamic Ip(slaac/dhcpv6) →
- 19. Set Up Internet Connection - Manually Set Up Your Internet C... →
- 20. Set Up Internet Connection - Set Up Ipv6 Firewall Rules →
- 21. Set Up Internet Connection - Service Type →
- 22. Register A Tp-link Id - Change Your Tp-link Id Information →
- 23. Register A Tp-link Id - Change Your Tp-link Id Information →
- 24. Tp-link Cloud Service - To Change Your Email Address →
- 25. Manage The User Tp-link Ids - Add Tp-link Id To Manage The R... →
- 26. Removetp-linkid(s)frommanagingtherouter - Managetheroutervia... →
- 27. Registeratp-linkid →
- 28. Network Map →
- 29. Network Map - Visit Http://tplinkwifi.net, And Log In With Y... →
- 30. Network Map - Mesh Devices →
- 31. Network Map - Speed Limit →
- 32. Wireless Settings - Specify Wireless Settings →
- 33. Wireless Settings - Specify Wireless Settings →
- 34. Wireless Settings - Enable Or Disable Twt →
- 35. Wireless Settings - Hide Ssid →
- 36. Wireless Settings - Use Wps For Wireless Connection →
- 37. Wireless Settings - Connect Via The Routers Pin →
- 38. Wireless Settings - Advanced Wireless Settings →
- 39. Wireless Settings - Airtime Fairness →
- 40. Create A Network For Guests - Customize Guest Network Option... →
- 41. Create A Network For Guests - Enable Bandwidth Control →
- 42. Guest Network - Customize Guest Network Options →
- 43. Iot Network →
- 44. Iot Network - Create An Iot Network →
- 45. Access The Usb Storage Device - Media Sharing →
- 46. Usb Settings - Access The Usb Storage Device →
- 47. Usb Settings - To Set Up Authentication For Data Security →
- 48. Usb Settings - Configure Remote Access Settings →
- 49. Usb Settings - Customize The Access Settings →
- 50. Usb Settings - Toonlysharespecificc... →
- 51. Usb Settings - Media Sharing →
- 52. Usb Settings - Time Machine →
- 53. Usb Settings - Time Machine →
- 54. Homeshield - Network Check →
- 55. Network Check →
- 56. Homeshield - Parental Controls →
- 57. Homeshield - Content Filter →
- 58. Homeshield - Qos →
- 59. Visithttp://tplinkwifi.net,andloginwithyourtp-linkidorthepas... →
- 60. Page 60 →
- 61. Add A Router As A Satellite Device - Add A Range Extender As... →
- 62. Add A Router As A Satellite Device - Via An Ethernet Cable →
- 63. Easymesh With Seamless Roaming - Add Satellite Devices →
- 64. Easymesh With Seamless Roaming - Add Satellite Devices →
- 65. Easymesh With Seamless Roaming - Add A Range Extender As A S... →
- 66. Easymesh With Seamless Roaming - Plug In The Extender Next T... →
- 67. Manage Devices In The Easymesh Network - To View Mesh Device... →
- 68. Protect The Network From Cyber Attacks - Access Control →
- 69. Protect The Network From Cyber Attacks - Access Control →
- 70. Network Security - Allow Specific Device(s) →
- 71. Network Security →
- 72. Network Security - Ip & Mac Binding →
- 73. Network Security - Alg →
- 74. Device Isolation →
- 75. Nat Forwarding - Share Local Resources On The Internet By Po... →
- 76. Nat Forwarding - Share Local Resources On The Internet By Po... →
- 77. Nat Forwarding - View Common Services →
- 78. Nat Forwarding - Set Up A Dynamic Dns Service Account →
- 79. Nat Forwarding - Make Applications Free From Port Restrictio... →
- 80. Assign A Static Ip Address To Your Pc - Enable Dmz →
- 81. Nat Forwarding - Upnp →
- 82. Vpn Server - Openvpn →
- 83. Use Openvpn To Access Your Home Network - Set Up Openvpn Ser... →
- 84. Vpn Server&client - Configure Openvpn Connection On Your Rem... →
- 85. Vpn Server&client - Enable Pptp →
- 86. Vpn Server&client - Configure Pptp Vpn Connection On Your Re... →
- 87. Vpn Server&client - Use My Internet Connection (vpn) →
- 88. Vpn Server&client →
- 89. Usel2tp/ipsecvpntoaccessyourhomenetwork - Set Upl2tp/ipsecvp... →
- 90. Vpn Server&client - Client Ip Address →
- 91. Vpn Server&client - Set Up A New Connection Or Network →
- 92. Vpn Server&client - Use My Internet Connection (vpn) →
- 93. Vpn Server&client →
- 94. Vpn Server&client - User Name And Password Configuration →
- 95. Vpn Server&client - Security →
- 96. Use Wireguard Vpn To Access Your Home Network - Set Up Wireg... →
- 97. Vpn Server&client - Set The Tunnel Ip Address And Listen Por... →
- 98. Vpn Server&client - Use Vpn Client To Access A Remote Vpn Se... →
- 99. Vpn Server&client - Openvpn →
- 100. Vpn Server&client - L2tp/ipsec Vpn →
- 101. Vpn Server&client - Save The Settings →
- 102. Vpn Server&client - Choose And Add The Devices That Will Acc... →
- 103. Customizeyournetwork... - Change Theinternetsettings →
- 104. Customizeyournetwork... - Changetheinternetset... →
- 105. Customizeyournetworksettings - Change Themacaddressofthe Rou... →
- 106. Customizeyournetwork... - Setuplinkaggregation →
- 107. Customizeyournetwork... - Flowcontroller →
- 108. Customize Your Network Settings - Igmp Proxy And Igmp Snoopi... →
- 109. Customizeyournetwork... - Specifydhcpserverset... →
- 110. Customizeyournetworksettings - Setupadynamicdnsserviceaccoun... →
- 111. Customizeyournetwork... →
- 112. Customizeyournetwork... - Createstaticroutes →
- 113. Customizeyournetworksettings - Change The Routers Lan Ip Add... →
- 114. Customizeyournetwork... - Networkdestination →
- 115. Customizeyournetwork... - Advancedtrafficmonit... →
- 116. Manage The Router - Update The Firmware →
- 117. Manage The Router - Update The Firmware →
- 118. Manage The Router - Local Update →
- 119. Manage The Router - Backup And Restore Configuration Setting... →
- 120. Manage The Router - Factory Default Restore →
- 121. Manage The Router - Change The Login Password →
- 122. Manage The Router - Local Management →
- 123. Manage The Router - Remote Management →
- 124. Manage The Router - Remote Management →
- 125. Manage The Router - System Log →
- 126. Manage The Router - Save Log →
- 127. Manage The Router - Test The Network Connectivity →
- 128. Manage The Router - Advanced > System > Diagnostics →
- 129. Manage The Router - Set System Time And Language →
- 130. Manage The Router - Set Time →
- 131. Manage The Router - Set The Router To Reboot Regularly →
- 132. Manage The Router - Control The Led →
- 133. Manage The Router →
- 134. Checkkeyparameterson... - Gameacceleration →
- 135. Check Key Parameters On Game Panel - Visit Http://tplinkwifi... →
- 136. Game Center - Network Traffic →
- 137. Game Dashboard - Game Acceleration →
- 138. Qos - Game Server Acceleration →
- 139. Game Center - Game Acceleration →
- 140. Chapter 18 - Game Center →
- 141. Game Center - Gear Acceleration →
- 142. Game Port Forwarding - Visit Http://tplinkwifi.net, And Log ... →
- 143. Game Center - Game Statistics →
- 144. Game Center - Game Detector →
- 145. Game Center - Game Diagnostics →
- 146. Traceroute - Enter The Ip Address Or Domain Name →
- 147. Wireless Password Recovery - Web Management Password Reset →
- 148. Lan Settings - Advanced →
- 149. Resetting The Router To Factory Default Settings - Reconfigu... →
- 150. Restart The Modem And The Router - Reset The Router To Facto... →
- 151. Visit Http://tplinkwifi.net, And Log In With Your Tp-link Id... →
- 152. Power Off Your Modem And Router - Confirm Your Internet Conn... →
- 153. Make Sure The Wireless Adapter Driver Is Installed Successfu... →
- 154. Fcc Compliance Information Statement - Product Name: Be11000... →
- 155. Fcc Rf Radiation Exposure Statement - Mobile Configurations →
- 156. Eu Declaration Of Conformity - Rf Exposure Information →
- 157. Canadian Compliance Statement - Caution →
- 158. Installation And Operation Guidelines - Radiation Exposure S... →
- 159. Adapter Installation Requirements - Recommended Power Suppli... →
- 160. Caution, Risk Of Electric Shock - Caution, Hot Surface →
- 161. Disconnection, All Power Plugs - Switch Of Mini-gap Construc... →