
×
- 1. The Provided Html Code Does Not Contain Any Subheadings Or Relevant Content Related To Installation/setup/configuration. Therefore, I Will T… (User Guide Be11000/be9300 Tri-band Wi-fi 7 Gaming Router Archer Ge650/ge550 2024 Tp-link 1910013678 Rev1.0.0)
- 2. About This Guide (Connect The Hardware → Log In To Your Router → Set Up Internet Connection → Tp-link Cloud Service → Network Map → Wireless Settings)
- 3. Use Of Wi-fi 7 (802.11be), Wi-fi 6 (802.11ax), And Features Including Multi-link Operation (mlo) (Homeshield Includes The Free Basic Plan → Use Of Wpa3 Requires Clients To Also Support The Corresponding Feature → This Router May Not Support All The Mandatory Features As Ratified In The Ieee 802.11be Specification → Further Software Upgrades For Feature Availability May Be Required → Actual Network Speed May Be Limited By The Rate Of The Products Ethernet Wan Or Lan Port)
- 4. Get To Know About Your Router (Product Overview → Appearance)
- 5. Get To Know About Your Router (Wps/wi-fi Button → Power On/off Button → Usb 3.0 Port → Reset Button → Led Description → Led Status)
- 6. Get To Know About Your Router (Led Status → Description)
- 7. Connect The Hardware (Positionyourrouter → Connectyourrouter)
- 8. Connect The Hardware (Position Your Router → Connect Your Router)
- 9. Connect The Hardware (Computer → Smart Device → Wi-fi → Wireless Network Connection → Choose A Network... → Connect Automatically)
- 10. Log In To Your Router
- 11. Log In To Your Router (Set Up The Tcp/ip Protocol → Visit Http://tplinkwifi.net)
- 12. Set Up Internet Connection (Use Quick Setup Wizard → Quick Setup Via Tp-link Tether App → Manually Set Up Your Internet Connection → Set Up The Router As An Access Point → Set Up An Ipv6 Internet Connection)
- 13. Set Up Internet Connection (Use Quick Setup Wizard → Set Up An Ipv6 Internet Connection → Quick Setup Via Tp-link Tether App → Tp-link Cloud Service)
- 14. Set Up Internet Connection (Manually Set Up Your Internet Connection)
- 15. Set Up Internet Connection (Pppoe → L2tp)
- 16. Set Up Internet Connection (Set Up The Router As An Access Point)
- 17. Set Up Internet Connection (Set Up An Ipv6 Internet Connection)
- 18. Set Up Internet Connection (Dynamic Ip(slaac/dhcpv6) → Pppoe)
- 19. Set Up Internet Connection (Manually Set Up Your Internet Connection → To4 Tunnel → Pass-through (bridge))
- 20. Set Up Internet Connection (Set Up Ipv6 Firewall Rules)
- 21. Set Up Internet Connection (Service Type → Service Name → Internal Ip)
- 22. Register A Tp-link Id (Change Your Tp-link Id Information → Manage The User Tp-link Ids → Manage The Router Via The Tp-link Tether App)
- 23. Register A Tp-link Id (Change Your Tp-link Id Information)
- 24. Tp-link Cloud Service (To Change Your Email Address → To Change Your Password)
- 25. Manage The User Tp-link Ids (Add Tp-link Id To Manage The Router → Manage The Router Via The Tp-link Tether App)
- 26. Removetp-linkid(s)frommanagingtherouter (Managetherouterviathetp-linktetherapp)
- 27. Registeratp-linkid
- 28. Network Map
- 29. Network Map (Visit Http://tplinkwifi.net, And Log In With Your Tp-link Id Or The Password You Set For The Router. → Click Each Network Device Icon To Check And Manage General Network Settings. → Click Internet To Check Internet Status. → Click The Router To Check Device Status And Network Settings. → You Can Turn On Or Off The Wireless Network Or Guest Network, Or Click Edit To Change Related Settings.)
- 30. Network Map (Mesh Devices → Clients → Speed Limit)
- 31. Network Map (Speed Limit)
- 32. Wireless Settings (Specify Wireless Settings → Schedule Your Wireless Function → Use Wps For Wireless Connection → Advanced Wireless Settings)
- 33. Wireless Settings (Specify Wireless Settings)
- 34. Wireless Settings (Enable Or Disable Twt → Enable Or Disable Ofdma → Use The Smart Connect Function → Enable Or Disable The Wireless Function → Change The Wireless Network Name (ssid) And Wireless Password)
- 35. Wireless Settings (Hide Ssid → Change The Security Option → Change Channel Settings → Change The Transmission Mode → Schedule Your Wireless Function)
- 36. Wireless Settings (Use Wps For Wireless Connection → Connect Via The Clients Pin)
- 37. Wireless Settings (Connect Via The Routers Pin → Push The Wps Button)
- 38. Wireless Settings (Advanced Wireless Settings → Check Advanced Wireless Settings For Your Device.)
- 39. Wireless Settings (Airtime Fairness → Beacon Interval → Rts Threshold → Dtim Interval → Group Key Update Period)
- 40. Create A Network For Guests (Customize Guest Network Options)
- 41. Create A Network For Guests (Enable Bandwidth Control → Set The Effective Time → Select The Security Type)
- 42. Guest Network (Customize Guest Network Options)
- 43. Iot Network
- 44. Iot Network (Create An Iot Network → Enable Checkbox For The 2.4ghz Or 5 Ghz Wireless Network → Customize The Ssid → Select The Security Type And Customize Your Own Password → Click Save → Sharing Network)
- 45. Access The Usb Storage Device (Media Sharing → Time Machine)
- 46. Usb Settings (Access The Usb Storage Device → Access The Usb Device Locally)
- 47. Usb Settings (To Set Up Authentication For Data Security → To Customize The Address Of The Usb Storage Device → Access The Usb Device Remotely)
- 48. Usb Settings (Configure Remote Access Settings → Visit Http://tplinkwifi.net → Go To Advanced > Usb > Usb Storage Device → Tick The Internet Ftp Checkbox → Click Save → Refer To The Following Table To Access Your Usb Disk Remotely)
- 49. Usb Settings (Customize The Access Settings → Set Up Authentication For Data Security → Set Up A Dynamic Dns Service Account → Access With The Username And Password → Go To Advanced > Usb > Usb Storage Device → Customize The Address Of The Usb Storage Device)
- 50. Usb Settings (Toonlysharespecificcontent → Tosetupauthenticationfordatasecurity)
- 51. Usb Settings (Media Sharing → Accessing As An Administrator → Changing Authentication Settings → Customizing The Address Of The Usb Storage Device → Default Administrator Account → Default Visitor Account)
- 52. Usb Settings (Time Machine)
- 53. Usb Settings (Time Machine → Storage Limit For Backups)
- 54. Homeshield (Network Check → Parental Controls → Qos → More Features)
- 55. Network Check
- 56. Homeshield (Parental Controls → Visit Http://tplinkwifi.net, And Log In With Your Tp-link Id Or The Password You Set For The Router. → Go To Advanced > Homeshield > Parental Controls. → Click + Add To Create A Profile For A Family Member. → Add Basic Profile Information. → Under Devices, Add Devices That Belong To This Family Member.)
- 57. Homeshield (Content Filter → Block Content For This Profile → Select The Content Categories To Block → Block A Specific Website → Set Time Restrictions On Internet Access)
- 58. Homeshield (Qos → Enable Bedtime → Advanced > Homeshield > More Features → Advanced > Homeshield > Qos)
- 59. Visithttp://tplinkwifi.net,andloginwithyourtp-linkidorthepasswordyousetfortherouter.
- 60.
- 61. Add A Router As A Satellite Device (Add A Range Extender As A Satellite Device → Manage Devices In The Easymesh Network)
- 62. Add A Router As A Satellite Device (Via An Ethernet Cable → Via The Wps Button → Via The Tether App)
- 63. Easymesh With Seamless Roaming (Add Satellite Devices → Via The Web Browser → Enable Easymesh)
- 64. Easymesh With Seamless Roaming (Add Satellite Devices → Follow The Page Instructions To Prepare Your Satellite Router → This Device Has Been Added Successfully)
- 65. Easymesh With Seamless Roaming (Add A Range Extender As A Satellite Device)
- 66. Easymesh With Seamless Roaming (Plug In The Extender Next To The Main Router → Press The Wps Button On Main Router And On The Extender → Check The Mesh Device On The Routers Web Page)
- 67. Manage Devices In The Easymesh Network (To View Mesh Devices And Connected Clients In The Network → To Manage An Easymesh Device In The Network → Change Device Information)
- 68. Protect The Network From Cyber Attacks (Access Control → Ip & Mac Binding → Alg → Device Isolation)
- 69. Protect The Network From Cyber Attacks (Access Control)
- 70. Network Security (Allow Specific Device(s) → Deny List)
- 71. Network Security
- 72. Network Security (Ip & Mac Binding → Allow List → Deny List)
- 73. Network Security (Alg → Sip Alg Configuration → Nat Traversal Filters → Router Login → Default Settings → Voice And Video Applications)
- 74. Device Isolation
- 75. Nat Forwarding (Share Local Resources On The Internet By Port Forwarding → Open Ports Dynamically By Port Triggering → Make Applications Free From Port Restriction By Dmz → Make Xbox Online Games Run Smoothly By Upnp)
- 76. Nat Forwarding (Share Local Resources On The Internet By Port Forwarding → Assign A Static Ip Address To Your Pc → Visit Http://tplinkwifi.net → Go To Advanced > Nat Forwarding > Port Forwarding → Click +add)
- 77. Nat Forwarding (View Common Services → View Connected Devices → Device Ip Address → Save → Recommended To Keep The Default Settings → Verify The Port Number)
- 78. Nat Forwarding (Set Up A Dynamic Dns Service Account → Open Ports Dynamically By Port Triggering → Configure The Port Triggering Rules)
- 79. Nat Forwarding (Make Applications Free From Port Restriction By Dmz → Note: → Tips:)
- 80. Assign A Static Ip Address To Your Pc (Enable Dmz → Select Your Pc For Dmz Host Ip Address → Save Configuration → Make Xbox Online Games Run Smoothly By Upnp → Enable Upnp For Multiplayer Gaming → Upnp Default Settings And Requirements)
- 81. Nat Forwarding (Upnp)
- 82. Vpn Server (Openvpn → Pptp Vpn → L2tp/ipsec Vpn → Wireguard Vpn → Vpn Client → Use Openvpn To Access Your Home Network)
- 83. Use Openvpn To Access Your Home Network (Set Up Openvpn Server On Your Router)
- 84. Vpn Server&client (Configure Openvpn Connection On Your Remote Device → Use Pptp Vpn To Access Your Home Network → Set Up Pptp Vpn Server On Your Router)
- 85. Vpn Server&client (Enable Pptp → Dynamic Dns Service → Client Ip Address → Pptp Connection Permission → Save → Configure Pptp Vpn Connection Account)
- 86. Vpn Server&client (Configure Pptp Vpn Connection On Your Remote Device → Set Up A New Connection Or Network → Connect To A Workplace)
- 87. Vpn Server&client (Use My Internet Connection (vpn) → Enter The Internet Ip Address Of The Router)
- 88. Vpn Server&client
- 89. Usel2tp/ipsecvpntoaccessyourhomenetwork (Set Upl2tp/ipsecvpnserveronyourrouter → Configurel2tp/ipsecconnectiononremotedevices)
- 90. Vpn Server&client (Client Ip Address → Ipsec Encryption → Ipsec Pre-shared Key → Configure The L2tp/ipsec Vpn Connection Account → Username And Password → Configure L2tp/ipsec Vpn Connection On Your Remote Device)
- 91. Vpn Server&client (Set Up A New Connection Or Network → Connect To A Workplace)
- 92. Vpn Server&client (Use My Internet Connection (vpn) → Enter The Internet Ip Address Of The Router → Dont Connect Now; Just Set It Up So I Can Connect Later → Enter The User Name And Password)
- 93. Vpn Server&client
- 94. Vpn Server&client (User Name And Password Configuration)
- 95. Vpn Server&client (Security → Layer 2 Tunneling Protocol With Ipsec (l2tp/ipsec) → Advanced Settings → Use Preshared Key For Authentication → Ipsec Pre-shared Key → Connect)
- 96. Use Wireguard Vpn To Access Your Home Network (Set Up Wireguard Vpn Server On Your Router)
- 97. Vpn Server&client (Set The Tunnel Ip Address And Listen Port → Select Your Client Access Type → Advanced Settings → Create Accounts That Can Be Used By Remote Clients To Connect To The Vpn Server → Account List → Traffic Sent From The Wiregard Vpn Client To The Allowed Ips)
- 98. Vpn Server&client (Use Vpn Client To Access A Remote Vpn Server → Enable Or Disable Pre-shared Key → Visit Http://tplinkwifi.net, And Log In With Your Tp-link Id Or The Password You Set For The Router → Go To Advanced > Vpn Client → Enable Vpn Client, Then Save The Settings → Add Vpn Servers, And Enable The One You Need)
- 99. Vpn Server&client (Openvpn → Pptp)
- 100. Vpn Server&client (L2tp/ipsec Vpn → Wireguard Vpn)
- 101. Vpn Server&client (Save The Settings → Add And Manage The Devices That Will Use The Vpn Function → In The Device List Section, Click Add)
- 102. Vpn Server&client (Choose And Add The Devices That Will Access The Vpn Server You Have Configured. → Save The Settings. → Now The Devices You Specified Can Access The Vpn Server You Enabled.)
- 103. Customizeyournetworksettings (Change Theinternetsettings → Change Thelansettings → Setuplinkaggregation → Flowcontroller → Configuretosupportiptvservice → Specifydhcpserversettings)
- 104. Customizeyournetworksettings (Changetheinternetsettings)
- 105. Customizeyournetworksettings (Change Themacaddressofthe Router → Change Theinternetportnegotiationspeedsetting → Enableflowcontroller → Change Thelansettings)
- 106. Customizeyournetworksettings (Setuplinkaggregation)
- 107. Customizeyournetworksettings (Flowcontroller → Configuretosupportiptvservice)
- 108. Customize Your Network Settings (Igmp Proxy And Igmp Snooping → Wireless Multicast Forwarding → Enable Iptv/vlan → Select The Appropriate Mode → Lan Port For Iptv Connection → Click Save)
- 109. Customizeyournetworksettings (Specifydhcpserversettings → Connectthesettopbox → Configureyoursettopbox → Enabledhcpserver → Reserveipaddresses → Visithttp://tplinkwifi.net)
- 110. Customizeyournetworksettings (Setupadynamicdnsserviceaccount)
- 111. Customizeyournetworksettings
- 112. Customizeyournetworksettings (Createstaticroutes)
- 113. Customizeyournetworksettings (Change The Routers Lan Ip Addresses → Disable Router Bs Dhcp Function → Visit Http://tplinkwifi.net → Log In With Your Tp-link Id → Go To Advanced > Network > Routing → Click Add And Finish The Settings)
- 114. Customizeyournetworksettings (Networkdestination → Subnetmask → Defaultgateway → Interface → Description → Checktheroutingtable)
- 115. Customizeyournetworksettings (Advancedtrafficmonitor → Enabletrafficstatistic)
- 116. Manage The Router (Update The Firmware → Backup And Restore Configuration Settings → Change The Login Password → Password Recovery → Local Management → Remote Management)
- 117. Manage The Router (Update The Firmware → Auto Update → Online Update)
- 118. Manage The Router (Local Update → Easymesh Satellite Update)
- 119. Manage The Router (Backup And Restore Configuration Settings)
- 120. Manage The Router (Factory Default Restore → Reset The Router Except Your Login Password And Tp-link Id → Reset The Router To Factory Default Settings → Backup The Current Configuration Settings)
- 121. Manage The Router (Change The Login Password → Password Recovery)
- 122. Manage The Router (Local Management)
- 123. Manage The Router (Remote Management)
- 124. Manage The Router (Remote Management → Set Up A Dynamic Dns Service Account)
- 125. Manage The Router (System Log)
- 126. Manage The Router (Save Log → Send The System Log To A Mailbox → Visit Http://tplinkwifi.net → Log In With Your Tp-link Id → Go To Advanced > System Tools > System Log → Enter The Information Required)
- 127. Manage The Router (Test The Network Connectivity)
- 128. Manage The Router (Advanced > System > Diagnostics → Ping Or Traceroute → Ip Address Or Domain Name → Ping Count And Ping Packet Size → Traceroute Max Ttl → Start To Begin The Diagnostics)
- 129. Manage The Router (Set System Time And Language)
- 130. Manage The Router (Set Time → Get From Managing Device → Manually Set The Date And Time → Set Daylight Saving Time)
- 131. Manage The Router (Set The Router To Reboot Regularly → Select The Correct Start Date And Time → Select The Correct End Date And Time → Set System Language → Click Save → Visit Http://tplinkwifi.net And Log In)
- 132. Manage The Router (Control The Led → Reboot Time → Night Mode → Led Control → Save)
- 133. Manage The Router
- 134. Checkkeyparametersongamepanel (Gameacceleration → Gameportforwarding → Gamestatictics → Gamedetector → Gamediagnostics)
- 135. Check Key Parameters On Game Panel (Visit Http://tplinkwifi.net, And Log In With Your Tp-link Id Or The Password You Set For The Router. → Go To Game Center > Game Panel. → Click Rgb Effects To Choose A Preferred Rgb Effect. By Default, The Fire Effect Is Used.)
- 136. Game Center (Network Traffic → Performance → Connected Usb Devices → Advanced > Usb > Usb Storage Device)
- 137. Game Dashboard (Game Acceleration → Qos → Game Server Acceleration → Gear Acceleration)
- 138. Qos (Game Server Acceleration)
- 139. Game Center (Game Acceleration → Game Server Acceleration → Device Boost List → Log In To The Account Of Your Subscribed Gpn Service → Select The Device You Want To Accelerate → Click Save)
- 140. Chapter 18 (Game Center)
- 141. Game Center (Gear Acceleration → Enable Button → Device Priority → Acceleration Duration → Reduce Game Latency → Boost Game Speed)
- 142. Game Port Forwarding (Visit Http://tplinkwifi.net, And Log In With Your Tp-link Id Or The Password You Set For The Router. → Go To Game Center > Game Port Forwarding. → Click +add. → Select A Game To Create A Game Profile.)
- 143. Game Center (Game Statistics)
- 144. Game Center (Game Detector → Visit Http://tplinkwifi.net → Log In With Your Tp-link Id → Go To Game Center > Game Detector → Choose A Game To Check The Real-time Server Ping Information)
- 145. Game Center (Game Diagnostics → Test The Network Connectivity → Visit Http://tplinkwifi.net → Log In With Your Tp-link Id → Go To Game Center > Game Diagnostics → Choose Ping Or Traceroute)
- 146. Traceroute (Enter The Ip Address Or Domain Name → Modify The Ping Count And The Ping Packet Size → Modify The Traceroute Max Ttl → Click Start To Begin The Diagnostics)
- 147. Wireless Password Recovery (Web Management Password Reset → Router Reset Instructions → Logging Into The Router's Web Management Page → Ip Address Configuration → Network Settings Verification → Internet Options Configuration)
- 148. Lan Settings (Advanced → Restore Advanced Settings)
- 149. Resetting The Router To Factory Default Settings (Reconfiguring The Router → Checking Internet Status → Configuring Dns Server)
- 150. Restart The Modem And The Router (Reset The Router To Factory Default Settings And Reconfigure The Router → Upgrade The Firmware Of The Router → Check The Tcp/ip Settings On The Particular Device → Make Sure The Physical Connection Between The Router And The Modem Is Proper → Clone The Mac Address Of Your Computer)
- 151. Visit Http://tplinkwifi.net, And Log In With Your Tp-link Id Or The Password You Set For The Router.
- 152. Power Off Your Modem And Router (Confirm Your Internet Connection Type → Visit Http://tplinkwifi.net → Select Your Internet Connection Type → Click Save → Restart The Modem And The Router → Please Upgrade The Firmware Of The Router)
- 153. Make Sure The Wireless Adapter Driver Is Installed Successfully And The Wireless Adapter Is Enabled. (On Windows 7 → On Windows Xp → Check The Wlan Led Indicator On Your Wireless Router/modem. → Go To Wireless Or Advanced > Wireless > Wireless Settings → Authenticating Problem/password Mismatch)
- 154. Fcc Compliance Information Statement (Product Name: Be11000/be9300 Tri-band Wi-fi 7 Gaming Router → Model Number: Archer Ge650/ge550 → Responsible Party: Tp-link Systems Inc → This Equipment Has Been Tested And Found To Comply With The Limits For A Class B Digital Device, Pursuant To Part 15 Of The Fcc Rules. → This Device Complies With Part 15 Of The Fcc Rules. Operation Is Subject To The Following Two Conditions:)
- 155. Fcc Rf Radiation Exposure Statement (Mobile Configurations → Indoor Use Only → Prohibited Operations → Separation Distance Requirements → Compliance With Technical Standards → Unauthorized Modifications)
- 156. Eu Declaration Of Conformity (Rf Exposure Information → National Restrictions → Ukca Mark → Uk Declaration Of Conformity)
- 157. Canadian Compliance Statement (Caution → Dfs (dynamic Frequency Selection) → Operation Restrictions)
- 158. Installation And Operation Guidelines (Radiation Exposure Statement → Industry Canada Statement → Safety Consultations And Precautions)
- 159. Adapter Installation Requirements (Recommended Power Supplies → Operating Temperature Range → Electromagnetic Field Precautions → Safety Information And Usage Guidelines → Explanation Of Symbols On The Product Label)
- 160. Caution, Risk Of Electric Shock (Caution, Hot Surface → Operators Manual → Energy Efficiency Marking → Waste Electrical And Electronic Equipment (weee) → Protective Earth → Functional Earthing)
- 161. Disconnection, All Power Plugs (Switch Of Mini-gap Construction → Switch Of Micro-gap Construction (for Us Version) → Switch Of Micro-gap → Micro-disconnection Construction (for Other Versions Except Us) → Switch Without Contact Gap (semiconductor Switching Device))
×
TP-Link BE11000 Tri Band Wi-Fi 7 Gaming Router User Guide








Chapter 15
VPN Server&Client
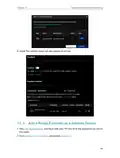
4. Select Use my Internet connection (VPN).
5. Enter the internet IP address of the router (for example: 218.18.1.73) in the Internet
address field. Click Next.
87

| General | Details |
|---|---|
| Name | TP-Link BE11000 Tri Band Wi-Fi 7 Gaming Router User Guide |
| Make | TP-Link |
| Language | English |
| Filetype | PDF (Download) |
| File size | 1.95 MB |
 (1 votes, average: 5.00 out of 5)
 Loading...
If you have any questions regarding TP-Link BE11000 Tri Band Wi-Fi 7 Gaming Router User Guide, please ask here and describe the problem in detail.

TP-Link VR300 Archer Modem Router User Guide

TP-Link T150500-2-DT WiFi Router Instruction Manual

TP-Link Archer AX55 Wi-Fi 6 Router Installation Guide

TP-Link Omada ER8411 VPN Router Instructions

TP-Link Configure VDSL Router User Guide

TP-Link Archer BE805 BE19000 Tri-Band Wi-Fi 7 Router User Manual

TP-Link VR600 Wireless DSL Modem Router Installation Guide

TP-Link AX58 Dual Band Gigabit Wi-Fi 6 Router Installation Guide

TP-Link AC750 Wireless Dual Band Router Owner’s Manual

TP-Link AX6000 8-Stream Wi-Fi 6 Router Installation Guide


D-Link DIR-X1860 AX1800 Wifi 6 Router Installation Guide

Cudy WR3000E AX3000 Gigabit Mesh Wi-Fi 6 Router Owner’s Manual

ASUS RT-AX82U V2 AX5400 Dual Band WiFi Router User Guide

D-Link G530 5G Router Instructions

Mercury Netgear D7000 Fibre Modem Router User Guide

verizon CR1000 Router Instructions

Cudy WR3000H 2.5G Mesh WiFi 6 Router Installation Guide

NETGEAR MR7500 M7 Ultra Mobile Router Owner’s Manual

WATER WORLD AC1200M Wireless Dual Frequency Router User Guide

SKYWORTH GN630 GPON ONT Wi-Fi Router Installation Guide
Table of Contents
- 1. The Provided Html Code Does Not Contain Any Subheadings Or R... →
- 2. About This Guide - Connect The Hardware →
- 3. Use Of Wi-fi 7 (802.11be), Wi-fi 6 (802.11ax), And Features ... →
- 4. Get To Know About Your Router - Product Overview →
- 5. Get To Know About Your Router - Wps/wi-fi Button →
- 6. Get To Know About Your Router - Led Status →
- 7. Connect The Hardware - Positionyourrouter →
- 8. Connect The Hardware - Position Your Router →
- 9. Connect The Hardware - Computer →
- 10. Log In To Your Router →
- 11. Log In To Your Router - Set Up The Tcp/ip Protocol →
- 12. Set Up Internet Connection - Use Quick Setup Wizard →
- 13. Set Up Internet Connection - Use Quick Setup Wizard →
- 14. Set Up Internet Connection - Manually Set Up Your Internet C... →
- 15. Set Up Internet Connection - Pppoe →
- 16. Set Up Internet Connection - Set Up The Router As An Access ... →
- 17. Set Up Internet Connection - Set Up An Ipv6 Internet Connect... →
- 18. Set Up Internet Connection - Dynamic Ip(slaac/dhcpv6) →
- 19. Set Up Internet Connection - Manually Set Up Your Internet C... →
- 20. Set Up Internet Connection - Set Up Ipv6 Firewall Rules →
- 21. Set Up Internet Connection - Service Type →
- 22. Register A Tp-link Id - Change Your Tp-link Id Information →
- 23. Register A Tp-link Id - Change Your Tp-link Id Information →
- 24. Tp-link Cloud Service - To Change Your Email Address →
- 25. Manage The User Tp-link Ids - Add Tp-link Id To Manage The R... →
- 26. Removetp-linkid(s)frommanagingtherouter - Managetheroutervia... →
- 27. Registeratp-linkid →
- 28. Network Map →
- 29. Network Map - Visit Http://tplinkwifi.net, And Log In With Y... →
- 30. Network Map - Mesh Devices →
- 31. Network Map - Speed Limit →
- 32. Wireless Settings - Specify Wireless Settings →
- 33. Wireless Settings - Specify Wireless Settings →
- 34. Wireless Settings - Enable Or Disable Twt →
- 35. Wireless Settings - Hide Ssid →
- 36. Wireless Settings - Use Wps For Wireless Connection →
- 37. Wireless Settings - Connect Via The Routers Pin →
- 38. Wireless Settings - Advanced Wireless Settings →
- 39. Wireless Settings - Airtime Fairness →
- 40. Create A Network For Guests - Customize Guest Network Option... →
- 41. Create A Network For Guests - Enable Bandwidth Control →
- 42. Guest Network - Customize Guest Network Options →
- 43. Iot Network →
- 44. Iot Network - Create An Iot Network →
- 45. Access The Usb Storage Device - Media Sharing →
- 46. Usb Settings - Access The Usb Storage Device →
- 47. Usb Settings - To Set Up Authentication For Data Security →
- 48. Usb Settings - Configure Remote Access Settings →
- 49. Usb Settings - Customize The Access Settings →
- 50. Usb Settings - Toonlysharespecificc... →
- 51. Usb Settings - Media Sharing →
- 52. Usb Settings - Time Machine →
- 53. Usb Settings - Time Machine →
- 54. Homeshield - Network Check →
- 55. Network Check →
- 56. Homeshield - Parental Controls →
- 57. Homeshield - Content Filter →
- 58. Homeshield - Qos →
- 59. Visithttp://tplinkwifi.net,andloginwithyourtp-linkidorthepas... →
- 60. Page 60 →
- 61. Add A Router As A Satellite Device - Add A Range Extender As... →
- 62. Add A Router As A Satellite Device - Via An Ethernet Cable →
- 63. Easymesh With Seamless Roaming - Add Satellite Devices →
- 64. Easymesh With Seamless Roaming - Add Satellite Devices →
- 65. Easymesh With Seamless Roaming - Add A Range Extender As A S... →
- 66. Easymesh With Seamless Roaming - Plug In The Extender Next T... →
- 67. Manage Devices In The Easymesh Network - To View Mesh Device... →
- 68. Protect The Network From Cyber Attacks - Access Control →
- 69. Protect The Network From Cyber Attacks - Access Control →
- 70. Network Security - Allow Specific Device(s) →
- 71. Network Security →
- 72. Network Security - Ip & Mac Binding →
- 73. Network Security - Alg →
- 74. Device Isolation →
- 75. Nat Forwarding - Share Local Resources On The Internet By Po... →
- 76. Nat Forwarding - Share Local Resources On The Internet By Po... →
- 77. Nat Forwarding - View Common Services →
- 78. Nat Forwarding - Set Up A Dynamic Dns Service Account →
- 79. Nat Forwarding - Make Applications Free From Port Restrictio... →
- 80. Assign A Static Ip Address To Your Pc - Enable Dmz →
- 81. Nat Forwarding - Upnp →
- 82. Vpn Server - Openvpn →
- 83. Use Openvpn To Access Your Home Network - Set Up Openvpn Ser... →
- 84. Vpn Server&client - Configure Openvpn Connection On Your Rem... →
- 85. Vpn Server&client - Enable Pptp →
- 86. Vpn Server&client - Configure Pptp Vpn Connection On Your Re... →
- 87. Vpn Server&client - Use My Internet Connection (vpn) →
- 88. Vpn Server&client →
- 89. Usel2tp/ipsecvpntoaccessyourhomenetwork - Set Upl2tp/ipsecvp... →
- 90. Vpn Server&client - Client Ip Address →
- 91. Vpn Server&client - Set Up A New Connection Or Network →
- 92. Vpn Server&client - Use My Internet Connection (vpn) →
- 93. Vpn Server&client →
- 94. Vpn Server&client - User Name And Password Configuration →
- 95. Vpn Server&client - Security →
- 96. Use Wireguard Vpn To Access Your Home Network - Set Up Wireg... →
- 97. Vpn Server&client - Set The Tunnel Ip Address And Listen Por... →
- 98. Vpn Server&client - Use Vpn Client To Access A Remote Vpn Se... →
- 99. Vpn Server&client - Openvpn →
- 100. Vpn Server&client - L2tp/ipsec Vpn →
- 101. Vpn Server&client - Save The Settings →
- 102. Vpn Server&client - Choose And Add The Devices That Will Acc... →
- 103. Customizeyournetwork... - Change Theinternetsettings →
- 104. Customizeyournetwork... - Changetheinternetset... →
- 105. Customizeyournetworksettings - Change Themacaddressofthe Rou... →
- 106. Customizeyournetwork... - Setuplinkaggregation →
- 107. Customizeyournetwork... - Flowcontroller →
- 108. Customize Your Network Settings - Igmp Proxy And Igmp Snoopi... →
- 109. Customizeyournetwork... - Specifydhcpserverset... →
- 110. Customizeyournetworksettings - Setupadynamicdnsserviceaccoun... →
- 111. Customizeyournetwork... →
- 112. Customizeyournetwork... - Createstaticroutes →
- 113. Customizeyournetworksettings - Change The Routers Lan Ip Add... →
- 114. Customizeyournetwork... - Networkdestination →
- 115. Customizeyournetwork... - Advancedtrafficmonit... →
- 116. Manage The Router - Update The Firmware →
- 117. Manage The Router - Update The Firmware →
- 118. Manage The Router - Local Update →
- 119. Manage The Router - Backup And Restore Configuration Setting... →
- 120. Manage The Router - Factory Default Restore →
- 121. Manage The Router - Change The Login Password →
- 122. Manage The Router - Local Management →
- 123. Manage The Router - Remote Management →
- 124. Manage The Router - Remote Management →
- 125. Manage The Router - System Log →
- 126. Manage The Router - Save Log →
- 127. Manage The Router - Test The Network Connectivity →
- 128. Manage The Router - Advanced > System > Diagnostics →
- 129. Manage The Router - Set System Time And Language →
- 130. Manage The Router - Set Time →
- 131. Manage The Router - Set The Router To Reboot Regularly →
- 132. Manage The Router - Control The Led →
- 133. Manage The Router →
- 134. Checkkeyparameterson... - Gameacceleration →
- 135. Check Key Parameters On Game Panel - Visit Http://tplinkwifi... →
- 136. Game Center - Network Traffic →
- 137. Game Dashboard - Game Acceleration →
- 138. Qos - Game Server Acceleration →
- 139. Game Center - Game Acceleration →
- 140. Chapter 18 - Game Center →
- 141. Game Center - Gear Acceleration →
- 142. Game Port Forwarding - Visit Http://tplinkwifi.net, And Log ... →
- 143. Game Center - Game Statistics →
- 144. Game Center - Game Detector →
- 145. Game Center - Game Diagnostics →
- 146. Traceroute - Enter The Ip Address Or Domain Name →
- 147. Wireless Password Recovery - Web Management Password Reset →
- 148. Lan Settings - Advanced →
- 149. Resetting The Router To Factory Default Settings - Reconfigu... →
- 150. Restart The Modem And The Router - Reset The Router To Facto... →
- 151. Visit Http://tplinkwifi.net, And Log In With Your Tp-link Id... →
- 152. Power Off Your Modem And Router - Confirm Your Internet Conn... →
- 153. Make Sure The Wireless Adapter Driver Is Installed Successfu... →
- 154. Fcc Compliance Information Statement - Product Name: Be11000... →
- 155. Fcc Rf Radiation Exposure Statement - Mobile Configurations →
- 156. Eu Declaration Of Conformity - Rf Exposure Information →
- 157. Canadian Compliance Statement - Caution →
- 158. Installation And Operation Guidelines - Radiation Exposure S... →
- 159. Adapter Installation Requirements - Recommended Power Suppli... →
- 160. Caution, Risk Of Electric Shock - Caution, Hot Surface →
- 161. Disconnection, All Power Plugs - Switch Of Mini-gap Construc... →