
Home > Connect Tech Inc > Connect Tech Inc Xtreme 10G Managed Ethernet Switch Router User Guide
Connect Tech Inc Xtreme 10G Managed Ethernet Switch Router User Guide






Xtreme/10G Managed Ethernet Switch/Router
Users Guide
Switch Details
DIP Switch Details (S1)
Ensure – S1 Lower Switch Position is set to “RUN” at all times.
Moving the switch to “RESET” will hold the entire device in RESET and will prevent the board from booting.
Typical Installation
1. Install XHG201 heatplate to XDG201 module.
2. Prepare breakout/carrier board with 4 x M3 8mm standoffs.
3. Ensure breakout/carrier board will be supplying module with +12V DC.
4. Mate board-to-board connector from XDG201 module to that of the breakout/carrier board.
5. Turn power ON to breakout/carrier board, XDG201 will now boot up.
On-Board Indicator LED’s
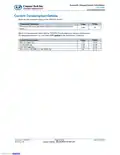
The XDG201 has 2 on-board indicator LEDs.
LED Designator
PWR
Description
Power Good Indicator
-
If this LED is ON, this indicates that all on-board
power supplies are ON and at the proper level.
System Status Indicator
Status
-
Function TBD
Document: CTIM-00472
Revision: 0.08
Page 14 of 24
Connect Tech Inc. 800-426-8979 | 519-836-1291
Date: 2019/07/09
Downloaded from Arrow.com.

| General | Details |
|---|---|
| Name | Connect Tech Inc Xtreme 10G Managed Ethernet Switch Router User Guide |
| Make | Connect Tech Inc |
| Language | English |
| Filetype | PDF (Download) |
| File size | 0.73 MB |
 (1 votes, average: 5.00 out of 5)
 Loading...
If you have any questions regarding Connect Tech Inc Xtreme 10G Managed Ethernet Switch Router User Guide, please ask here and describe the problem in detail.


TP-Link WR3002X WiFi 6 Portable Router Installation Guide

BT Smart Hub 3 Broadband Router User Guide

Pix-Link AX02 Wi-Fi 6 Router Installation Guide

APRISM MI12 Wi-Fi 6 Dual Radio Router User Guide

ASUS BE6800 Dual Band WiFi Router User Guide

HOLZMANN MASCHINEN OBF1200_230V Hand Held Devices Router User Manual

Cudy LT500-OUTDOOR Outdoor 4G Cat 4 AC1200 Wi-Fi Router Installation Guide

NETGEAR R7450 WiFi Router User Guide

Ruijie RG-EW3000GX Reyee Wi-Fi Router Installation Guide

Askey EAI2326 Enterprise Wi-Fi 6 Router User Guide