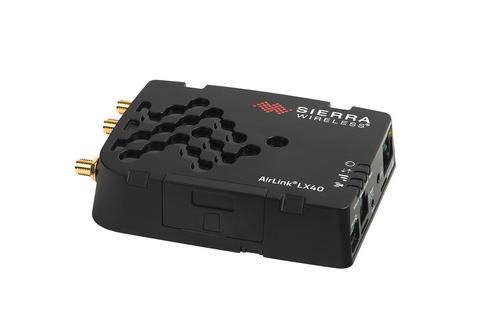
Home > SIERRA WIRELESS > SIERRA WIRELESS AirLink LX40 Enterprise LTE Router User Guide
×
- 1. Airlink Lx40 (Hardware User Guide → Installation → Setup → Configuration → Troubleshooting → Maintenance → Safety Information)
- 2. Important (Safety And Hazards → Warning: Explosion Hazarddo Not Disconnect While Circuit Is Live Unless The Area Is Known To Be Non-hazardous. → Warning: Do Not Use The Usb Connector In A Hazardous Area. → Warning: Do Not Use The Reset Button In A Hazardous Area. → This Device Is Suitable For Use In Class 1 Div 2 Groups A, B, C, And D T4 Locations. → Ambient Temperatures Of -30c To +60c. Ul Listed For Use In Ambient Temperatures Not Exceeding 60c.)
- 3. Installation Requirements (Device Enclosure Specifications → Safety Warnings → Liability Disclaimer → Patents And Licensing Information → Copyright And Trademarks)
- 4. Installation (Setup → Configuration → Contact Information → Sales Information → Technical Support → Warranty And Returns)
- 5. Installation And Startup (Tools And Materials Required → Installation Overview → Step 1insert The Sim Card → Step 2mount And Ground The Lx40 Chassis → Step 3connect The Antennas → Step 8configure The Software)
- 6. Recovery Mode (Specifications → Certification And Interoperability → Included Radio Module Firmware → Network Technology → Host Interfaces → Power Specifications)
- 7. Ac Power Adapter Input (Ac Power Adapter Output → Ac Power Adapter Environmental Specifications → Ac Power Adapter Reliability And Quality Control → Ac Power Adapter Safety Standards → Ac Power Adapter Emc Standards → Ac Power Adapter Hazardous Substances)
- 8. Introduction To The Lx40 (Key Features → Aleos Software Configuration User Guide For Airlink Lx40)
- 9. Introduction To The Lx40 (Cellular Antenna Connector → Wi-fi Antenna Connector → Diversity Antenna Connector → Rj-45 Ethernet Port → Power Connector → Usb 2.0 Micro-ab Port)
- 10. Power Consumption Scenarios (Inrush Current → Accessories)
- 11. Introduction To The Lx40 (Warranty)
- 12. Installation And Startup (Tools And Materials Required → Installation Overview → Insert The Sim Card → Mount And Ground The Lx40 Chassis → Connect The Antennas → Configure The Software)
- 13. Installation And Startup (Reset The Lx40 To Factory Default Settings → Step 1insert The Sim Card)
- 14. Step 2mount And Ground The Lx40 Chassis (Grounding The Lx40)
- 15. Installation And Startup (Grounding Point → Flat Mount → Din Rail Mount → Mounting Bracket → Mounting Surface)
- 16. Airlink Lx40 Series Hardware User Guide (Mounting In A High Vibration Environment)
- 17. Installation And Startup (Din Rail Mount)
- 18. Step 3connect The Antennas (Wi-fi Channels Supported → Maximum Antenna Gain → Rf Exposure)
- 19. Installation And Startup (Recommended Antenna Separation → Step 4connect The Data Cables → Step 5connect The Power)
- 20. Power Over Ethernet (Electrical Installations → Operating Voltage → Cable Strain Relief → Fusing)
- 21. Installation And Startup (Power Connector On The Lx40 → On/off (ignition) Control → Gpio → For I/o Information → Note: If You Want To Turn The Lx40 On/off Using A Control Line → Note: When The Lx40 Is Using Poe, On/off Control Is Ignored)
- 22. Wiring Diagrams (Basic Installation With Dc Power → Basic Installation With I/o Input Triggered By Standby Mode → Step 2mount And Ground The Lx40 Chassis)
- 23. Installation And Startup (Pin 1 (power) → Pin 2 (ground) → Pin 3 (on/off Control) → Pin 4 (gpio) → Step 2mount And Ground The Lx40 Chassis → Step 6i/o Configuration)
- 24. Step 6i/o Configuration (Power Connector → I/o Pin-out For The Lx40 Power Connector → Pulse Counter → Digital Input → High Side Pull-up/dry Contact Switch Input → Analog Input)
- 25. Installation And Startup (Pulse Counter → Digital Pulse Generator → Protection Circuitry)
- 26. Digital Input (Protection → Circuitry)
- 27. Installation And Startup (High Side Pull-up / Dry Contact Switch Input → Analog Input)
- 28. Analog Input (Analog Input Range → Analog Input Accuracy → Data Sampling → Updates Ui → Events Reporting → Microprocessor)
- 29. Installation And Startup (Low Side Current Sink Output → Protection Circuitry → External Solenoid/relay Circuit → Internal Pull-up Resistor → Pin 4 (power Connector) → I Sink = 500 Ma (typ)*)
- 30. Step 7check The Router Operation (Step 5connect The Power)
- 31. Installation And Startup (Led Behavior → Power Management → Recovery Mode)
- 32. Led Behavior (Network → Ethernet Leds)
- 33. Installation And Startup (Step 8configure The Software → Configuring With Acemanager → Configuring With Airlink Management Service)
- 34. Configuring With Amm (Configuring With At Commands → Reboot The Lx40 → Reset The Lx40 To Factory Default Settings)
- 35. Installation And Startup (Recovery Mode)
- 36. Recovery Mode (Aleos Software Configuration User Guide)
- 37. Specifications (Certification And Interoperability → Emissions / Immunity → Safety → Environmental Compliance → Gsm/hspa+ Certifications → Included Radio Module Firmware)
- 38. Lx40 Lte Australia/nz (wp7609) (Lx40 Lte-m/nb-iot (wp7702) → Network Technology → Reliability)
- 39. Specifications (Environmental Testing → Test Method → Mechanical Shock → Temperature → Humidity → Electrostatic Discharge)
- 40. Host Interfaces (Antenna → Usb → Ethernet → Sim Card Interface → Mechanical Specifications)
- 41. Specifications (Screw Torque Settings → Operating Voltage → Power Specifications → Dc Power Supply Specifications → On/off Control Specifications → Protocols)
- 42. Wi-fi Performance (Technology Frequency → Wi-fi Channels Supported)
- 43. Specifications (Wi-fi Antenna Gain)
- 44. Radio Frequency Bands (Radio Technology → Module Firmware → Frequencies)
- 45. Specifications (Radio Module Firmware → Band → Frequencies → Technology)
- 46. Airlink Lx40 Series Hardware User Guide (Lx40 Radio Module Wp7609 Australia And New Zealand → Module Firmware → Installation → Configuration → Setup → Warnings)
- 47. Specifications (Radio → Technology → Module Firmware → Band → Generic → Frequencies → Lte)
- 48. Lx40 Radio Module Wp7702 Worldwide (Radio Technology → Module Firmware → Generic Frequencies → Lte)
- 49. Specifications (Radio Technology → Module Firmware → Generic Frequencies)
- 50. Radio Module Conducted Transmit Power
- 51. Specifications (Radio Module Wp7609 Conducted Transmit Power → Radio Module Wp7610 Conducted Transmit Power → Radio Module Wp7702 Conducted Transmit Power)
- 52. Airlink Lx40 Series Hardware User Guide (Mechanical Specifications → Front View → Top View)
- 53. Regulatory Information (Important Information For North American Users → Warning: Changes Or Modifications To This Device Not Expressly Approved By Sierra Wireless Could Void The User's Authority To Operate This Equipment.)
- 54. Rf Exposure (Maximum Antenna Gain)
- 55. Regulatory Information (Wp7607/7609 Maximum Antenna Gain → Wp7702 Antenna Gain Specifications → Wp76xx/wp7702 Collocated Radio Transmitter Specifications)
- 56. Airlink Lx40 Series Hardware User Guide (Weee Notice)
- 57. A: Accessories (Dc Power Cable (black Connector) → Dc Cable Specifications → Power Connector Housing → Warning Label)
- 58. Ac Power Adapter (black Connector) (Ac Power Adapter Input → Ac Power Adapter Output)
- 59. Ac Power Adapter Environmental Specifications (Ac Power Adapter Reliability And Quality Control → Ac Power Adapter Mtbf → Ac Power Adapter Safety Standards → Ac Power Adapter Emc Standards)
- 60. Ac Power Adapter Hazardous Substances (Eu Directive 2011/65/eu 'rohs' → Eu Directive 2012/19/eu 'weee' → Reach → Ac Power Adapter Energy Efficiency)
- 61. Antenna Installation (Tools And Materials Required → Connecting Data Cables → Connecting Power Cable → Configuring The Router → Grounding The Chassis → Mobile Network Operator)
- 62. Reset To Factory Default Settings (Software, Configure → Tools Required For Install → Wi-fi Performance → Wiring Diagrams → Specifications → Regulatory)
×
SIERRA WIRELESS AirLink LX40 Enterprise LTE Router User Guide
Installation and Startup
DIN Rail Mount
You can mount the LX40 on a DIN rail in a vertical orientation, with the antenna
connectors pointing up or down.
Note: The DIN rail mounting clip should only be used on a horizontally-mounted DIN rail.
Ensure spring clip
is at the bottom
To mount the LX40 with antenna
connectors pointing down, rotate the
DIN clip 180 degrees before attaching.
Figure 2-6: Attaching the DIN Rail Mounting Clip
To attach the LX40 to a horizontally mounted DIN rail:
Note: Before installing the LX40 in its final location, you may want to install the SIM card (see
page 13), attach antennas (see page 18), power up the device (see page 19) and test the network
connectivity (see page 30). After a successful test, you can remove cables and antennas and
proceed with the procedure below.
1. Secure the LX40 in the mounting bracket, as described on page 15.
2. Use the screws provided to attach the DIN clip to the bracket. Attach the clip in the
direction to achieve the desired position for the LX40. In the final orientation, the
spring clip should be at the bottom. Torque the screws to a maximum of 1.1 N-m (10
in-lb.).
3. Attach the DIN rail clip to a horizontal DIN rail, with the spring clip at the bottom.
Rev. 4 January 2022
17
41112510
| General | Details |
|---|---|
| Name | SIERRA WIRELESS AirLink LX40 Enterprise LTE Router User Guide |
| Make | SIERRA WIRELESS |
| Language | English |
| Filetype | PDF (Download) |
| File size | 0.96 MB |
If you have any questions regarding SIERRA WIRELESS AirLink LX40 Enterprise LTE Router User Guide, please ask here and describe the problem in detail.

SIERRA WIRELESS XR80 5G Cellular Router Instructions


NETGEAR RS100 Nighthawk Dual Band WiFi 7 Router User Guide

WaterWorld AX3000 Wireless Dual Band Gigabit Router User Manual

UBIQUITI U-LTE-Backup Pro LTE Router Installation Guide

ioGiant AX1800 Wi-Fi Router Wireless Router Installation Guide

Roam-ON R10 MiFi 4G LTE WiFi Mobile Hotspot Router User Manual

MEIG SRT838iPro 5G CPE WiFi Router User Manual

TANGERINE NetComm CF40 Wi-Fi 6 Router User Guide

Cisco RV320 Small Gigabit Dual WAN VPN Router User Manual

NETGEAR MR7500 M7 Ultra Mobile Router Owner’s Manual

Synology RT6600AX Tri-Band Mesh 11ax Router Installation Guide
Table of Contents
- 1. Airlink Lx40 - Hardware User Guide →
- 2. Important - Safety And Hazards →
- 3. Installation Requirements - Device Enclosure Specifications →
- 4. Installation - Setup →
- 5. Installation And Startup - Tools And Materials Required →
- 6. Recovery Mode - Specifications →
- 7. Ac Power Adapter Input - Ac Power Adapter Output →
- 8. Introduction To The Lx40 - Key Features →
- 9. Introduction To The Lx40 - Cellular Antenna Connector →
- 10. Power Consumption Scenarios - Inrush Current →
- 11. Introduction To The Lx40 - Warranty →
- 12. Installation And Startup - Tools And Materials Required →
- 13. Installation And Startup - Reset The Lx40 To Factory Default... →
- 14. Step 2mount And Ground The Lx40 Chassis - Grounding The Lx40 →
- 15. Installation And Startup - Grounding Point →
- 16. Airlink Lx40 Series Hardware User Guide - Mounting In A High... →
- 17. Installation And Startup - Din Rail Mount →
- 18. Step 3connect The Antennas - Wi-fi Channels Supported →
- 19. Installation And Startup - Recommended Antenna Separation →
- 20. Power Over Ethernet - Electrical Installations →
- 21. Installation And Startup - Power Connector On The Lx40 →
- 22. Wiring Diagrams - Basic Installation With Dc Power →
- 23. Installation And Startup - Pin 1 (power) →
- 24. Step 6i/o Configuration - Power Connector →
- 25. Installation And Startup - Pulse Counter →
- 26. Digital Input - Protection →
- 27. Installation And Startup - High Side Pull-up / Dry Contact S... →
- 28. Analog Input - Analog Input Range →
- 29. Installation And Startup - Low Side Current Sink Output →
- 30. Step 7check The Router Operation - Step 5connect The Power →
- 31. Installation And Startup - Led Behavior →
- 32. Led Behavior - Network →
- 33. Installation And Startup - Step 8configure The Software →
- 34. Configuring With Amm - Configuring With At Commands →
- 35. Installation And Startup - Recovery Mode →
- 36. Recovery Mode - Aleos Software Configuration User Guide →
- 37. Specifications - Certification And Interoperability →
- 38. Lx40 Lte Australia/nz (wp7609) - Lx40 Lte-m/nb-iot (wp7702) →
- 39. Specifications - Environmental Testing →
- 40. Host Interfaces - Antenna →
- 41. Specifications - Screw Torque Settings →
- 42. Wi-fi Performance - Technology Frequency →
- 43. Specifications - Wi-fi Antenna Gain →
- 44. Radio Frequency Bands - Radio Technology →
- 45. Specifications - Radio Module Firmware →
- 46. Airlink Lx40 Series Hardware User Guide - Lx40 Radio Module ... →
- 47. Specifications - Radio →
- 48. Lx40 Radio Module Wp7702 Worldwide - Radio Technology →
- 49. Specifications - Radio Technology →
- 50. Radio Module Conducted Transmit Power →
- 51. Specifications - Radio Module Wp7609 Conducted Transmit Powe... →
- 52. Airlink Lx40 Series Hardware User Guide - Mechanical Specifi... →
- 53. Regulatory Information - Important Information For North Ame... →
- 54. Rf Exposure - Maximum Antenna Gain →
- 55. Regulatory Information - Wp7607/7609 Maximum Antenna Gain →
- 56. Airlink Lx40 Series Hardware User Guide - Weee Notice →
- 57. A: Accessories - Dc Power Cable (black Connector) →
- 58. Ac Power Adapter (black Connector) - Ac Power Adapter Input →
- 59. Ac Power Adapter Environmental Specifications - Ac Power Ada... →
- 60. Ac Power Adapter Hazardous Substances - Eu Directive 2011/65... →
- 61. Antenna Installation - Tools And Materials Required →
- 62. Reset To Factory Default Settings - Software, Configure →


