
×
- 1. The Html Code Provided Does Not Contain Any Subheadings Or Relevant Content Related To Installation/setup/configuration. Therefore, I Will T… (User Guide Ac1900 Mu-mimo Wi-fi Router Archer Ac1900 2023 Tp-link 1910013403 Rev1.6.0)
- 2. About This Guide (Connect The Hardware → Log In To Your Router → Set Up Internet Connection → Tp-link Cloud Service → Onemesh With Seamless Roaming → Guest Network)
- 3. The Html Code Does Not Contain Any Relevant Subheadings Related To Installation/setup/configuration. Therefore, I Will Take The First Senten… (Specifications Can Be Found On The Product Page At Https://www.tp-link.com.)
- 4. Get To Know About Your Router (Product Overview → Appearance)
- 5. Product Overview (Appearance → Top Panel)
- 6. Get To Know About Your Router (Led Explanation → Router Mode → Access Point Mode)
- 7. Get To Know About Your Router (Button And Port Explanation → Power On/off Button → Wan Port → Lan Ports (1/2/3/4) → Wps/wi-fi Button → Reset Button)
- 8. Connect The Hardware (Positionyourrouter → Connectyourrouter)
- 9. Connect The Hardware (Position Your Router → Connect Your Router)
- 10. Connect The Hardware (Set Up The Router As An Access Point → Verify Led Indicators → Connect Your Computer To The Router → Method 1: Wired)
- 11. Connect The Hardware (Ethernet Cable → Wps → Wi-fi → Method 2: Wirelessly → Method 3: Use The Wps Button)
- 12. Connect The Hardware (Wlan → Tp-link → Myhome → Homenetwork → Tp-link_router → Wps/wi-fi)
- 13. Log In To Your Router
- 14. Log In To Your Router (Set Up The Tcp/ip Protocol → Visit Http://tplinkwifi.net → Create A Login Password For Secure Management → Refer To The Faq Section → Tp-link Id And Cloud Router Login)
- 15. Set Up Internet Connection (Use Quick Setup Wizard → Quick Setup Via Tp-link Tether App → Manually Set Up Your Internet Connection → Set Up The Router As An Access Point → Set Up An Ipv6 Internet Connection)
- 16. Set Up Internet Connection (Use Quick Setup Wizard → Set Up An Ipv6 Internet Connection → Tp-link Cloud Service)
- 17. Set Up Internet Connection (Quick Setup Via Tp-link Tether App → Manually Set Up Your Internet Connection)
- 18. Set Up Internet Connection (Static Ip → Pppoe)
- 19. Set Up Internet Connection (Secondary Connection → Dynamic Ip → Pppoe → Advanced → Faq)
- 20. Set Up Internet Connection (Set Up The Router As An Access Point → Set Up An Ipv6 Internet Connection)
- 21. Set Up Internet Connection (Pass-through (bridge) → Router)
- 22. Set Up Internet Connection (Mac Clone → Lan Settings → Check Ipv6 Connection)
- 23. Register A Tp-link Id (Change Your Tp-link Id Information → Manage The User Tp-link Ids → Manage The Router Via The Tp-link Tether App)
- 24. Register A Tp-link Id (Change Your Tp-link Id Information)
- 25. Tp-link Cloud Service (Manage The User Tp-link Ids)
- 26. Addtp-linkidtomanagetherouter (Removetp-linkid(s)frommanagingtherouter → Manage The Router Via The Tp-link Tether App)
- 27. Manage The Router Via The Tp-link Tether App (Launch The Apple App Store Or Google Play Store → Connect Your Device To The Routers Wireless Network → Log In With Your Tp-link Id → Register A Tp-link Id → Access The Internet With Cellular Data Or A Wi-fi Network)
- 28. Set Up A Onemesh Network (Manage Devices In The Onemesh Network)
- 29. Onemesh With Seamless Roaming (Same Network Name & Password → Internet For Seamless Roaming → Unified Wi-fi Network → Seamless Roaming → Easy Setup And Management → Set Up A Onemesh Network)
- 30. Onemesh With Seamless Roaming (Connect A Onemesh Extender To This Router → Check Full List Of Tp-link Onemesh Devices → Set Up The Extender To Join The Onemesh Network → Find It In The Available Onemesh Devices List → Add It To The Onemesh Network → Router And Extender Successfully Form A Onemesh Network)
- 31. Onemesh With Seamless Roaming (Manage Devices In The Onemesh Network)
- 32. Onemesh With Seamless Roaming (Manage The Onemesh Device As Needed → Change Device Information → Click Manage Device To Redirect To The Web Management Page Of This Device → Click Leave Onemesh To Delete This Device From The Onemesh Network)
- 33. Guest Network (Create A Network For Guests → Customize Guest Network Options)
- 34. Create A Network For Guests (Enable Guest Network → Customize The Ssid → Select Security Type → Click Save → Share Network → View Guest Network Information)
- 35. Guest Network (Customize Guest Network Options → Allow Guests To See Each Other → Allow Guests To Access Your Local Network)
- 36. Parental Controls
- 37. Parental Controls (Setting Up Access Restrictions → Customize The Blocked Content)
- 38. Parental Controls (Set Time Restrictions On Internet Access)
- 39. Parental Controls (Enable Bed Time → Configure The Times → Click Save → The Amount Of Time Your Child Spends Online Is Controlled → Inappropriate Content Is Blocked → Devices Under This Profile Will Be Unable To Access The Internet)
- 40. Qos
- 41. Enableqosandsetbandwidthallocation (Go Toadvanced>qos>globalsettings → Ticktoenableqos → Inputthemaximumuploadanddownloadbandwidth → In Thedeviceprioritysection → Clicksave → Done!)
- 42. Protect The Network From Cyber Attacks (Access Control → Ip & Mac Binding → Alg (application Layer Gateway))
- 43. Protect The Network From Cyber Attacks (Access Control)
- 44. Network Security (Allow Specific Device(s) → Add Connected Devices)
- 45. Network Security (Add Unconnected Devices → Ip & Mac Binding)
- 46. Network Security (Ip & Mac Binding → Enable Ip & Mac Binding → Bind Your Device(s) → Arp List → Add A Binding Entry)
- 47. Network Security (Alg (application Layer Gateway) → View Connected Devices → Bind Device By Mac Address And Ip Address → Add Device → Keep Alg Settings As Default → Log In To Tp-link Router)
- 48. Share Local Resources On The Internet By Port Forwarding (Open Ports Dynamically By Port Triggering → Make Xbox Online Games Run Smoothly By Upnp → Make Applications Free From Port Restriction By Dmz)
- 49. Nat Forwarding (Share Local Resources On The Internet By Port Forwarding → Assign A Static Ip Address To Your Pc → Visit Http://tplinkwifi.net → Go To Advanced > Nat Forwarding > Port Forwarding)
- 50. Nat Forwarding (View Common Services → View Connected Devices → Save → Tips)
- 51. Nat Forwarding (Open Ports Dynamically By Port Triggering → Make Applications Free From Port Restriction By Dmz)
- 52. Natforwarding (Upnp → Makexboxonlinegamesrunsmoothlybyupnp → Save → Externalport → Existingapplications → Porttriggeringrules)
- 53. Nat Forwarding (Make Applications Free From Port Restriction By Dmz → Assign A Static Ip Address To Your Pc)
- 54. Nat Forwarding (Enable Dmz → Dmz Host Ip Address → Save → Configuration Completed)
- 55. Customize Your Network Settings (Change The Lan Settings → Configure To Support Iptv Service → Check Multicast Settings → Specify Dhcp Server Settings → Set Up A Dynamic Dns Service Account → Specify Wireless Settings)
- 56. Change The Lan Settings (Configure To Support Iptv Service)
- 57. Customizeyournetworksettings (Enableiptv/vlan → Selecttheappropriatemode → Clicksave → Connecttheset-topboxtothecorrespondinglanport → Youriptvsetupisdonenow)
- 58. Customizeyournetworksettings (Specifydhcpserversettings → Visithttp://tplinkwifi.net → Go Toadvanced>network>dhcpserver → Enablecheckbox → Ipaddresspool → Addressreservation)
- 59. Customizeyournetworksettings (Setupadynamicdnsserviceaccount)
- 60. Customizeyournetworksettings (Createstaticroutes)
- 61. Customizeyournetworksettings (Changetherouterslanipaddresses → Visithttp://tplinkwifi.net → Gotoadvancednetworkrouting → Clickaddandfinishthesettings)
- 62. Customizeyournetworksettings (Subnetmask → Defaultgateway → Interface → Description → Specifywirelesssettings)
- 63. Customizeyournetworksettings (Changewirelessnetworknameandpassword → Hidessid → Usesmartconnectfunction → Changesecurityoption → Transmitpower → Channelwidth)
- 64. Customizeyournetworksettings (Scheduleyourwirelessfunction → Channel → Mode → Enablemu-mimo)
- 65. Customizeyournetworksettings (Usewpsforwirelessconnection → Connectviatheclientspin → Connectviatherouterspin)
- 66. Customizeyournetworksettings (Pushthewpsbutton → Advancedwirelesssettings)
- 67. Customizeyournetworksettings (Wmm → Shortgi → Apisolation → Airtimefairness → Beaconinterval → Rtsthreshold)
- 68. Customizeyournetworksettings (Wdsbridging → Configuretheipaddressoftherouter → Surveythessidtobebridged)
- 69. Customizeyournetworksettings (Disabledhcp → Checkwdsstatus)
- 70. Upgrade The Firmware (Backup And Restore Configuration Settings → Change The Login Password → Local Management → Remote Management → View System Log → Set Up System Time & Language)
- 71. Manage The Router (Upgrade The Firmware → Auto Update → Online Upgrade)
- 72. Manage The Router (Local Upgrade → Backup And Restore Configuration Settings)
- 73. Manage The Router (Backup & Restore → Restore Configuration Settings → Reset The Router)
- 74. Manage The Router (Change The Login Password → Local Management)
- 75. Manage The Router (Allow All Lan Connected Devices To Manage The Router → Allow Specific Devices To Manage The Router)
- 76. Manage The Router (Remote Management → Forbid All Devices To Manage The Router Remotely → Allow All Devices To Manage The Router Remotely → Allow A Specific Device To Manage The Router Remotely → Set Up A Dynamic Dns Service Account)
- 77. Manage The Router (Set Up A Dynamic Dns Service Account → Http Referer Head Check → View System Log)
- 78. Cwmp Settings (Manage The Router → Cpe Wan Management Protocol → Configure The Parameters → Inform → Inform Interval → Acs Url)
- 79. Manage The Router (Connection Require Authentication → Path → Port → Test The Network Connectivity → Diagnostics)
- 80. Manage The Router (Set Up System Time & Language)
- 81. Manage The Router (Get Time From The Internet → Get Time From Your Computer → Manually Set The Date And Time)
- 82. Manage The Router (Set The Current Date → Set The Current Time → Set Up Daylight Saving Time → Set The Router To Reboot Regularly)
- 83. Manage The Router (Control The Led)
- 84. Manage The Router
- 85. What Should I Do If I Forget My Wireless Password? (What Should I Do If I Forget My Web Management Password? → What Should I Do If I Cant Log In To The Routers Web Management Page?)
- 86. Lansettings (Advanced → Restoreadvancedsettings)
- 87. Reset The Router To Factory Default Settings (Reconfigure The Router → Check Internet Status → Manually Configure The Dns Server → Enter 8.8.8.8 As Primary Dns)
- 88. Restart The Modem And The Router (Reset The Router To Factory Default Settings And Reconfigure The Router → Upgrade The Firmware Of The Router → Check The Tcp/ip Settings On The Particular Device → Make Sure The Physical Connection Between The Router And The Modem Is Proper → Clone The Mac Address Of Your Computer)
- 89. Visit Http://tplinkwifi.net, And Log In With Your Tp-link Id Or The Password You Set For The Router.
- 90. Power Off Your Modem And Router (Confirm Your Internet Connection Type → Visit Http://tplinkwifi.net → Select Your Internet Connection Type → Click Save → Restart The Modem And The Router Again → Please Upgrade The Firmware Of The Router)
- 91. Make Sure The Wireless Adapter Driver Is Installed Successfully And The Wireless Adapter Is Enabled. (On Windows 7 → On Windows Xp → Check The Wlan Led Indicator On Your Wireless Router/modem. → Go To Wireless Or Advanced > Wireless > Wireless Settings. → Authenticating Problem/password Mismatch)
- 92. Product Name: Ac1900 Mu-mimo Wi-fi Router (Model Number: Archer Ac1900 → Responsible Party: Tp-link Usa Corporation → This Equipment Has Been Tested And Found To Comply With The Limits For A Class B Digital Device, Pursuant To Part 15 Of The Fcc Rules.)
- 93. Fcc Rf Radiation Exposure Statement (Fcc Compliance Information Statement → Product Name → Model Number → Responsible Party → Address → Website)
- 94. Ukca Mark (Uk Declaration Of Conformity → National Restrictions → Canadian Compliance Statement)
- 95. Caution: (Radiation Exposure Statement: → Industry Canada Statement → Korea Warning Statements: → Ncc Notice & Bsmi Notice:)
- 96. 安全諮詢及注意事項 (裝電源供應器 → 注意防潮 → 請勿將本產品置放於靠近熱源的地方 → 不 → 要私自拆開機殼或自行維修 → 限用物質含有情況標示聲明書 → 設備名稱ac1900 Mu-mimo Wi-fi Router)
- 97. Safety Information (Explanations Of The Symbols On The Product Label → Operating Temperature)
- 98. Operators Manual (Recycling)
×
TP-Link AC1900 Archer AC1900 MU-MIMO Wi-Fi Router User Guide






Chapter 13
Manage the Router
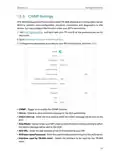
4. Specify the LED off time, and the LED will be off during this period every day.
5. Click SAVE.
83

| General | Details |
|---|---|
| Name | TP-Link AC1900 Archer AC1900 MU-MIMO Wi-Fi Router User Guide |
| Make | TP-Link |
| Language | English |
| Filetype | PDF (Download) |
| File size | 1.9 MB |
 (1 votes, average: 5.00 out of 5)
 Loading...
If you have any questions regarding TP-Link AC1900 Archer AC1900 MU-MIMO Wi-Fi Router User Guide, please ask here and describe the problem in detail.

TP-Link VR300 Archer Modem Router User Guide

TP-Link T150500-2-DT WiFi Router Instruction Manual

TP-Link Archer AX55 Wi-Fi 6 Router Installation Guide

TP-Link Omada ER8411 VPN Router Instructions

TP-Link Configure VDSL Router User Guide

TP-Link Archer BE805 BE19000 Tri-Band Wi-Fi 7 Router User Manual

TP-Link VR600 Wireless DSL Modem Router Installation Guide

TP-Link AX58 Dual Band Gigabit Wi-Fi 6 Router Installation Guide

TP-Link AC750 Wireless Dual Band Router Owner’s Manual

TP-Link AX6000 8-Stream Wi-Fi 6 Router Installation Guide


ZLWL ZR2720N Router User Guide

AVCOMM AP224 WLAN Compact LTE WLAN Router Installation Guide

GRANDSTREAM GWN700x VPN Router User Guide

TP-Link BE11000 Tri Band Wi-Fi 7 Gaming Router User Guide

SAX1V1R Spectrum WiFi 6 Router User Guide: Troubleshoot & Personalize

TP-Link Archer A7 Wireless Dual Band Gigabit Router User Guide

Yifan YF325 4G Router User Guide

ASUS RT-BE86U, RT-BE6800 Dual Band Wi-Fi Router User Guide

D-Link R95 BE9500 Wi-Fi 7 Router User Guide

D-Link DWR-960 Wi-Fi Router Instruction Manual
Table of Contents
- 1. The Html Code Provided Does Not Contain Any Subheadings Or R... →
- 2. About This Guide - Connect The Hardware →
- 3. The Html Code Does Not Contain Any Relevant Subheadings Rela... →
- 4. Get To Know About Your Router - Product Overview →
- 5. Product Overview - Appearance →
- 6. Get To Know About Your Router - Led Explanation →
- 7. Get To Know About Your Router - Button And Port Explanation →
- 8. Connect The Hardware - Positionyourrouter →
- 9. Connect The Hardware - Position Your Router →
- 10. Connect The Hardware - Set Up The Router As An Access Point →
- 11. Connect The Hardware - Ethernet Cable →
- 12. Connect The Hardware - Wlan →
- 13. Log In To Your Router →
- 14. Log In To Your Router - Set Up The Tcp/ip Protocol →
- 15. Set Up Internet Connection - Use Quick Setup Wizard →
- 16. Set Up Internet Connection - Use Quick Setup Wizard →
- 17. Set Up Internet Connection - Quick Setup Via Tp-link Tether ... →
- 18. Set Up Internet Connection - Static Ip →
- 19. Set Up Internet Connection - Secondary Connection →
- 20. Set Up Internet Connection - Set Up The Router As An Access ... →
- 21. Set Up Internet Connection - Pass-through (bridge) →
- 22. Set Up Internet Connection - Mac Clone →
- 23. Register A Tp-link Id - Change Your Tp-link Id Information →
- 24. Register A Tp-link Id - Change Your Tp-link Id Information →
- 25. Tp-link Cloud Service - Manage The User Tp-link Ids →
- 26. Addtp-linkidtomanagetherouter - Removetp-linkid(s)frommanagi... →
- 27. Manage The Router Via The Tp-link Tether App - Launch The Ap... →
- 28. Set Up A Onemesh Network - Manage Devices In The Onemesh Net... →
- 29. Onemesh With Seamless Roaming - Same Network Name & Password →
- 30. Onemesh With Seamless Roaming - Connect A Onemesh Extender T... →
- 31. Onemesh With Seamless Roaming - Manage Devices In The Onemes... →
- 32. Onemesh With Seamless Roaming - Manage The Onemesh Device As... →
- 33. Guest Network - Create A Network For Guests →
- 34. Create A Network For Guests - Enable Guest Network →
- 35. Guest Network - Customize Guest Network Options →
- 36. Parental Controls →
- 37. Parental Controls - Setting Up Access Restrictions →
- 38. Parental Controls - Set Time Restrictions On Internet Access →
- 39. Parental Controls - Enable Bed Time →
- 40. Qos →
- 41. Enableqosandsetbandwidthallocation - Go Toadvanced>qos>globa... →
- 42. Protect The Network From Cyber Attacks - Access Control →
- 43. Protect The Network From Cyber Attacks - Access Control →
- 44. Network Security - Allow Specific Device(s) →
- 45. Network Security - Add Unconnected Devices →
- 46. Network Security - Ip & Mac Binding →
- 47. Network Security - Alg (application Layer Gateway) →
- 48. Share Local Resources On The Internet By Port Forwarding - O... →
- 49. Nat Forwarding - Share Local Resources On The Internet By Po... →
- 50. Nat Forwarding - View Common Services →
- 51. Nat Forwarding - Open Ports Dynamically By Port Triggering →
- 52. Natforwarding - Upnp →
- 53. Nat Forwarding - Make Applications Free From Port Restrictio... →
- 54. Nat Forwarding - Enable Dmz →
- 55. Customize Your Network Settings - Change The Lan Settings →
- 56. Change The Lan Settings - Configure To Support Iptv Service →
- 57. Customizeyournetwork... - Enableiptv/vlan →
- 58. Customizeyournetwork... - Specifydhcpserverset... →
- 59. Customizeyournetworksettings - Setupadynamicdnsserviceaccoun... →
- 60. Customizeyournetwork... - Createstaticroutes →
- 61. Customizeyournetworksettings - Changetherouterslanipaddresse... →
- 62. Customizeyournetwork... - Subnetmask →
- 63. Customizeyournetworksettings - Changewirelessnetworknameandp... →
- 64. Customizeyournetwork... - Scheduleyourwireless... →
- 65. Customizeyournetwork... - Usewpsforwirelesscon... →
- 66. Customizeyournetwork... - Pushthewpsbutton →
- 67. Customizeyournetwork... - Wmm →
- 68. Customizeyournetwork... - Wdsbridging →
- 69. Customizeyournetwork... - Disabledhcp →
- 70. Upgrade The Firmware - Backup And Restore Configuration Sett... →
- 71. Manage The Router - Upgrade The Firmware →
- 72. Manage The Router - Local Upgrade →
- 73. Manage The Router - Backup & Restore →
- 74. Manage The Router - Change The Login Password →
- 75. Manage The Router - Allow All Lan Connected Devices To Manag... →
- 76. Manage The Router - Remote Management →
- 77. Manage The Router - Set Up A Dynamic Dns Service Account →
- 78. Cwmp Settings - Manage The Router →
- 79. Manage The Router - Connection Require Authentication →
- 80. Manage The Router - Set Up System Time & Language →
- 81. Manage The Router - Get Time From The Internet →
- 82. Manage The Router - Set The Current Date →
- 83. Manage The Router - Control The Led →
- 84. Manage The Router →
- 85. What Should I Do If I Forget My Wireless Password? - What Sh... →
- 86. Lansettings - Advanced →
- 87. Reset The Router To Factory Default Settings - Reconfigure T... →
- 88. Restart The Modem And The Router - Reset The Router To Facto... →
- 89. Visit Http://tplinkwifi.net, And Log In With Your Tp-link Id... →
- 90. Power Off Your Modem And Router - Confirm Your Internet Conn... →
- 91. Make Sure The Wireless Adapter Driver Is Installed Successfu... →
- 92. Product Name: Ac1900 Mu-mimo Wi-fi Router - Model Number: Ar... →
- 93. Fcc Rf Radiation Exposure Statement - Fcc Compliance Informa... →
- 94. Ukca Mark - Uk Declaration Of Conformity →
- 95. Caution: - Radiation Exposure Statement: →
- 96. 安全諮詢及注意事項 - 裝電源供應器 →
- 97. Safety Information - Explanations Of The Symbols On The Prod... →
- 98. Operators Manual - Recycling →