×
- 1. The Html Code Provided Does Not Contain Any Subheadings Or Relevant Content Related To Installation/setup/configuration. Therefore, I Will T… (User Guide Ac1900 Mu-mimo Wi-fi Router Archer Ac1900 2023 Tp-link 1910013403 Rev1.6.0)
- 2. About This Guide (Connect The Hardware → Log In To Your Router → Set Up Internet Connection → Tp-link Cloud Service → Onemesh With Seamless Roaming → Guest Network)
- 3. The Html Code Does Not Contain Any Relevant Subheadings Related To Installation/setup/configuration. Therefore, I Will Take The First Senten… (Specifications Can Be Found On The Product Page At Https://www.tp-link.com.)
- 4. Get To Know About Your Router (Product Overview → Appearance)
- 5. Product Overview (Appearance → Top Panel)
- 6. Get To Know About Your Router (Led Explanation → Router Mode → Access Point Mode)
- 7. Get To Know About Your Router (Button And Port Explanation → Power On/off Button → Wan Port → Lan Ports (1/2/3/4) → Wps/wi-fi Button → Reset Button)
- 8. Connect The Hardware (Positionyourrouter → Connectyourrouter)
- 9. Connect The Hardware (Position Your Router → Connect Your Router)
- 10. Connect The Hardware (Set Up The Router As An Access Point → Verify Led Indicators → Connect Your Computer To The Router → Method 1: Wired)
- 11. Connect The Hardware (Ethernet Cable → Wps → Wi-fi → Method 2: Wirelessly → Method 3: Use The Wps Button)
- 12. Connect The Hardware (Wlan → Tp-link → Myhome → Homenetwork → Tp-link_router → Wps/wi-fi)
- 13. Log In To Your Router
- 14. Log In To Your Router (Set Up The Tcp/ip Protocol → Visit Http://tplinkwifi.net → Create A Login Password For Secure Management → Refer To The Faq Section → Tp-link Id And Cloud Router Login)
- 15. Set Up Internet Connection (Use Quick Setup Wizard → Quick Setup Via Tp-link Tether App → Manually Set Up Your Internet Connection → Set Up The Router As An Access Point → Set Up An Ipv6 Internet Connection)
- 16. Set Up Internet Connection (Use Quick Setup Wizard → Set Up An Ipv6 Internet Connection → Tp-link Cloud Service)
- 17. Set Up Internet Connection (Quick Setup Via Tp-link Tether App → Manually Set Up Your Internet Connection)
- 18. Set Up Internet Connection (Static Ip → Pppoe)
- 19. Set Up Internet Connection (Secondary Connection → Dynamic Ip → Pppoe → Advanced → Faq)
- 20. Set Up Internet Connection (Set Up The Router As An Access Point → Set Up An Ipv6 Internet Connection)
- 21. Set Up Internet Connection (Pass-through (bridge) → Router)
- 22. Set Up Internet Connection (Mac Clone → Lan Settings → Check Ipv6 Connection)
- 23. Register A Tp-link Id (Change Your Tp-link Id Information → Manage The User Tp-link Ids → Manage The Router Via The Tp-link Tether App)
- 24. Register A Tp-link Id (Change Your Tp-link Id Information)
- 25. Tp-link Cloud Service (Manage The User Tp-link Ids)
- 26. Addtp-linkidtomanagetherouter (Removetp-linkid(s)frommanagingtherouter → Manage The Router Via The Tp-link Tether App)
- 27. Manage The Router Via The Tp-link Tether App (Launch The Apple App Store Or Google Play Store → Connect Your Device To The Routers Wireless Network → Log In With Your Tp-link Id → Register A Tp-link Id → Access The Internet With Cellular Data Or A Wi-fi Network)
- 28. Set Up A Onemesh Network (Manage Devices In The Onemesh Network)
- 29. Onemesh With Seamless Roaming (Same Network Name & Password → Internet For Seamless Roaming → Unified Wi-fi Network → Seamless Roaming → Easy Setup And Management → Set Up A Onemesh Network)
- 30. Onemesh With Seamless Roaming (Connect A Onemesh Extender To This Router → Check Full List Of Tp-link Onemesh Devices → Set Up The Extender To Join The Onemesh Network → Find It In The Available Onemesh Devices List → Add It To The Onemesh Network → Router And Extender Successfully Form A Onemesh Network)
- 31. Onemesh With Seamless Roaming (Manage Devices In The Onemesh Network)
- 32. Onemesh With Seamless Roaming (Manage The Onemesh Device As Needed → Change Device Information → Click Manage Device To Redirect To The Web Management Page Of This Device → Click Leave Onemesh To Delete This Device From The Onemesh Network)
- 33. Guest Network (Create A Network For Guests → Customize Guest Network Options)
- 34. Create A Network For Guests (Enable Guest Network → Customize The Ssid → Select Security Type → Click Save → Share Network → View Guest Network Information)
- 35. Guest Network (Customize Guest Network Options → Allow Guests To See Each Other → Allow Guests To Access Your Local Network)
- 36. Parental Controls
- 37. Parental Controls (Setting Up Access Restrictions → Customize The Blocked Content)
- 38. Parental Controls (Set Time Restrictions On Internet Access)
- 39. Parental Controls (Enable Bed Time → Configure The Times → Click Save → The Amount Of Time Your Child Spends Online Is Controlled → Inappropriate Content Is Blocked → Devices Under This Profile Will Be Unable To Access The Internet)
- 40. Qos
- 41. Enableqosandsetbandwidthallocation (Go Toadvanced>qos>globalsettings → Ticktoenableqos → Inputthemaximumuploadanddownloadbandwidth → In Thedeviceprioritysection → Clicksave → Done!)
- 42. Protect The Network From Cyber Attacks (Access Control → Ip & Mac Binding → Alg (application Layer Gateway))
- 43. Protect The Network From Cyber Attacks (Access Control)
- 44. Network Security (Allow Specific Device(s) → Add Connected Devices)
- 45. Network Security (Add Unconnected Devices → Ip & Mac Binding)
- 46. Network Security (Ip & Mac Binding → Enable Ip & Mac Binding → Bind Your Device(s) → Arp List → Add A Binding Entry)
- 47. Network Security (Alg (application Layer Gateway) → View Connected Devices → Bind Device By Mac Address And Ip Address → Add Device → Keep Alg Settings As Default → Log In To Tp-link Router)
- 48. Share Local Resources On The Internet By Port Forwarding (Open Ports Dynamically By Port Triggering → Make Xbox Online Games Run Smoothly By Upnp → Make Applications Free From Port Restriction By Dmz)
- 49. Nat Forwarding (Share Local Resources On The Internet By Port Forwarding → Assign A Static Ip Address To Your Pc → Visit Http://tplinkwifi.net → Go To Advanced > Nat Forwarding > Port Forwarding)
- 50. Nat Forwarding (View Common Services → View Connected Devices → Save → Tips)
- 51. Nat Forwarding (Open Ports Dynamically By Port Triggering → Make Applications Free From Port Restriction By Dmz)
- 52. Natforwarding (Upnp → Makexboxonlinegamesrunsmoothlybyupnp → Save → Externalport → Existingapplications → Porttriggeringrules)
- 53. Nat Forwarding (Make Applications Free From Port Restriction By Dmz → Assign A Static Ip Address To Your Pc)
- 54. Nat Forwarding (Enable Dmz → Dmz Host Ip Address → Save → Configuration Completed)
- 55. Customize Your Network Settings (Change The Lan Settings → Configure To Support Iptv Service → Check Multicast Settings → Specify Dhcp Server Settings → Set Up A Dynamic Dns Service Account → Specify Wireless Settings)
- 56. Change The Lan Settings (Configure To Support Iptv Service)
- 57. Customizeyournetworksettings (Enableiptv/vlan → Selecttheappropriatemode → Clicksave → Connecttheset-topboxtothecorrespondinglanport → Youriptvsetupisdonenow)
- 58. Customizeyournetworksettings (Specifydhcpserversettings → Visithttp://tplinkwifi.net → Go Toadvanced>network>dhcpserver → Enablecheckbox → Ipaddresspool → Addressreservation)
- 59. Customizeyournetworksettings (Setupadynamicdnsserviceaccount)
- 60. Customizeyournetworksettings (Createstaticroutes)
- 61. Customizeyournetworksettings (Changetherouterslanipaddresses → Visithttp://tplinkwifi.net → Gotoadvancednetworkrouting → Clickaddandfinishthesettings)
- 62. Customizeyournetworksettings (Subnetmask → Defaultgateway → Interface → Description → Specifywirelesssettings)
- 63. Customizeyournetworksettings (Changewirelessnetworknameandpassword → Hidessid → Usesmartconnectfunction → Changesecurityoption → Transmitpower → Channelwidth)
- 64. Customizeyournetworksettings (Scheduleyourwirelessfunction → Channel → Mode → Enablemu-mimo)
- 65. Customizeyournetworksettings (Usewpsforwirelessconnection → Connectviatheclientspin → Connectviatherouterspin)
- 66. Customizeyournetworksettings (Pushthewpsbutton → Advancedwirelesssettings)
- 67. Customizeyournetworksettings (Wmm → Shortgi → Apisolation → Airtimefairness → Beaconinterval → Rtsthreshold)
- 68. Customizeyournetworksettings (Wdsbridging → Configuretheipaddressoftherouter → Surveythessidtobebridged)
- 69. Customizeyournetworksettings (Disabledhcp → Checkwdsstatus)
- 70. Upgrade The Firmware (Backup And Restore Configuration Settings → Change The Login Password → Local Management → Remote Management → View System Log → Set Up System Time & Language)
- 71. Manage The Router (Upgrade The Firmware → Auto Update → Online Upgrade)
- 72. Manage The Router (Local Upgrade → Backup And Restore Configuration Settings)
- 73. Manage The Router (Backup & Restore → Restore Configuration Settings → Reset The Router)
- 74. Manage The Router (Change The Login Password → Local Management)
- 75. Manage The Router (Allow All Lan Connected Devices To Manage The Router → Allow Specific Devices To Manage The Router)
- 76. Manage The Router (Remote Management → Forbid All Devices To Manage The Router Remotely → Allow All Devices To Manage The Router Remotely → Allow A Specific Device To Manage The Router Remotely → Set Up A Dynamic Dns Service Account)
- 77. Manage The Router (Set Up A Dynamic Dns Service Account → Http Referer Head Check → View System Log)
- 78. Cwmp Settings (Manage The Router → Cpe Wan Management Protocol → Configure The Parameters → Inform → Inform Interval → Acs Url)
- 79. Manage The Router (Connection Require Authentication → Path → Port → Test The Network Connectivity → Diagnostics)
- 80. Manage The Router (Set Up System Time & Language)
- 81. Manage The Router (Get Time From The Internet → Get Time From Your Computer → Manually Set The Date And Time)
- 82. Manage The Router (Set The Current Date → Set The Current Time → Set Up Daylight Saving Time → Set The Router To Reboot Regularly)
- 83. Manage The Router (Control The Led)
- 84. Manage The Router
- 85. What Should I Do If I Forget My Wireless Password? (What Should I Do If I Forget My Web Management Password? → What Should I Do If I Cant Log In To The Routers Web Management Page?)
- 86. Lansettings (Advanced → Restoreadvancedsettings)
- 87. Reset The Router To Factory Default Settings (Reconfigure The Router → Check Internet Status → Manually Configure The Dns Server → Enter 8.8.8.8 As Primary Dns)
- 88. Restart The Modem And The Router (Reset The Router To Factory Default Settings And Reconfigure The Router → Upgrade The Firmware Of The Router → Check The Tcp/ip Settings On The Particular Device → Make Sure The Physical Connection Between The Router And The Modem Is Proper → Clone The Mac Address Of Your Computer)
- 89. Visit Http://tplinkwifi.net, And Log In With Your Tp-link Id Or The Password You Set For The Router.
- 90. Power Off Your Modem And Router (Confirm Your Internet Connection Type → Visit Http://tplinkwifi.net → Select Your Internet Connection Type → Click Save → Restart The Modem And The Router Again → Please Upgrade The Firmware Of The Router)
- 91. Make Sure The Wireless Adapter Driver Is Installed Successfully And The Wireless Adapter Is Enabled. (On Windows 7 → On Windows Xp → Check The Wlan Led Indicator On Your Wireless Router/modem. → Go To Wireless Or Advanced > Wireless > Wireless Settings. → Authenticating Problem/password Mismatch)
- 92. Product Name: Ac1900 Mu-mimo Wi-fi Router (Model Number: Archer Ac1900 → Responsible Party: Tp-link Usa Corporation → This Equipment Has Been Tested And Found To Comply With The Limits For A Class B Digital Device, Pursuant To Part 15 Of The Fcc Rules.)
- 93. Fcc Rf Radiation Exposure Statement (Fcc Compliance Information Statement → Product Name → Model Number → Responsible Party → Address → Website)
- 94. Ukca Mark (Uk Declaration Of Conformity → National Restrictions → Canadian Compliance Statement)
- 95. Caution: (Radiation Exposure Statement: → Industry Canada Statement → Korea Warning Statements: → Ncc Notice & Bsmi Notice:)
- 96. 安全諮詢及注意事項 (裝電源供應器 → 注意防潮 → 請勿將本產品置放於靠近熱源的地方 → 不 → 要私自拆開機殼或自行維修 → 限用物質含有情況標示聲明書 → 設備名稱ac1900 Mu-mimo Wi-fi Router)
- 97. Safety Information (Explanations Of The Symbols On The Product Label → Operating Temperature)
- 98. Operators Manual (Recycling)
×
TP-Link AC1900 Archer AC1900 MU-MIMO Wi-Fi Router User Guide
Chapter 4
Set Up Internet Connection
4 2 Quick Setup Via TP-Link Tether App
The Tether app runs on iOS and Android devices, such as smartphones and tablets.
1. Launch the Apple App Store or Google Play store and search “TP-Link Tether” or
simply scan the QR code to download and install the app.
OR
2. Connect your device to the router’s wireless network.
3. Launch the Tether app, tap the + button and select Router > Wireless Router. Follow
the steps to complete the setup and connect to the internet.
4. Connect your devices to the newly configured wireless networks of the router and
enjoy the internet!
4 3 Manually Set Up Your Internet Connection
In this part, you can check your current internet connection settings. You can also
modify the settings according to the service information provided by your ISP.
Follow the steps below to check or modify your internet connection settings.
1. Visit http://tplinkwifi.net, and log in with your TP-Link ID or the password you set for
the router.
2. Go to Internet, or go to Advanced > Network > Internet.
3. Select your internet connection type from the drop-down list.
4. Follow the instructions on the page to continue the configuration. Parameters on the
figures are just used for demonstration.
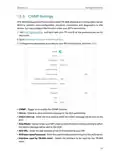
1 ) If you choose Dynamic IP, you need to select whether to clone the MAC address.
Dynamic IP users are usually equipped with a cable TV or fiber cable.
16
| General | Details |
|---|---|
| Name | TP-Link AC1900 Archer AC1900 MU-MIMO Wi-Fi Router User Guide |
| Make | TP-Link |
| Language | English |
| Filetype | PDF (Download) |
| File size | 1.9 MB |
If you have any questions regarding TP-Link AC1900 Archer AC1900 MU-MIMO Wi-Fi Router User Guide, please ask here and describe the problem in detail.

TP-Link T150500-2-DT WiFi Router Instruction Manual

TP-Link Archer AX55 Wi-Fi 6 Router Installation Guide

TP-Link VR300 Archer Modem Router User Guide

TP-Link Omada ER8411 VPN Router Instructions

TP-Link Configure VDSL Router User Guide

TP-Link Archer BE805 BE19000 Tri-Band Wi-Fi 7 Router User Manual

TP-Link VR600 Wireless DSL Modem Router Installation Guide

TP-Link AX58 Dual Band Gigabit Wi-Fi 6 Router Installation Guide

TP-Link AC750 Wireless Dual Band Router Owner’s Manual

TP-Link AX6000 8-Stream Wi-Fi 6 Router Installation Guide


TP-Link Archer C20 Wireless Dual Band Router Installation Guide

CNCU FC300 Easy Route CNC Router Instructions

TELTONIKA RUT300 Router User Guide

Tenda TX2L ProV1.0 WiFi 6 Router Installation Guide

D-Link N300 4G Router User Guide

TAIKO AUDIO TAP0016 Extreme Router User Guide

ASUS BT8 ZenWiFi Tri Band WiFi Router User Guide

Spectrum 20240729 WiFi 6E Router User Guide

Ridgid R860443 18-VOLT CORDLESS COMPACT ROUTER User Guide

GRANDSTREAM HT812 Analog FXS IP Gateway 2 Port + NAT Router User Guide
Table of Contents
- 1. The Html Code Provided Does Not Contain Any Subheadings Or R... →
- 2. About This Guide - Connect The Hardware →
- 3. The Html Code Does Not Contain Any Relevant Subheadings Rela... →
- 4. Get To Know About Your Router - Product Overview →
- 5. Product Overview - Appearance →
- 6. Get To Know About Your Router - Led Explanation →
- 7. Get To Know About Your Router - Button And Port Explanation →
- 8. Connect The Hardware - Positionyourrouter →
- 9. Connect The Hardware - Position Your Router →
- 10. Connect The Hardware - Set Up The Router As An Access Point →
- 11. Connect The Hardware - Ethernet Cable →
- 12. Connect The Hardware - Wlan →
- 13. Log In To Your Router →
- 14. Log In To Your Router - Set Up The Tcp/ip Protocol →
- 15. Set Up Internet Connection - Use Quick Setup Wizard →
- 16. Set Up Internet Connection - Use Quick Setup Wizard →
- 17. Set Up Internet Connection - Quick Setup Via Tp-link Tether ... →
- 18. Set Up Internet Connection - Static Ip →
- 19. Set Up Internet Connection - Secondary Connection →
- 20. Set Up Internet Connection - Set Up The Router As An Access ... →
- 21. Set Up Internet Connection - Pass-through (bridge) →
- 22. Set Up Internet Connection - Mac Clone →
- 23. Register A Tp-link Id - Change Your Tp-link Id Information →
- 24. Register A Tp-link Id - Change Your Tp-link Id Information →
- 25. Tp-link Cloud Service - Manage The User Tp-link Ids →
- 26. Addtp-linkidtomanagetherouter - Removetp-linkid(s)frommanagi... →
- 27. Manage The Router Via The Tp-link Tether App - Launch The Ap... →
- 28. Set Up A Onemesh Network - Manage Devices In The Onemesh Net... →
- 29. Onemesh With Seamless Roaming - Same Network Name & Password →
- 30. Onemesh With Seamless Roaming - Connect A Onemesh Extender T... →
- 31. Onemesh With Seamless Roaming - Manage Devices In The Onemes... →
- 32. Onemesh With Seamless Roaming - Manage The Onemesh Device As... →
- 33. Guest Network - Create A Network For Guests →
- 34. Create A Network For Guests - Enable Guest Network →
- 35. Guest Network - Customize Guest Network Options →
- 36. Parental Controls →
- 37. Parental Controls - Setting Up Access Restrictions →
- 38. Parental Controls - Set Time Restrictions On Internet Access →
- 39. Parental Controls - Enable Bed Time →
- 40. Qos →
- 41. Enableqosandsetbandwidthallocation - Go Toadvanced>qos>globa... →
- 42. Protect The Network From Cyber Attacks - Access Control →
- 43. Protect The Network From Cyber Attacks - Access Control →
- 44. Network Security - Allow Specific Device(s) →
- 45. Network Security - Add Unconnected Devices →
- 46. Network Security - Ip & Mac Binding →
- 47. Network Security - Alg (application Layer Gateway) →
- 48. Share Local Resources On The Internet By Port Forwarding - O... →
- 49. Nat Forwarding - Share Local Resources On The Internet By Po... →
- 50. Nat Forwarding - View Common Services →
- 51. Nat Forwarding - Open Ports Dynamically By Port Triggering →
- 52. Natforwarding - Upnp →
- 53. Nat Forwarding - Make Applications Free From Port Restrictio... →
- 54. Nat Forwarding - Enable Dmz →
- 55. Customize Your Network Settings - Change The Lan Settings →
- 56. Change The Lan Settings - Configure To Support Iptv Service →
- 57. Customizeyournetwork... - Enableiptv/vlan →
- 58. Customizeyournetwork... - Specifydhcpserverset... →
- 59. Customizeyournetworksettings - Setupadynamicdnsserviceaccoun... →
- 60. Customizeyournetwork... - Createstaticroutes →
- 61. Customizeyournetworksettings - Changetherouterslanipaddresse... →
- 62. Customizeyournetwork... - Subnetmask →
- 63. Customizeyournetworksettings - Changewirelessnetworknameandp... →
- 64. Customizeyournetwork... - Scheduleyourwireless... →
- 65. Customizeyournetwork... - Usewpsforwirelesscon... →
- 66. Customizeyournetwork... - Pushthewpsbutton →
- 67. Customizeyournetwork... - Wmm →
- 68. Customizeyournetwork... - Wdsbridging →
- 69. Customizeyournetwork... - Disabledhcp →
- 70. Upgrade The Firmware - Backup And Restore Configuration Sett... →
- 71. Manage The Router - Upgrade The Firmware →
- 72. Manage The Router - Local Upgrade →
- 73. Manage The Router - Backup & Restore →
- 74. Manage The Router - Change The Login Password →
- 75. Manage The Router - Allow All Lan Connected Devices To Manag... →
- 76. Manage The Router - Remote Management →
- 77. Manage The Router - Set Up A Dynamic Dns Service Account →
- 78. Cwmp Settings - Manage The Router →
- 79. Manage The Router - Connection Require Authentication →
- 80. Manage The Router - Set Up System Time & Language →
- 81. Manage The Router - Get Time From The Internet →
- 82. Manage The Router - Set The Current Date →
- 83. Manage The Router - Control The Led →
- 84. Manage The Router →
- 85. What Should I Do If I Forget My Wireless Password? - What Sh... →
- 86. Lansettings - Advanced →
- 87. Reset The Router To Factory Default Settings - Reconfigure T... →
- 88. Restart The Modem And The Router - Reset The Router To Facto... →
- 89. Visit Http://tplinkwifi.net, And Log In With Your Tp-link Id... →
- 90. Power Off Your Modem And Router - Confirm Your Internet Conn... →
- 91. Make Sure The Wireless Adapter Driver Is Installed Successfu... →
- 92. Product Name: Ac1900 Mu-mimo Wi-fi Router - Model Number: Ar... →
- 93. Fcc Rf Radiation Exposure Statement - Fcc Compliance Informa... →
- 94. Ukca Mark - Uk Declaration Of Conformity →
- 95. Caution: - Radiation Exposure Statement: →
- 96. 安全諮詢及注意事項 - 裝電源供應器 →
- 97. Safety Information - Explanations Of The Symbols On The Prod... →
- 98. Operators Manual - Recycling →