×
- 1. Installation (Setup → Configuration)
- 2. Safety Symbols (Warning → Danger → Caution → Damage Prevention And Information Messages)
- 3. General Power Tool Safety Warnings (Work Area Safety → Personal Safety → Electrical Safety)
- 4. Power Tool Use And Care (Battery Tool Use And Care → Service → Recharge Only With The Charger Specified By The Manufacturer → Do Not Use The Power Tool If The Switch Does Not Turn It On And Off → Maintain Power Tools And Accessories → Do Not Expose A Battery Pack Or Tool To Fire Or Excessive Temperature)
- 5. Importan T (Read The Instructions)
- 6. Wear Eye Protection Symbol (Always Operate With Two Hands → Do Not Use The Guard For Cut-off Operations → Symbols (certification Information) → This Symbol Designates That This Tool Is Listed By Underwriters Laboratories. → This Symbol Designates That This Component Is Recognized By Underwriters Laboratories. → This Symbol Designates That This Tool Is Listed By The Canadian Standards Association.)
- 7. Functional Descriptions & Specifications (V Trim Router → On/off Switch → Variable Speed Dial → Depth Adjustment Ring → Quick Release Tab (x2) → Edge Guide Slot → Dust Extraction Hood)
- 8. Fx4221 Model No. 24 V D.c. Rated Voltage Collet Capacity No-load Speed Recommended Operating Temperature Recommended Storage Temperature
- 9. Assembly (Toattach/detachbatterypack → Batterypack)
- 10. Installing And Removing The Base (To Remove The Base → To Install The Base)
- 11. Installing And Removing Bits (Spindle Stop → Spindle Lock → To Remove The Base → To Install The Base)
- 12. Installing And Removing The Edge (Guide Assembly → To Install The Edge Guide Assembly → Note: If The Connection Of Edge Guide Assembly Is Loose, Perform The Following Steps)
- 13. Installing And Removing The Dust Extraction Hood
- 14. Installing And Removing The Subbase (To Install Subbase → Centering Cone → Collet Nut → Base Lock Lever → Base Depth Adjustment Ring)
- 15. To Install Subbase (Insert The Template Guide Into The Center Hole → Use Only A Maximum 1-3/16' (30.5 Mm) Template Guide With This Tool → The D-shaped Subbase Does Not Accommodate Template Guides)
- 16. Adjustments (Installing And Removing Bits → Adjusting The Depth Of Cut → Depth Adjustment Scale → Base Lock Lever → Warning → Deep Cuts)
- 17. Variable Speed Dial (Warning → Current Speed)
- 18. Warning (Battery Pack → Charger → Soft Start Feature → Brushless On/off Switch → Led Lights)
- 19. General Operations With The Trim (Routing With The Edge Guide → Edge Guide Assembly → Straight Routing → Removing The Cutter Bit → Warning)
- 20. Circular Routing (Center Hole → Installation Steps → Warning → Edge Guide Assembly → Battery Pack Attachment → Circle Cutting Procedure)
- 21. Internal Routing (Feeding The Trim Router → Bit Rotation → Direction Of Feed For External Cuts → Climb-cutting)
- 22. Direction Of Feed For Internal Cuts (Feeding Too Quickly → Feeding Too Slowly → Rate Of Feed → Warning → Always Clamp The Workpiece → Always Be Alert And Exercise Extreme Caution)
- 23. Maintenance (Cleaning → Service → Preventive Maintenance → General Maintenance → Storage)
- 24. Flex 5-year Limited Warranty (V Tools: 5-year Limited Warranty With Registration → V Batteries And Chargers: 5-year Limited Warranty With Registration → Corded, 12v And 20v Flex Legacy Products: 1-year Limited Warranty, No Registration Benefit → Flex Stack Pack Storage System: 1-year Limited Warranty With Registration → Functional Attachments Ft161 And Ft421: 5-year Limited Warranty With Registration / 3-year Limited Warranty Without Registration → Other Accessories And Attachments: No Warranty)
- 25. Symboles Relatifs À La Sécurité (Avertissement → Danger → Avertissement → Mise En Garde → Messages Dinformation Et De Prévention Des Dommages → Équipement De Protection Des Yeux)
- 26. Sécurité De La Zone De Travail (Sécurité Électrique → Sécurité Personnelle)
- 27. Utilisation Et Entretien De Loutil Électrique (Assurez-vous Que Linterrupteur Est Dans La Position Darrêt (off) → Débranchez La Fiche De La Prise Secteur → Retirez Toute Clé De Réglage → Entretenez De Façon Appropriée Les Outils Électriques → Ne Laissez Pas La Familiarité Vous Inciter À Devenir Complaisant(e) → Gardez Les Outils De Coupe Tranchants Et Propres)
- 28. Important: Les Symboles Suivants Peuvent Figurer Sur Votre Outil. Familiarisez-vous Avec Eux Et Apprenez Leur Signification. En Comprenant Ce…
- 29. Lisez Les Instructions (Alerte Lutilisateur Pour Lui Demander De Porter Une Protection Des Yeux. → Alerte Lutilisateur Pour Lui Demander De Toujours Tenir L'outil Avec Les Deux Mains → Alerte Lutilisateur Pour Lui Demander De Ne Pas Utiliser Le Dispositif De Protection Pour Les Opérations De Tronçonnage → Symboles (renseignements En Matière Dhomologation))
- 30. Toupie De Finition Des Bords De 24 V (Interrupteur De Marche/arrêt → Cadran De Réglage De La Vitesse → Anneau De Réglage De La Profondeur → Levier De Verrouillage De La Base → Verrouillage De La Broche → Hotte Pour Lextraction De La Poussière)
- 31. Fx4221 Modèle N 24 V C.c. Tension Nominale Capacité Des Douilles 1/4 Po Jusquà 31000 Tr/min Vitesse À Vide Température De Fonctionnement Rec…
- 32. Assemblage (Avertissement → Pour Attacher/détacher Le Bloc-piles (fig. 2) → Avis)
- 33. Installation Et Retrait De La Base (Retrait De La Base → Installation De La Base)
- 34. Installation Et Retrait Des Mèches (Verrouillage De La Broche Spindle Stop → Sélection De La Mèche → Retrait De La Base → Installation De La Base)
- 35. Installation Et Retrait De Lensemble De Guide De Bord (Installation De Lensemble Du Guide De Bord → Remarque : Si La Connexion De Lensemble De Guide De Bord Est Lâche, Exécutez La Procédure Suivante)
- 36. Installation Et Retrait De La Hotte Dextraction De La Poussière (Installation De La Hotte Dextraction De La Poussière → Retrait De La Hotte Dextraction De La Poussière)
- 37. Installation Et Retrait De Lembase (Pour Installer Lembase → Assurez-vous Que Lembase Peut Bouger Librement. → Insérez La Broche Du Cône De Centrage Dans La Douille Et Serrez Lécrou De La Douille. → Fermez Le Levier De Verrouillage De La Base. → Serrez Les Vis De Lembase Pour Fixer Lembase En Place. → Desserrez Lécrou De Fixation De La Douille Et Retirez Le Cône De Centrage.)
- 38. Installation De Lembase (Utilisation Dun Guide De Gabarit)
- 39. Réglage De La Profondeur De Coupe (Installation Et Retrait Des Mèches → Avertissement → Remarque → Avis)
- 40. Molette De Réglage De La Vitesse (Cadran De Réglage De La Vitesse → Avertissement)
- 41. Avertissement (Bloc-piles → Chargeur → Fonctionnalité De Démarrage En Douceur → Brushless → Interrupteur De Marche/arrêt → Lampes À Del)
- 42. Opérations Générales Avec La Toupie (Toupillage Avec Le Guide De Bord → Desserrez Le Bouton Et Faites Glisser Le Guide → Mettez Loutil En Marche Et Laissez-le Atteindre → Serrez Toujours Fermement La Pièce À Usiner → Avertissement → Retirez La Pile, Placez Loutil À Lenvers)
- 43. Toupillage Circulaire (Avertissement → Désactivez Le Loutil Et Détachez Le Bloc-piles → Sécurisez Solidement Le Guide De Bord Sur La Base → Alignez Le Trou Central Du Guide De Bord Sur Le Centre Du Cercle À Découper → Faites Pivoter Loutil Dans Le Sens Des Aiguilles Dune Montre Autour Du Clou Pour Effectuer La Coupe Circulaire → Lorsque La Coupe Est Terminée, Mettez Loutil Hors Tension Et Laissez La Mèche Sarrêter Complètement Avant De La Retirer De La Pièce)
- 44. Toupillage Interne (Avertissement → Pénétration De La Toupie De Finition Des Bords Dans La Pièce À Usiner → Rotation De La Mèche → Sens De La Pénétration Pour Les Coupes Externes → Guide → Poussée)
- 45. Pénétration Trop Rapide (Pénétration Trop Lente → Vitesse De Pénétration → Avertissement → Découpage Par Escalade → Coupe Interne → Contrôle De L'outil)
- 46. Maintenance (Service Après-vente → Maintenance Générale → Rangement)
- 47. Garantie Limitée De Cinq Ans Avec L'enregistrement (Outils De 24 V → Piles Et Chargeurs De 24 V → Produits Filaires Flex De La Génération Précédente → Système De Stockage Flex Stack Pack → Attachements Fonctionnels Ft161 Et Ft421 → Autres Accessoires Et Attachements)
- 48. Símbolos De Seguridad (Advertencia → Peligro → Precaución → Mensajes De Prevención E Información De Daños)
- 49. Seguridad En El Área De Trabajo (Seguridad Eléctrica → Seguridad Personal)
- 50. Evite Los Arranques Accidentales (Desconecte El Enchufe De La Fuente De Alimentación → Realice Mantenimiento De Las Herramientas Eléctricas → Vístase Adecuadamente → Mantenga Las Herramientas De Corte Afiladas Y Limpias → Uso Y Cuidado De La Herramienta Eléctrica → No Fuerce La Herramienta Eléctrica)
- 51. Importante: (Símbolo → Nombre → Designación/explicación → Corriente Alterna (ca) → Corriente Continua (cc) → Tipo O Característica De Corriente → Herramienta De Clase Ii)
- 52. Lea Las Instrucciones (Utilice Siempre La Herramienta Con Las Dos Manos → No Utilice El Protector Para Operaciones De Tronzado → Símbolos (información De Certificación))
- 53. Fresadora Recortadora De 24 V (Interruptor De Encendido Y Apagado → Dial De Velocidad Variable → Anillo De Ajuste De Profundidad → Escala De Ajuste De Profundidad → Palanca De Fijación De La Base → Cubierta De Extracción De Polvo)
- 54. Fx4221 (Núm. De Modelo → Tensión Nominal → Capacidad Del Portaherramienta → Velocidad Sin Carga → Temperatura De Funcionamiento Recomendada → Temperatura De Almacenamiento Recomendada)
- 55. Ensamblaje (Advertencia → Para Instalar/desinstalar El Paquete De Batería → Para Instalar El Paquete De Batería: → Para Desinstalar El Paquete De Batería:)
- 56. Instalación Y Desinstalación De La Base (Para Desinstalar La Base → Para Instalar La Base)
- 57. Instalación Y Desinstalación De Las Brocas (Para Instalar La Base → Para Desinstalar La Base → Seleccione La Broca → Advertencia → Apriete Firmemente → No Utilice Brocas Con Vástagos Dañados)
- 58. Instalación Y Desinstalación Del Ensamblaje De La Guía De Borde (Para Instalar El Ensamblaje De La Guía De Borde → Nota: Si La Conexión Del Ensamblaje De La Guía De Borde Está Floja, Realice Los Siguientes Pasos)
- 59. Instalación Y Desinstalación De La Cubierta De Extracción De Polvo (Para Instalar La Cubierta De Extracción De Polvo → Para Desinstalar La Cubierta De Extracción De Polvo)
- 60. Instalación Y Desinstalación De La Subbase (Para Instalar La Subbase → Alinee Los Agujeros Ubicados En La Subbase → Inserte El Pasador Del Cono Centrador → Abra La Palanca De Fijación De La Base → Cierre La Palanca De Fijación De La Base)
- 61. Guías De Plantilla (no Suministradas) (Aviso → Para Instalar La Subbase)
- 62. Ajustes (Ajuste De La Profundidad De Corte → Instalación Y Desinstalación De Las Brocas → Advertencia → Aviso)
- 63. Dial De Velocidad Variable (Advertencia → Velocidad Actual)
- 64. Instrucciones De Utilización (Advertencia → Paquete De Batería → Cargador → Aviso: Sírvase Consultar Los Manuales Del Paquete De Batería Y Del Cargador Para Obtener Información Detallada De Utilización.)
- 65. Función De Arranque Suave (Brushless → Interruptor De Encendido Y Apagado → Luces Led)
- 66. Fresado Con La Guía De Borde (Ensamblaje De La Guía De Borde → Fresado Recto → Advertencia → Cortes De Prueba → Control Adecuado → Inspección Del Corte Acabado)
- 67. Fresado Circular (Instalación De La Guía De Borde → Ajuste De La Longitud De La Guía De Borde → Fijación De La Guía De Borde → Encendido De La Herramienta → Corte Circular → Finalización Del Corte)
- 68. Fresado Interno (Avance De La Fresadora Recortadora → Advertencia → Guía → Rotación De La Broca → Empuje → Sentido De Avance Para Cortes Externos)
- 69. Avance Demasiado Rápido (Avance Demasiado Lento → Sentido De Avance Para Cortes Internos → Velocidad De Avance → Fije Siempre → Advertencia)
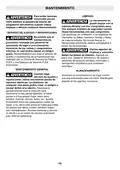
- 70. Mantenimiento (Limpieza → Servicio De Ajustes Y Reparaciones → Mantenimiento General → Almacenamiento)
- 71. Garantía Limitada De 5 Años Con Registro (Baterías Y Cargadores De 24 V: Garantía Limitada De 5 Años Con Registro → Productos Flex Legacy Alámbricos, De 12 V Y De 20 V: Garantía Limitada De 1 Año → Sistema De Almacenamiento Flex Stack Pack: Garantía Limitada De 1 Año Con El Registro → Aditamentos Funcionales Ft161 Y Ft421: Garantía Limitada De 5 Años Con El Registro → Otros Accesorios Y Aditamentos: Ninguna Garantía → Reclamaciones Bajo Esta Garantía)
×
FLEX FX4221 24V Trim Router Instruction Manual


| General | Details |
|---|---|
| Name | FLEX FX4221 24V Trim Router Instruction Manual |
| Make | FLEX |
| Language | English |
| Filetype | PDF (Download) |
| File size | 2.88 MB |

If you have any questions regarding FLEX FX4221 24V Trim Router Instruction Manual, please ask here and describe the problem in detail.


ADVANTECH ICR-3200 Cellular Router Instruction Manual

TP-Link BE3600 Wi-Fi 7 Portable Router User Guide

FIRSTNUM C600C 4G LTE Broadband Router User Manual

Siretta QUARTZ-ONYX 5G NR Router User Guide

peplink MAX Transit Pro Router User Manual

Cudy WR1500 WiFi 6 Trådløs Router Installation Guide

Cudy LT12 4G Cat 12 AC1200 Wi-Fi Router Installation Guide

ZTE E3330 WiFi 6 Wireless Router User Manual

STRONG 4G LTE Wi-Fi Router Installation Guide

TELTONIKA RUT300 Router User Guide
Table of Contents
- 1. Installation - Setup →
- 2. Safety Symbols - Warning →
- 3. General Power Tool Safety Warnings - Work Area Safety →
- 4. Power Tool Use And Care - Battery Tool Use And Care →
- 5. Importan T - Read The Instructions →
- 6. Wear Eye Protection Symbol - Always Operate With Two Hands →
- 7. Functional Descriptions & Specifications - V Trim Router →
- 8. Fx4221 Model No. 24 V D.c. Rated Voltage Collet Capacity No-... →
- 9. Assembly - Toattach/detachbatte... →
- 10. Installing And Removing The Base - To Remove The Base →
- 11. Installing And Removing Bits - Spindle Stop →
- 12. Installing And Removing The Edge - Guide Assembly →
- 13. Installing And Removing The Dust Extraction Hood →
- 14. Installing And Removing The Subbase - To Install Subbase →
- 15. To Install Subbase - Insert The Template Guide Into The Cent... →
- 16. Adjustments - Installing And Removing Bits →
- 17. Variable Speed Dial - Warning →
- 18. Warning - Battery Pack →
- 19. General Operations With The Trim - Routing With The Edge Gui... →
- 20. Circular Routing - Center Hole →
- 21. Internal Routing - Feeding The Trim Router →
- 22. Direction Of Feed For Internal Cuts - Feeding Too Quickly →
- 23. Maintenance - Cleaning →
- 24. Flex 5-year Limited Warranty - V Tools: 5-year Limited Warra... →
- 25. Symboles Relatifs À La Sécurité - Avertissement →
- 26. Sécurité De La Zone De Travail - Sécurité Électrique →
- 27. Utilisation Et Entretien De Loutil Électrique - Assurez-vous... →
- 28. Important: Les Symboles Suivants Peuvent Figurer Sur Votre O... →
- 29. Lisez Les Instructions - Alerte Lutilisateur Pour Lui Demand... →
- 30. Toupie De Finition Des Bords De 24 V - Interrupteur De March... →
- 31. Fx4221 Modèle N 24 V C.c. Tension Nominale Capacité Des Doui... →
- 32. Assemblage - Avertissement →
- 33. Installation Et Retrait De La Base - Retrait De La Base →
- 34. Installation Et Retrait Des Mèches - Verrouillage De La Broc... →
- 35. Installation Et Retrait De Lensemble De Guide De Bord - Inst... →
- 36. Installation Et Retrait De La Hotte Dextraction De La Poussi... →
- 37. Installation Et Retrait De Lembase - Pour Installer Lembase →
- 38. Installation De Lembase - Utilisation Dun Guide De Gabarit →
- 39. Réglage De La Profondeur De Coupe - Installation Et Retrait ... →
- 40. Molette De Réglage De La Vitesse - Cadran De Réglage De La V... →
- 41. Avertissement - Bloc-piles →
- 42. Opérations Générales Avec La Toupie - Toupillage Avec Le Gui... →
- 43. Toupillage Circulaire - Avertissement →
- 44. Toupillage Interne - Avertissement →
- 45. Pénétration Trop Rapide - Pénétration Trop Lente →
- 46. Maintenance - Service Après-vente →
- 47. Garantie Limitée De Cinq Ans Avec L'enregistrement - Outils ... →
- 48. Símbolos De Seguridad - Advertencia →
- 49. Seguridad En El Área De Trabajo - Seguridad Eléctrica →
- 50. Evite Los Arranques Accidentales - Desconecte El Enchufe De ... →
- 51. Importante: - Símbolo →
- 52. Lea Las Instrucciones - Utilice Siempre La Herramienta Con L... →
- 53. Fresadora Recortadora De 24 V - Interruptor De Encendido Y A... →
- 54. Fx4221 - Núm. De Modelo →
- 55. Ensamblaje - Advertencia →
- 56. Instalación Y Desinstalación De La Base - Para Desinstalar L... →
- 57. Instalación Y Desinstalación De Las Brocas - Para Instalar L... →
- 58. Instalación Y Desinstalación Del Ensamblaje De La Guía De Bo... →
- 59. Instalación Y Desinstalación De La Cubierta De Extracción De... →
- 60. Instalación Y Desinstalación De La Subbase - Para Instalar L... →
- 61. Guías De Plantilla (no Suministradas) - Aviso →
- 62. Ajustes - Ajuste De La Profundidad De Corte →
- 63. Dial De Velocidad Variable - Advertencia →
- 64. Instrucciones De Utilización - Advertencia →
- 65. Función De Arranque Suave - Brushless →
- 66. Fresado Con La Guía De Borde - Ensamblaje De La Guía De Bord... →
- 67. Fresado Circular - Instalación De La Guía De Borde →
- 68. Fresado Interno - Avance De La Fresadora Recortadora →
- 69. Avance Demasiado Rápido - Avance Demasiado Lento →
- 70. Mantenimiento - Limpieza →
- 71. Garantía Limitada De 5 Años Con Registro - Baterías Y Cargad... →